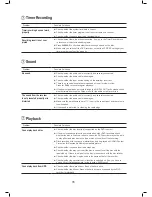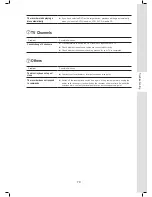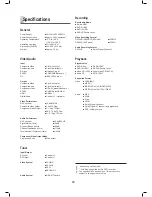
background image

Digital Video Support

65

Digital V

ideo Support

 

  It is illegal to download and use unauthorized copyrighted materials. Make sure you obtain the permission or 

authorization from copyright owners and related third-parties before you start using or watching the videos or 

fi les. If you fail to do so, you may be subject to fi nes and/or penalties. 

Before you start

►    Check whether you have switched your TV’s input source to corresponding option (e.g. VIDEO 1, LINE 2, etc.), 

so that signal from the DVD recorder can appear on screen. For further information, please check the instruction 

manual offered by your TV manufacturer.

MPEG-4 Videos

Supported Formats

The MPEG-4 technology allows a large video 

fi le, such as a two-hour movie, to be effi ciently 

compressed without sacrifi cing its original video 

and audio quality. If you watch an MPEG-4-based 

movie, there may be subtitle fi les saved for playback 

in addition to the video/audio fi les. Please check the 

table below to see whether your MPEG-4 fi les are 

supported by this DVD recorder. 

Category

Codec 

Standard

File Extension

Movie

Video

• DivX
• XviD

AVI, DIVX*, 

DIV*

Audio

• MP3
• AC3 
• LPCM

Subtitle

---

SUB, SRT, TXT

 Bitmap-based subtitles, such as idx+sub, are not 

supported by this DVD recorder. 

 * depending on the model. 

Playing MPEG-4 Files


1

    Select the fi le you wish to play either through Easy 

Guider or through the Contents Menu.

For more details, please see ‘Contents Menu’ (p.32) 

or ‘Using Easy Guider: Play’ (p.37)


2

   I f playback does not start automatically, press 

PLAY

 to begin playback.


3

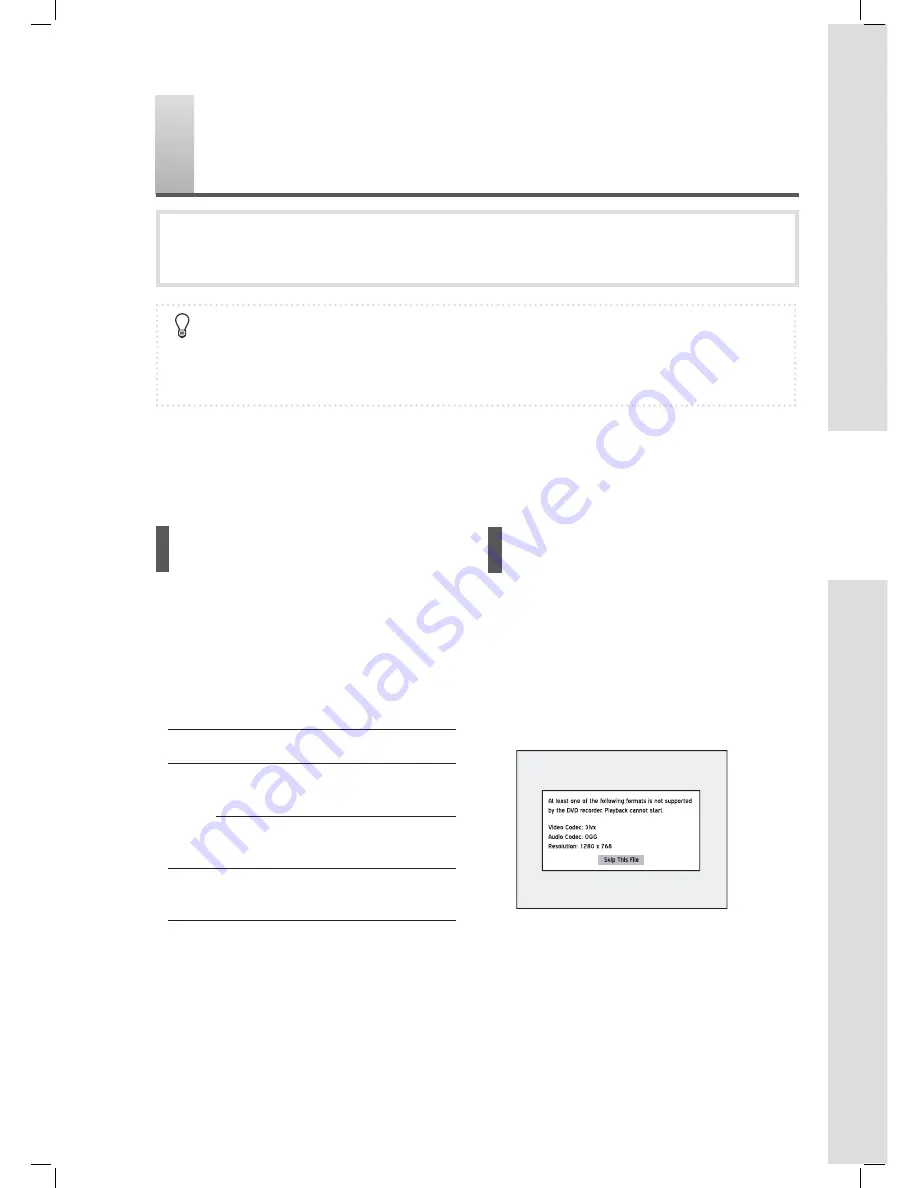
   I f the fi le is not supported by the DVD recorder, a 

pop-up box will appear. Press 

ENTER

 to skip the 

fi le.

Playback_07_01


4

   I f there are other fi les on your source medium, the 

DVD recorder will start playing back the next fi le. 


5

    Press 


STOP

 to stop playback at a marked stop.

Press 


PLAY

 to resume playback from a marked 

stop.

Summary of Contents for HD-A940 Series

Page 1: ...odel Comparison Chart on the back cover for the features supported by each model The HDMI connection of this DVD recorder features HDCP technology for the purpose of content protection Connecting the...

Page 2: ...nce receptacles and the point where they exit from the product 11 ACCESSORIES ATTACHMENTS Use only accessories attachments speci ed by the manufacturer 12 USAGE Unplug this product during lightning st...

Page 3: ...Audio CD MP3 and JPEG discs Recording of copyrighted material may infringe copyright laws CAUTION POWER BUTTON Disconnect the main plug to shut the power off completely The POWER button in any positio...

Page 4: ...er 24 Video Input Output 25 Audio Output 26 Recording Playback 26 DVD Movie 26 Channel Editor 28 Moving up down TV Channels 29 Inserting TV Channels 29 Swapping TV Channels 29 Renaming TV Channels 30...

Page 5: ...EG 4 Videos 65 Supported Formats 65 Playing MPEG 4 Files 65 DivX VOD 66 Navigation Menu 67 EDITING Edit Menu 69 Screen Overview 69 Editing Titles 70 Rename Title 70 Protect Title 70 Overwrite Title 71...

Page 6: ...ding the trademarks For best results use discs with the above logos Recording Time Type Mode Time DVD 4 7GB HQ 1 hour SP 2 hours LP 3 hours EP 4 hours SLP 6 hours Just Fit Variable DVD R DL Double Lay...

Page 7: ...VD RW discs in all cases due to the type of disc or condition of the recording depending on the model If an MP3 le name contains two byte characters e g Chinese characters it may not be displayed corr...

Page 8: ...ile Video Title DVD RW Data File Video Title When using a disc formatted with Quick Preparation mode When using a disc formatted with Full Preparation mode DVD R Data File Video Title DVD RW Data File...

Page 9: ...ed via line inputs 13 DV LINK IEEE 1394 jack Connects digital camcorder 14 LINE IN S Video Composite VIDEO AUDIO L R jacks Connects the outputs of external equipment via S Video or composite video aud...

Page 10: ...ts an amplifier or a receiver with a digital input jack 3 COMP OUT COMPONENT jacks Connects the inputs of external equipment via component video cables 6 HDMI DIGITAL OUT jack Connects a TV or an AV a...

Page 11: ...button Switches to TV view or SCART source view decoder 19 CH CH button Changes TV channels 20 ShowView button Displays the ShowView system menu 21 GUIDER button Displays Easy Guider menu 22 MENU butt...

Page 12: ...and match the markings inside the remote control Using rechargeable batteries is not recommended Remote Control Signal The remote has an operating range of approximately 7 5 M and works best when poin...

Page 13: ...may cause a viewing problem when playing a copy protected disc The same viewing problem may also occur when connecting the recorder to a TV VCR combo system Connection Method Wall DVD Recorder TV Wal...

Page 14: ...ow to select a type of video cable you wish to use then look down the column to see what types of audio connections are applicable Select only one of the applicable options to connect your DVD recorde...

Page 15: ...n The DVD recorder supports the HDCP technology which is developed to prevent copying of the content transmitted via the HDMI cable After all connections are made the recorder will start checking whet...

Page 16: ...reen Blue Red TUNER If your television supports Progressive Scan mode you may adjust the Component Output setting accordingly for better results Please go to Setup Video Input Output Video Output and...

Page 17: ...e an HDMI cable to connect the HDMI OUT jack on the DVD recorder to the HDMI IN jack on the television After all connections are made make sure related system settings are correct on the Setup menu If...

Page 18: ...he red and white ends to connect the AUDIO OUT jack on the DVD recorder to the AUDIO IN jack on a stereo ampli er a receiver or a TV White SCART IN AUX DECODER Audio cable IN RIGHT DVD LEFT VIDEO R L...

Page 19: ...SCART IN AUX DECODER IN OPTICAL COAXIAL Optical digital cable OPTICAL COAXIAL Digital Out Optical DIGITAL AUDIO DEVICE TUNER 2 Using a Coaxial Cable Use a coaxial cable to connect the DIGITAL OUT COA...

Page 20: ...jack on the televi sion SCART IN AUX DECODER SCART OUT Wall RF IN T V RF OUT SCART OUT RF IN SCART IN CANAL Decoder Completed in Step 1 TUNER SCART IN During recording if you have problem watching pro...

Page 21: ...model which features attached power cord you only need to plug the power cord to the outlet at this step Preparing the DVD Recorder for Further Settings After completing the connection process check w...

Page 22: ...Back Or select Exit if you wish to quit the setup process Select a language for on screen message Language The Easy Setup guide appears automatically when you switch on your new DVD recorder for the...

Page 23: ...ing process 6 Complete Settings After the scanning process is completed press ENTER to save the settings and exit the Easy Setup screen Setup Menu Use the Setup menu to edit your system setting prefer...

Page 24: ...e TV channels are scanned and stored in a speci c order If your TV content provider changes the channel listing or if you reinstall this DVD recorder you may need to go through this process again Edit...

Page 25: ...roblem using the feature try to use a new SCART cable Setting Component Video Output If your TV supports Progressive Scan mode you can choose to set the DVD recorder s output accordingly to enjoy bett...

Page 26: ...e established a digital audio connection For more information please see Connecting the DVD Recorder p 13 Recording Playback Option Application Recording Mode Select a recording mode for different pic...

Page 27: ...sired language versions Setting Parental Lock Some DVD Video discs are encoded with a Parental Management Level PML numbered from 0 to 8 You can set the parental control level of this DVD recorder to...

Page 28: ...select Tuner then press ENTER Press to select Utilities then press ENTER Press to select Edit Channel then press ENTER The Channel Editor menu will appear Pressing EDIT Button While Viewing TV Press T...

Page 29: ...ion 4 To swap other TV channels repeat steps 1 3 5 When completed press to select Exit or another option to continue then press ENTER Moving up down TV Channels 1 Press to select a channel from the li...

Page 30: ...CH 01 The channel selected will then be switched on or off 3 To switch on or off other channels repeat steps 1 2 4 When completed press to select Exit or another option to continue then press ENTER S...

Page 31: ...end time which are all contained in the ShowView programming numbers You can complete the timer recording setup simply by inputting the ShowView number which can be found in most newspapers TV listin...

Page 32: ...your TV manufacturer Make sure the remote control works Contents Menu Contents Menu offers you a quick overview of what stored in your selected medium Screen Overview File catalogue When selected the...

Page 33: ...be correctly displayed if it contains characters which use a cod ing page or character sets not supported by this DVD recorder This however will not affect any operation you wish to perform Previewing...

Page 34: ...ursor forwards Back button Press to delete character one by one Clear button Press to delete all characters Finish button Press to confirm setting and exit screen Space button Press to insert space in...

Page 35: ...s ENTER You can enter up to 30 characters for a title name 4 If you want to make changes during the process press to select Back which allows you to delete character by character in a backward directi...

Page 36: ...pressing and ENTER buttons on your remote control Screen Overview Select a function to start Function shortcut Exit button When selected the icon is highlighted Press ENTER to start the function Back...

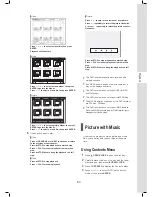
Page 37: ...to skip the picture 6 Press STOP to stop playback at a marked stop Press PLAY to start playback from where you left off Press STOP twice to bring the playback to a full stop Press PLAY to start playb...

Page 38: ...nother device video cassette recorder DVD player DVD recorder etc connected to this recorder Before you start Check whether you have switched your TV s input source to corresponding option e g VIDEO 1...

Page 39: ...Time p 24 Check whether there is enough space on the disc or on the hard drive Check whether the channel scanning process for your TV is completed Setup Menu Tuner p 24 Date Time Mode 1 On the Easy G...

Page 40: ...ress to select the signal source then press ENTER If you select TV press to select the channel you want to record then press ENTER If you select TV press to switch on or off the PDC function then pres...

Page 41: ...target medium to save the recording then press ENTER 7 Press to select a recording mode then press ENTER 8 If your signal source is set to TV press to select a TV audio mode then press ENTER 9 Summary...

Page 42: ...cess will then start Disc with Data Media Files Press to select the type of le you would like to copy then press ENTER Proceed to step 4 Select the media type you wish to copy 4 If you have chosen All...

Page 43: ...hen you rst enter the album If you decide to copy the whole album after adopting the Selected File option you will need to exit the album rst Press to select Return then press ENTER to go back to the...

Page 44: ...rive If during the process you decide to cancel the ap plication you can press to select Exit then press ENTER to exit the present screen 3 Press to select Erase then press ENTER 4 Press to select Go...

Page 45: ...ack on other DVD players or on PCs For more details please see Disc Information p 6 Only discs used to record video titles require naliza tion Discs used to copy media les such as MP3 or JPEG les are...

Page 46: ...rmat which enjoys a relatively greater compatibility However it is still likely that recordings made with this recorder may not be able to be played back on other DVD recorders or DVD players One reco...

Page 47: ...VD to switch to HDD Disc Press OPEN CLOSE to open the disc tray Carefully place the disc in the tray with the label side facing up then press OPEN CLOSE 3 Press TV MODE or SOURCE to select TV as the s...

Page 48: ...to select the correct signal source Recording_02_03 TV Front AV DV SCART 2 Press HDD DVD to select your target medium If you would like to record on disc press OPEN CLOSE to open the disc tray and pla...

Page 49: ...to start recording After you press RECORD DV will automatically start playing back the footage 5 Press PAUSE STEP to pause recording DV will continue playing back the footage 6 Press STOP to stop rec...

Page 50: ...o stop recording 3 Press RECORD again if you need to start another recording session Each new recording session is placed after the previous session unless a certain recorded title is set to be overwr...

Page 51: ...press ENTER 5 When completed press to return to the main menu 6 Press or SETUP to completely exit the Setup menu New chapter division setting will take effect on future recordings it CANNOT be applied...

Page 52: ...CANNOT exceed 8 hours Once the session has lasted for over 8 hours this DVD recorder will automatically stop recording If you use a DVD R DVD R DVD RW formatted in Quick Preparation mode you need to...

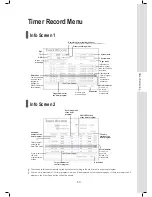
Page 53: ...creen 2 for more details Info Screen 2 99999 HDD Target medium for the timer program Exit button Press to enter the timer program setup screen ShowView number of the timer program Recording mode of th...

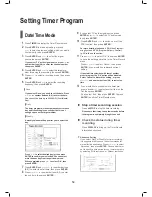
Page 54: ...lication Press to select Advanced then press ENTER Choose whether or not to specify a time period for your timer programs by selecting With restriction or Without restriction Setting Timer Program Dat...

Page 55: ...p up box appears TV Station GCN Preset Channel Region A X 2 4 Region B X 2 15 Region C X 2 56 3 Press ENTER and to select the recording frequency then press ENTER 4 Press ENTER and to select the targe...

Page 56: ...sion has lasted for over 8 hours this DVD recorder will automatically stop recording If you use a DVD R DVD R DVD RW formatted in Quick Preparation mode you need to nalize the disc before it can be pl...

Page 57: ...ou press TIME SHIFT 3 Press PLAY when you decide to go back to watch the program The program will then be played back from where it is interrupted 4 Press PAUSE STEP to pause playback Press PLAY again...

Page 58: ...n complete the process using Easy Guider Please see Using Easy Guider Disc Tools p 43 for details on how to nalize a disc Navigation Menu Screen Overview Media DVD Video Video Titles MPEG 1 MPEG 2 Fil...

Page 59: ...400 300 200 or 100 2 To resume the normal image size press to select 100 then press ENTER 3 To view different sections of the enlarged image go to the on screen control pad Press to select the directi...

Page 60: ...p playing back the disc If you would like to see the total number of title chap ter please go to Information on the Navigation menu Search by Time 1 Press to select Time then press ENTER 2 Press or nu...

Page 61: ...c is already preset to a default language the playback will start following this setting but you can use the Navigation menu to select a different language at any time during playback 1 Press to selec...

Page 62: ...the label side facing up then press OPEN CLOSE 3 If playback does not start automatically press PLAY to begin playback 4 Press STOP to stop playback Press PLAY to resume playback 5 To remove the disc...

Page 63: ...te the picture counter clockwise Press STOP to stop playback at a marked stop Press PLAY to resume playback from a marked stop Press STOP twice to bring the playback to a full stop This DVD recorder s...

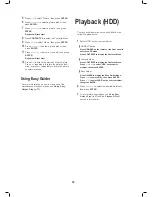
Page 64: ...on on how to make use of the simultaneous playback please see Using Easy Guider Play p 37 Playback HDD To play back les stored on the built in hard drive follow the steps below 1 Select HDD as the sou...

Page 65: ...you watch an MPEG 4 based movie there may be subtitle les saved for playback in addition to the video audio les Please check the table below to see whether your MPEG 4 les are supported by this DVD re...

Page 66: ...rk Chapter Mark Chapter Mark Chapter Mark Chapter Mark Chapter Mark Chapter Mark Chapter Mark Chapter Mark Chapter Mark Chapter Mark Chapter Mark Chapter Mark Slide Time Slide Time Slide Time Slide Ti...

Page 67: ...Menu Press NAVI to display additional viewing options during playback For more information please see Navigation Menu p 58 Subtitle This DVD recorder supports the text based subtitles when playing ba...

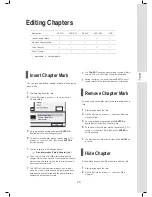
Page 68: ...Erase Music Picture File Rename Erase If you do not nalize a disc before playing it on another player recorder results of the editings you have made will not be shown Please see Using Easy Guider Dis...

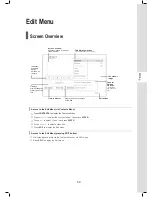
Page 69: ...original chapter markings of the title Displays current progress of the title Time indicator Access to the Edit Menu via Contents Menu Press CONTENTS to display the Contents Menu Press to select the...

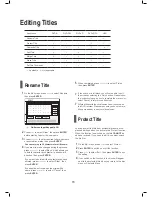
Page 70: ...ame press to select Cancel then press ENTER 5 When completed press to select Finish then press ENTER If the entry bar is left blank you will not be able to exit the screen by selecting the Finish butt...

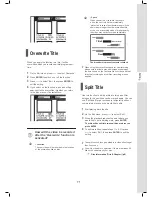
Page 71: ...2 Title 3 Title 1 New Title 3 Overwrite The black bars represent contents recorded When using the overwritten space for new recording please note that there may be discrepancy between the time shown o...

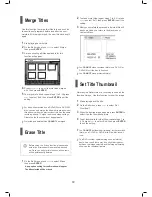
Page 72: ...be permanently deleted 1 On the Edit menu press to select Erase then press ENTER A pop up box asking for con rmation will appear The title selected will be erased 2 To erase more titles repeat steps 1...

Page 73: ...e rst command will be successfully executed This DVD recorder captures images on an interval basis As a result there may be a slight discrepancy between the point selected and the point ultimately des...

Page 74: ...r will be displayed in a darker color A message hidden appears at the left bottom corner of the screen window Show Chapter During playback you can choose to show chapter s currently hidden within a ti...

Page 75: ...y be subject to payment of damages and other remedies Please note that you CANNOT record copy a rented or purchased video disc from another device video cassette recorder DVD player DVD recorder etc c...

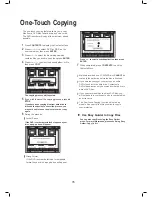
Page 76: ...er Copy p 41 One Touch Copying The one touch copying feature allows you to copy les from a DVD disc to hard drive and vice versa The DVD recorder will copy at the maximum speed possible 1 Press CONTEN...

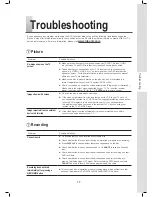
Page 77: ...isc is distorted or scratched If the video output signal from the recorder goes via VCR to your TV set or if you connect the recorder to a TV VCR set the copyright protection code applied to some DVD...

Page 78: ...whether the audio cable is correctly and securely connected Check whether the audio cable is damaged Make sure the ampli er receiver or TV is set to the correct input and the volume is switched on If...

Page 79: ...Check whether the antenna cables are connected correctly Check whether the channel scanning process for your TV is completed Others Problem Possible Solutions The disc tray does not open close Contact...

Page 80: ...Noise 1kHz 90dB Dynamic Range 1kHz 80dB Channel Separation 1kHz 110dB Total Harmonic Distortion 1kHz 65dB Component Video Output Mode Progressive Scan 576p output Tuner Input Output RF Input Coaxial...

Page 81: ...dia Interface HDMI is an all digital interface which transmits uncompressed high de nition video and multi channel digital audio from any audio video source to display devices via a single cable Inter...

Page 82: ...6x 30 RICOH RICOHJPN R03 16x 31 MAXELL MAXELL 003 16x 32 CMC CMC MAG M01 16x 33 RITEK RITEK R04 16x 34 SONY SONY D21 16x 35 RITEK RITEK R05 16x Manufacturer Disc ID Write Speed 36 NANYA NANYA FLX 16x...

Page 83: ...D1 16x 34 Mitsubishi MCC 03 RG20 16x 35 TAIYO YUDEN TYG03 16x 36 RITEK RITEK M16 16x 37 BeALL BeALL G16001 16x 38 MAXELL MXL RG04 16x 39 CMC CMC MAG AM3 16x 40 MBI MBI01 RG40 16x 41 MBI MBI03 RG40 16...

Page 84: ...enakkerplein 16 5652 BJ EINDHOVEN The Netherlands Tel 31 40 2508000 Fax 31 40 2508092 Service e mail dceu_support liteonit com USA Lite On Sales and Distribution Inc 42000 Christy Street Fremont CA 94...

Reviews: