


Printing from a flash drive
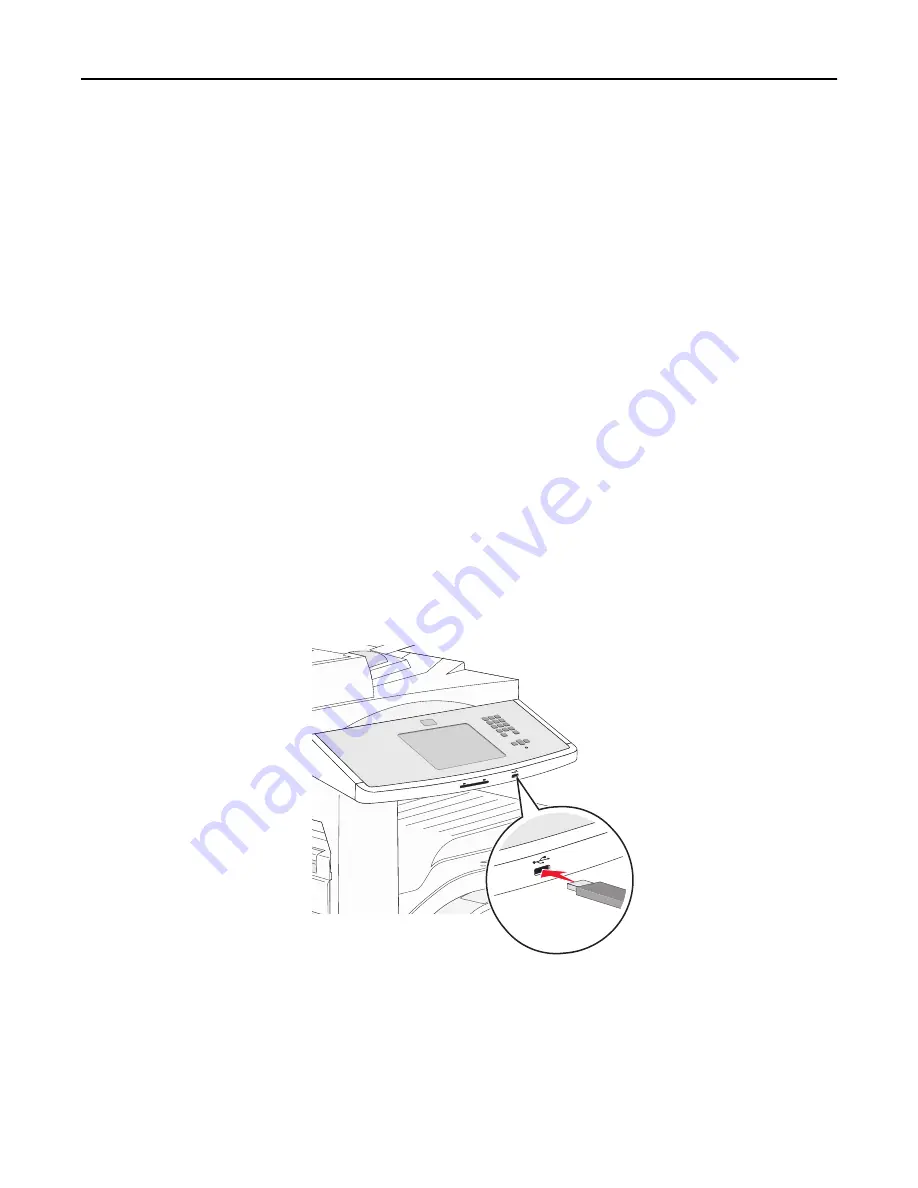
A USB port is located on the printer control panel. Insert a flash drive to print supported file types. Supported file types
include: .pdf, .gif, .jpeg, .jpg, .bmp, .png, .tiff, .tif, .pcx, .html, .xps, and .dcx.
Lexmark has tested and approved the following USB flash memory devices:
•
Lexar FireFly 512 MB
•
Lexar FireFly 1 GB
•
SanDisk Cruizer Micro 512 MB
•
SanDisk Cruizer Micro 1 GB
•
Sony 512 MB
•
Sony 1 GB
Notes:
•
Hi
‑
Speed flash drives must support the USB 2.0 specification, specifically supporting the High Speed mode.
•
USB devices must support the FAT (
File Allocation Tables
) system. Devices formatted with NTFS (
New
Technology File System
) or any other file system are not supported.
•
If selecting an encrypted .pdf file, then enter the file password from the printer control panel.
•
Before printing an encrypted .pdf file, enter the file password from the printer control panel.
•
You cannot print files for which you do not have printing permissions.
1
Make sure the printer is on and
Ready
appears.
2
Insert a flash drive into the USB port.
Notes:
•
If you insert the flash drive when the printer requires attention, such as when a jam has occurred, then the
printer ignores the flash drive.
•
If you insert the flash drive while the printer is printing other jobs, then
Printer Busy
appears. After the
other jobs are processed, you may need to view the held jobs list to print documents from the flash drive.
Printing
79
Summary of Contents for X860de
Page 6: ...Edition notice 287 Power consumption 291 Index 304 Contents 6 ...
Page 211: ...3 Place the tray into the printer 4 Remove the cable cover Maintaining the printer 211 ...
Page 242: ...231 paper jam 1 Open Door D 2 Remove the jam D D 3 Close Door D Troubleshooting 242 ...
Page 250: ...282 paper jam 1 Open Door F 2 Remove the jam 3 Close Door F Troubleshooting 250 ...
Page 254: ...28x paper jam 284 paper jam 1 Open Door F 2 Remove the jam 3 Close Door F Troubleshooting 254 ...


