Repair information
4-75
7525-63
x
Go Back
Previous
Next
Scanner component removal procedures
Flatbed removal
1.
Remove the AIO rear cable cover. See
“AIO back cable cover removal” on page 4-8
.
2.
Remove the rear shield. See
“Rear shield removal” on page 4-7
.
3.
Remove the left cover. See
“Left cover removal” on page 4-4
.
4.
Remove the ADF unit. See
“Duplex ADF removal” on page 4-87
.
5.
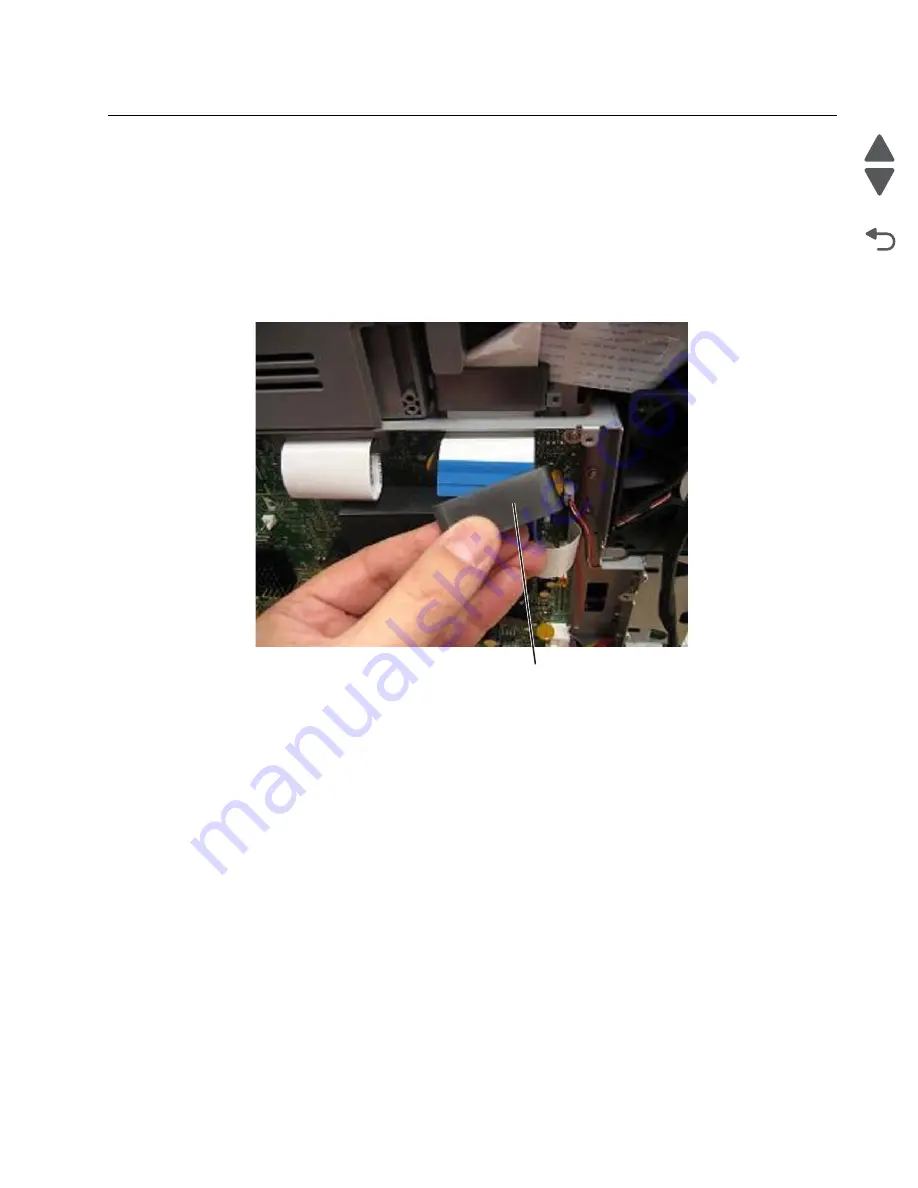
Disconnect the CCD cable from JCCD1 on the RIP board.
6.
Remove the first toroid (A) from the CCD cable. The toroid will be reused on the new flatbed unit.
A
Summary of Contents for X548 Series
Page 10: ...x Service Manual 7525 63x Go Back Previous Next...
Page 15: ...Notices and safety information xv 7525 63x Go Back Previous Next...
Page 16: ...xvi Service Manual 7525 63x Go Back Previous Next...
Page 22: ...xxii Service Manual 7525 63x Go Back Previous Next...
Page 44: ...1 22 Service Manual 7525 63x Go Back Previous Next...
Page 116: ...2 72 Service Manual 7525 63x Go Back Previous Next...
Page 303: ...Locations 5 3 7525 63x Go Back Previous Next Print engine interior view...
Page 316: ...5 16 Service Manual 7525 63x Go Back Previous Next HVPS...
Page 318: ...5 18 Service Manual 7525 63x Go Back Previous Next LVPS...
Page 324: ...6 4 Service Manual 7525 63x Go Back Previous Next...
Page 326: ...7 2 Service Manual 7525 63x Go Back Previous Next Assembly 1 Covers 7 11 9 8 1 2 3 4 5 6 10...
Page 330: ...7 6 Service Manual 7525 63x Go Back Previous Next Assembly 3 Operator panel 1 2 3 4 7 8 5 6 9...
Page 332: ...7 8 Service Manual 7525 63x Go Back Previous Next Assembly 4 Paperpath 5 2 4 7 6 1 3 8 9 3 10...
Page 336: ...7 12 Service Manual 7525 63x Go Back Previous Next Assembly 6 Electronics 2...
Page 344: ...I 4 Service Manual 7525 63x Go Back Previous Next...
Page 347: ...Part number index I 7 7525 63x Go Back Previous Next...


