


3-6
Service Manual
5062
Go Back
Previous
Next
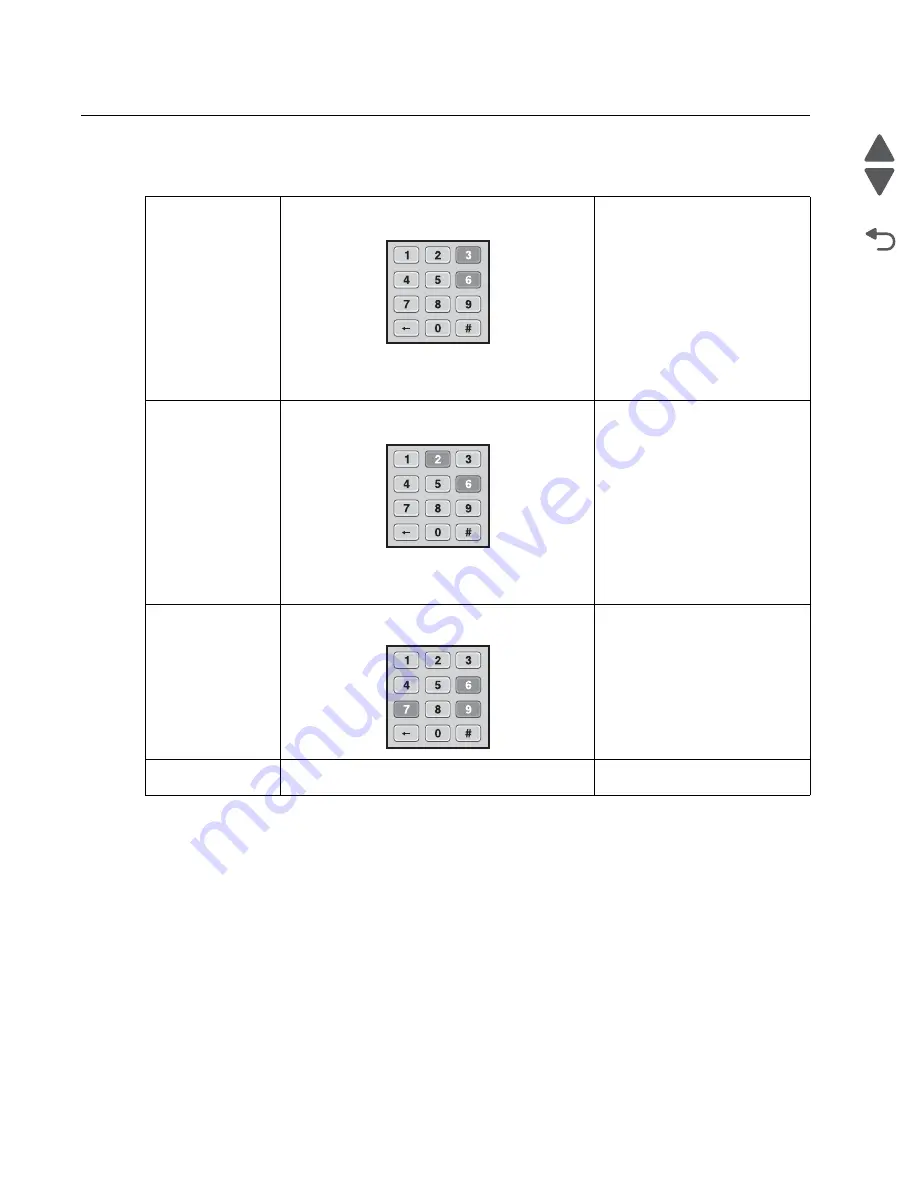
Accessing service menus
There are different test menus that can be accessed during POR to identify problems with the printer.
Diagnostics menu
1. Turn off the printer.
2. Press and hold
3
and
6
.
3. Turn on the printer.
4. Release the buttons when the splash screen
appears.
The Diagnostics menu group
contains the settings and
operations used while
manufacturing and servicing the
printer.
For more information, see
“Diagnostics menu” on
page 3-7
.
Configuration menu
1. Turn off the printer.
2. Press and hold
2
and
6
.
3. Turn on the printer.
4. Release the buttons when the splash screen
appears.
The Configuration menu group
contains a set of menus, settings,
and operations which are
infrequently required by a user.
Generally, the options made
available in this menu group are
used to configure a printer for
operation.
See
“Configuration Menu” on
page 3-26
for more information.
Network SE menu
While in Network/Ports Menu, press and hold
9
,
7
,
and
6
.
SE menu
From a browser, add “/se” to the device IP address
(for example: http://158.183.3.2/se)
Summary of Contents for C792 Family
Page 14: ...xiv Service Manual 5062 Go Back Previous Next ...
Page 19: ...Notices and safety information xix 5062 Go Back Previous Next ...
Page 20: ...xx Service Manual 5062 Go Back Previous Next ...
Page 40: ...1 14 Service Manual 5062 Go Back Previous Next ...
Page 212: ...2 172 Service Manual 5062 Go Back Previous Next ...
Page 468: ...4 214 Service Manual 5062 Go Back Previous Next 7 Remove the motor from the bracket ...
Page 490: ...4 236 Service Manual 5062 Go Back Previous Next 4 Flex the sides to remove the roller frame ...
Page 592: ...4 338 Service Manual 5062 Go Back Previous Next ...
Page 594: ...5 2 Service Manual 5062 Go Back Previous Next Connectors System board ...
Page 610: ...5 18 Service Manual 5062 Go Back Previous Next 5 bin mailbox system card ...
Page 612: ...5 20 Service Manual 5062 Go Back Previous Next Finisher Stacker system card HTU system card ...
Page 616: ...6 4 Service Manual 5062 Go Back Previous Next ...
Page 622: ...7 6 Service Manual 5062 Go Back Previous Next Assembly 3 Front 1 2 4 5 6 7 8 3 3 3 3 ...
Page 624: ...7 8 Service Manual 5062 Go Back Previous Next Assembly 3 1 Front continued 1 2 4 5 1 1 1 3 ...
Page 626: ...7 10 Service Manual 5062 Go Back Previous Next Assembly 4 Left 1 2 4 5 6 8 7 3 ...
Page 628: ...7 12 Service Manual 5062 Go Back Previous Next Assembly 4 1 Left continued 1 2 3 4 ...
Page 630: ...7 14 Service Manual 5062 Go Back Previous Next Assembly 5 Rear 1 2 3 6 11 8 9 12 4 7 5 13 10 ...
Page 632: ...7 16 Service Manual 5062 Go Back Previous Next Assembly 6 Optional 550 sheet tray 2 3 1 ...
Page 644: ...7 28 Service Manual 5062 Go Back Previous Next Assembly 11 Finisher stapler assembly 1 2 ...
Page 648: ...7 32 Service Manual 5062 Go Back Previous Next Assembly 13 5 bin mailbox assembly complete 1 ...
Page 654: ...7 38 Service Manual 5062 Go Back Previous Next Assembly 16 HTU complete 1 ...
Page 662: ...7 46 Service Manual 5062 Go Back Previous Next Assembly 20 HTU with hole punch complete 1 ...
Page 682: ...A 2 Service Manual 5062 Go Back Previous Next Print Quality Pages Page 1 total of five ...
Page 684: ...A 4 Service Manual 5062 Go Back Previous Next Print Quality Pages Page 3 total of five ...
Page 704: ...I 14 Service Manual 5062 Go Back Previous Next ...


