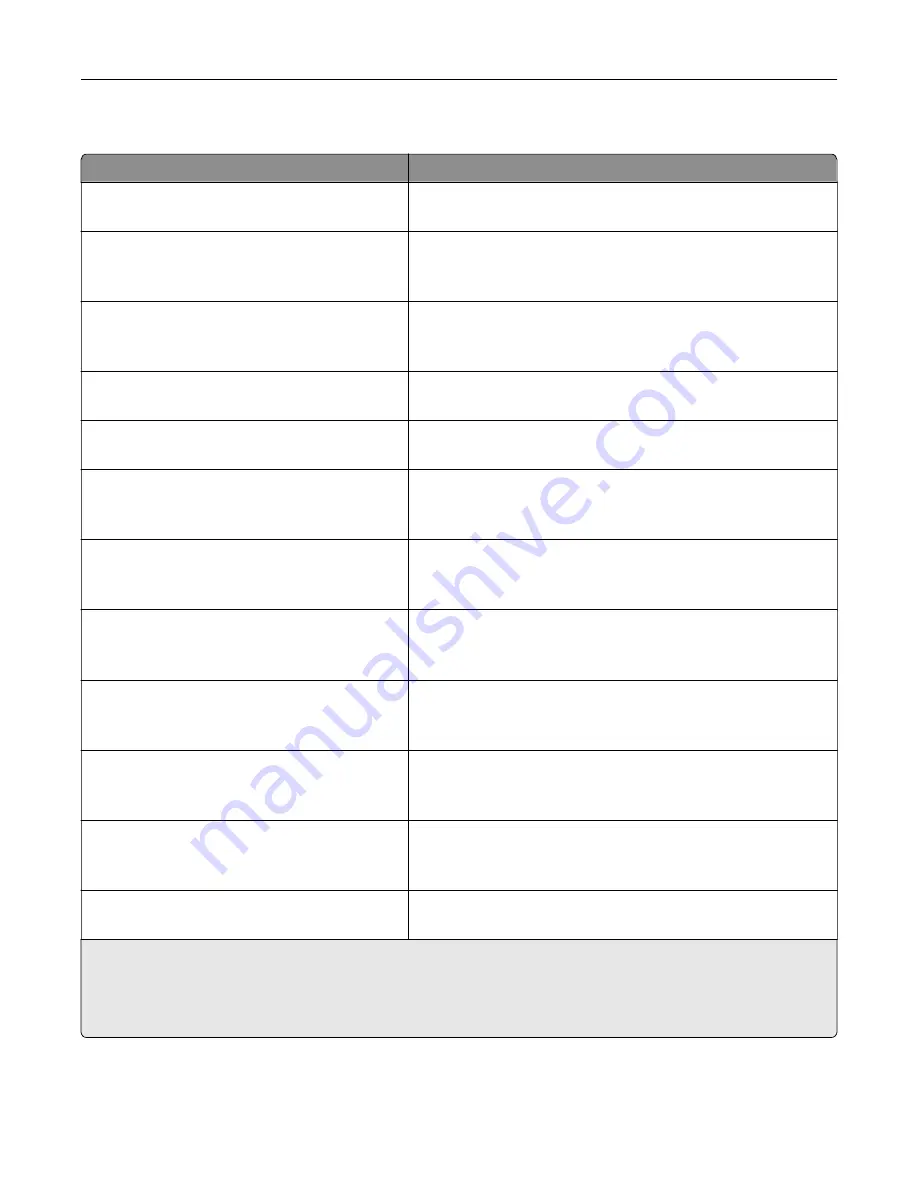
Paper Loading menu
Use
To
Cardstock Loading
Off
Determine and set two
‑
sided printing for all print jobs that specify
Cardstock as the paper type.
Recycled Loading
Duplex
Off
Determine and set two
‑
sided printing for all print jobs that specify
Recycled as the paper type.
Glossy Loading
Duplex
Off
Determine and set two
‑
sided printing for all print jobs that specify
Glossy as the paper type.
Heavy Glossy Loading
Off
Determine and set two
‑
sided printing for all print jobs that specify
Heavy Glossy as the paper type.
Labels Loading
Off
Determine and set two
‑
sided printing for all print jobs that specify
Labels as the paper type.
Bond Loading
Duplex
Off
Determine and set two
‑
sided printing for all print jobs that specify
Bond as the paper type.
Letterhead Loading
Duplex
Off
Determine and set two
‑
sided printing for all print jobs that specify
Letterhead as the paper type.
Preprinted Loading
Duplex
Off
Determine and set two
‑
sided printing for all print jobs that specify
Preprinted as the paper type.
Colored Loading
Duplex
Off
Determine and set two
‑
sided printing for all print jobs that specify
Colored as the paper type.
Light Loading
Duplex
Off
Determine and set two
‑
sided printing for all print jobs that specify
Light as the paper type.
Heavy Loading
Duplex
Off
Determine and set two
‑
sided printing for all print jobs that specify
Heavy as the paper type.
Rough/Cotton Loading
Off
Determine and set two
‑
sided printing for all print jobs that specify
Rough/Cotton as the paper type.
Notes:
•
Duplex sets the printer default to two
‑
sided printing for every print job unless one
‑
sided printing is selected
from Printing Preferences or the Print dialog.
•
Off is the factory default setting for all the menus.
Understanding the printer menus
77
Summary of Contents for C2132
Page 1: ...C2132 User s Guide June 2017 www lexmark com Machine type s 5027 Model s 639...
Page 133: ...2 Open the top door 1 2 3 Remove the toner cartridges 1 2 Maintaining the printer 133...
Page 138: ...16 Insert the waste toner bottle 17 Insert the right side cover Maintaining the printer 138...
Page 142: ...2 Open the top door 1 2 3 Remove the toner cartridges 1 2 Maintaining the printer 142...
Page 152: ...Settings General Settings Factory Defaults Restore Now Managing the printer 152...
Page 156: ...Below the fuser In the fuser access door 3 Close the front door Clearing jams 156...


