Leviton PICCOLO SCAN User Manual Download Page 19

Navigation     


13

7.1.2. Using Option Windows 

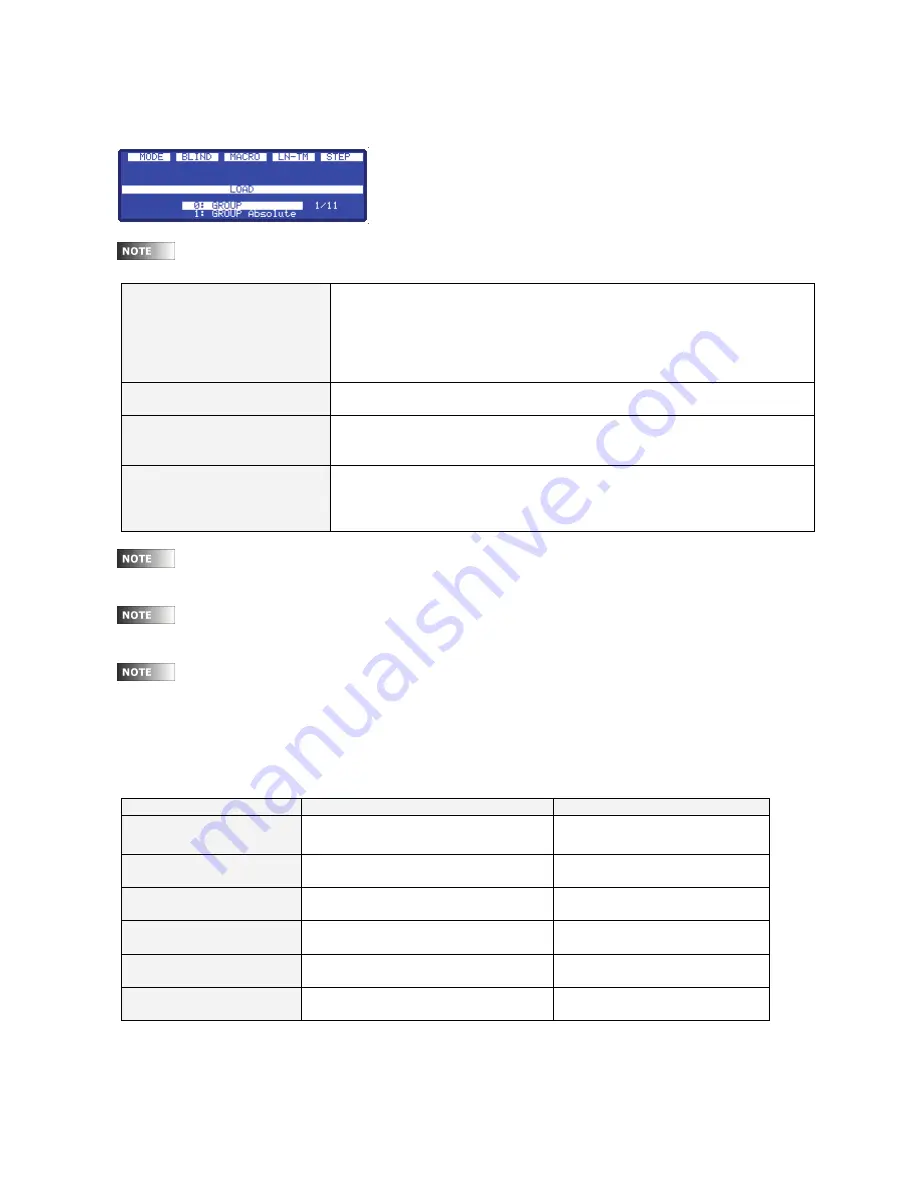
The console provides option lists or windows that are used for selectable commands. For example, pressing 

[LOAD] will open the following window in which group load options can be selected: 


 To close options windows, make desired selection or press [C]. 


Numeric Selection 

Select the desired option by entering the index number, for example, 

[#][ENTER]. 


In certain cases, pressing [ENTER] is not necessary (the window will close 

automatically when digit is entered). 


Selection by Mouse (OLE) 

In the OLE software, desired options can be selected with a mouse. 


Selection by Encoder Wheel 

Move the encoder wheel to select the desired option then press [Encoder] or 

[ENTER] to accept. 


Selection by original 

function key ([LOAD] & 

[SHAPE]) 

Only for [LOAD] and [SHAPE] option windows: Press the key again to select 

the next option. 


 Options preceded by the “?” symbol in the LCD display are not available for selection (grayed out 

in base monitor). 


 For [LOAD] or [SHAPE] windows: Options in yellow characters (in base monitor) are selected. Use 

the encoder wheel (green cursor in base monitor) to pre-select other options. 


 For the [PARAM] window: Options in yellow characters (in base monitor) are special commands 

for fixture ignition and control. Use the encoder wheel (green cursor in base monitor) to pre-select other 

options. 

7.2. Display / Screen Symbols and Colors  


Source 

View in Base Monitor 

View in Base Display 

Editing Channels 

Red (Light Red for active channels)  

e

 (e

 for active channels) 


Editing Channels in 

Manual Mode 

Magenta Ma 


Submasters 

Yellow Sm 


Inhibited Submasters 

Black  

Level over inverted background. 


X1 (Crossfader) 

Cyan X1 


X2 (Crossfader) 

Light Cyan 

X2 


Summary of Contents for PICCOLO SCAN

Page 1: ...User Manual PICCOLO SCAN Piccolo Scan 12 model shown Document Release July 2010 Revision A Software v1 70...

Page 2: ...period but agrees only to repair or replace defective equipment returned to its plant in Tualatin Oregon This Warranty is void on any product that has been improperly installed overloaded short circui...

Page 3: ...gs 8 4 2 Power On 8 4 3 Console Reset 8 5 Getting Help 9 5 1 Help by Functions 9 5 2 Contacting Technical Support 9 6 Base Auxiliary LCD Displays Base Screen 10 6 1 Base LCD Display 10 6 1 1 Display B...

Page 4: ...odes Tm 22 11 3 Modifying Cues 22 12 Using Submasters Theatre Manual Modes 23 12 1 Loading Groups and Cues into Submasters 23 12 1 1 Cue Lists in Submasters 24 12 2 Submaster Playback 24 12 2 1 Normal...

Page 5: ...oups containing Shapes 37 16 3 Shape Base Configuration 37 16 3 1 All Groups and Cues 37 16 3 2 Individual Groups and Cues 38 17 Functions 39 17 1 Exam and Modify Functions 39 17 2 Test and Next Funct...

Page 6: ...uration Menu 40 54 21 6 Special Commands 54 21 6 1 Multimedia Panel Menu 70 54 21 6 2 Status Playbacks Zero Menu 71 54 21 6 3 Delete Console Show Menu 72 55 21 6 4 Security Defaults Menu 77 55 21 6 5...

Page 7: ...ideal control solution for use in theatres schools music and corporate venues houses of worship and TV studios The console can be operated in a variety of ways depending on the user s needs and experi...

Page 8: ...s Two LCD displays soft keys 4 encoders 1 trackball and direct function keys for programming of moving lights LED lights scrollers etc Numeric editor For creating cues and groups by entering levels vi...

Page 9: ...y Wait Encoders 4 Trackball 4 Trackball Multifunction Fader 1 1 LCD Display Two 240 x 64 screens Two 240 x 64 screens VGA Monitor Output Yes Yes DMX 512 Dimmer Patch 1 1 DMX Universes Out 1 1 DMX Univ...

Page 10: ...Data Pin 4 No Connection Pin 5 No Connection Always use shielded and twisted pair cables for RS485 data with 120 ohms of characteristic impedance and low capacitance The Data and Data signals must be...

Page 11: ...OUT Pin 2 Ground MIDI IN Pin 3 n c MIDI OUT Pin 3 n c MIDI IN Pin 4 Signal MIDI OUT Pin 4 Return MIDI IN Pin 5 Return MIDI OUT Pin 5 Signal 2 2 3 USB Connections Type A Device Used to connect USB mem...

Page 12: ...dio signals mono Pin Out Pin 1 0 V ref jack body Pin 2 N C Pin 3 Signal jack live point 2 2 9 VGA Connection SUBD 15 connector standard video VGA compatible 2 2 10 Power Supply and Switch An external...

Page 13: ...e pressed A Channel Fader appears as Fader GrandMaster and SubMaster Faders appear as GM and SM The Crossfader appears as X1 X2 Softkeys appear as 1_B to 5_B with the associated function next to it Fo...

Page 14: ...tempt to switch on the console before contacting Leviton Technical Support 1 Place the console on a flat surface 2 Connect a proper DMX cable between the DMX OUT port and the first DMX device or split...

Page 15: ...ct Technical Support and we will be glad to answer your questions You can also call us during regular business hours at 1 800 959 6004 Please have the console model number and serial number available...

Page 16: ...grandmaster submasters crossfaders page current time etc Use the left right arrow keys to view additional information about each item 6 1 1 Display Background Colors The display background can be disp...

Page 17: ...tc Use the left right arrow keys to view additional information about each item For example to view additional fixture parameters of patched fixtures All channels fixtures if patched submasters the ev...

Page 18: ...Cell Each cell value or text can be edited using the alphanumeric keypad Select the desired cell red in base screen with the cursor then enter relevant data Press ENTER or any arrow key to accept data...

Page 19: ...nction key LOAD SHAPE Only for LOAD and SHAPE option windows Press the key again to select the next option Options preceded by the symbol in the LCD display are not available for selection grayed out...

Page 20: ...ible in this mode 8 3 Theatre Mode The upper faders C operate as channel faders while the lower faders S operate as submaster faders This mode is a conventional working mode for lighting consoles wher...

Page 21: ...change channel banks The active bank is marked with an LED in example below the first bank is selected Channel control in SINGLE mode C channel LED s in middle of fader groups are lit in green Channel...

Page 22: ...trol over the level To take back control move the fader to its current output level it will then unlock a beep is emitted Pressing the flash key above the fader will bump the channel level to 100 FF f...

Page 23: ...channels press 0 0 fades out immediately For the last selected channels press RST fades out as per default editor time see section 21 4 1 For all edited channels press RST RST fades out as per default...

Page 24: ...previous scene or starting from zero RST RST 9 4 5 Channel Editing Example in Double Mode Double mode is used for executing manual sequences Each new scene is prepared in blind no output on stage wit...

Page 25: ...times a name text can be added to each group via the groups table by pressing GRP GRP Other attributes such as timing modes may be selected in the groups table also Inside the groups table the OPTION...

Page 26: ...roup 1 Press RST RST to clear previous channels 2 Press GRP MD FY 3 Perform desired changes with channel faders or keypad 4 Record changes by pressing REC or discard them by pressing RST RST To modify...

Page 27: ...attributes may be added here also see Cue Attributes below Inside the cues table the OPTIONS key can be used to toggle between all cues general attributes and the cue list To exit the cues table pres...

Page 28: ...immer Shapes fade their size and rate T3 Only parameters defined in library as 20 Dimmer 0 X and 1 Y and channels fade with times or manually Shapes fade their size and rate 11 3 Modifying Cues Use th...

Page 29: ...to manually operate the submaster with group or cue loaded 12 1 Loading Groups and Cues into Submasters Use any of the following commands to load groups and cues into submasters To load a group into...

Page 30: ...vel may be different To take manual control with the fader it is necessary to move the fader up to the output level At this moment the console emits a beep and the fader is again controlling the outpu...

Page 31: ...ps or cues groups or cues must be pre recorded 12 5 1 Programming Effects To program an effect follow below 1 Press EFFECT REC or EFFECT REC for next effect 2 Press ENTER is the effect type 0 CHANNELS...

Page 32: ...r stop an effect in automatic mode Press S to set number of times effect will run before stopping automatically Press and hold 5 B STEP and press S to execute the effect in manual mode step by step 12...

Page 33: ...the crossfader using one of the following methods Assign a closed cue list from to CUE THRU ASSIGN Assign an open cue list from cue to last recorded cue CUE ASSIGN Assign all recorded cues CUE ASSIGN...

Page 34: ...ade programmed times are not computed GO Button Pressing the GO button starts the next crossfade automatically using the programmed times of the cue in X2 next cue It is possible to perform multiple G...

Page 35: ...In normal mode loading pages does not delete the contents of submasters recorded as empty To load a page only to submasters press PAGE LOAD To load a page only to the crossfader press PAGE ASSIGN To...

Page 36: ...ands as explained for channels see section 9 3 For example pressing FIXTURE THRU will select a range of fixtures In the example below Fixtures 1 and 2 have been selected and the Color1 parameter is be...

Page 37: ...ning to the first and last fixtures X Y values remain unchanged FINE Press to change sensitivity of the Trackball and Encoder Wheels Normal LED off Regular sensitivity Precision LED on Fine sensitivit...

Page 38: ...COL 3 Press desired bank key or use the keyboard For example COL press bank key or COL opens a red options window ENTER See also EDIT and BANKS sections below 15 3 4 LIBs Libraries Libraries are user...

Page 39: ...e the same in the example below COL is used 1 Press LIBs LED is lit 2 Press COL REC to record the color library number 3 Press OPTIONS to name the library 4 Note that the LED of the banks key correspo...

Page 40: ...e all libraries of one category press POS DELETE DELETE 15 3 5 EDIT This key selects a special editing mode that allows for palettes and libraries to be selected by category i e Dimmer Position Color...

Page 41: ...15 3 7 WHEEL Pressing the WHEEL key allows you to Search for a parameter value with the encoder in a temporary blind mode and then pass it to live mode once the Wheel key is released hold down Wheel...

Page 42: ...B the reference point to apply the variations Variations from centre Example 50 over 50 to obtain values from 25 75 Variations from up Example 50 over 50 to obtain values from 0 50 Variations from dow...

Page 43: ...e them use this option Shape Base Fixed Each new group or cue activated can change the shape base value and will also stop the shape of any shape parameter over which we take control In general if you...

Page 44: ...ixed behaviors can be defined for individual groups and cues For groups press GROUP GROUP or GROUP OPTIONS then move to the last cell of the group and select desired behavior For cues press CUE CUE or...

Page 45: ...t the general group options text Cue CUE MD FY REC or CUE CUE The first command opens a cue for editing The second command opens the cues list to edit the general cue options times jumps text and comm...

Page 46: ...and line are selected for editing For example Select channels 35 37 39 and set their levels at FF 1 Press CHANNEL 3 5 ENTER selects channel 35 2 Press NEXT NEXT ENTER selects channel 37 3 Press NEXT N...

Page 47: ...d step time 4 The effect automatically adopts the new step time 4_B LN TM LED Off To learn auto times for cues in X2 1 Assign desired cues to the crossfader 2 Press 4_B LN TM LED On 3 Press GO 4 Wait...

Page 48: ...d create a new one 17 6 3 Deleting Macros To delete an individual macro from the data memory Press 3_B MACRO DELETE To delete a range of macros from the data memory Press 3_B MACRO THRU DELETE To dele...

Page 49: ...le For example to view dimmer 48 place cursor in Dmx column then press 48 ENTER Li Value of the limit function The dimmer output level will never be higher than this level If the limit is FF 100 the d...

Page 50: ...higher the power output is raised to 100 This curve is useful to turn discharge type lamps on and off HMI MSR Park Curve 5 PRK A dimmer with a park curve is always at 100 and its output is independen...

Page 51: ...s 201 210 18 2 Patching Fixtures No fixtures moving lights scrollers etc are patched in the console by default Therefore it is necessary to patch desired fixtures in the fixtures patch table To open t...

Page 52: ...ng changes To edit a gel position select its cell with the cursor then enter value Move cursor to accept changes or press C to discard To edit a gel position and view changing values on stage select i...

Page 53: ...add a new fixture to the cache 1 Insert USB memory stick with new fixtures in the USB Host 1 port at rear of console 2 In the Fixtures Patch press OPTIONS to activate cache 3 Select fixture type to b...

Page 54: ...ecial parameters effects prisms speed etc Name Text to identify parameter Ch Fn Parameter channel number Ch 8 bit parameters Ch Fn 16 bit parameters I Indicates if parameter is inverted For example if...

Page 55: ...t import basic show data to from other lighting consoles 4 To store a new show select the last empty line and choose F option 1 Save 5 To record over a previously stored show select line of stored sho...

Page 56: ...ver information is located ltusb inf located in same folder as software update Important USB driver installation must be performed at this point or the driver will not be installed correctly If a prob...

Page 57: ...trol for DMX input 2 General control for dimmers set as SM D house lights 3 Disabled Convert Two conversion tables are available for reading DMX input data 21 2 Disk Printer 21 2 1 Disk Menu 10 Please...

Page 58: ...to set range of groups recording when using LOAD Double Cue Num Used to set range of cues recording in Double mode Virtual dm Used to enable a virtual dimmer when editing color mix fixtures without a...

Page 59: ...Beep Enable disable warning beep Light Adjust level of the work light 0 100 Default is 0 Monitor Select color scheme of the monitor Light Dark Dark Date Adjust the current date Time Adjust the current...

Page 60: ...DMX of all active receivers that were linked with the DMX of the console non active receivers will remain connected Select 1 LOGIN to connect the RF DMX with all free and active receivers 21 5 Etherne...

Page 61: ...default status unless password is disabled again Saved To store a user default patch select 0 SAVE with password Enabled Load at RST When Enabled the saved patch will be loaded when the console is re...

Page 62: ...number Only units connected to the same net can communicate with each other For ArtNet this number represents the Subnet number Note that to communicate by IPX with Capture the Net Number must be bet...

Page 63: ...hannel s of console 24 48 etc To control Capture fixtures with the console s fixtures Capture channel numbers must be increased 1 from the console s channel numbers 25 49 etc 3 In Console a Edit conso...

Page 64: ...e IP address in same range as PC press MENU 40 b Enable console Ethernet and set Subnet and ArtNet universe numbers to same values as Pandoras Box product c Patch layers and cameras For example 2 vide...

Page 65: ...59 d To select files and folders for Media and Mesh contents in layers and for Mesh in cameras configure the media contents inside the project e In Pandoras Box select Configuration menu and press Run...

Page 66: ...ox name Unit name up to 22 alphanumeric characters may be used Box Press ENTER to locate and to identify the NPC 2D 4D LED s on NPC 2D 4D will blink DMX1 DMX2 Current configuration of NPC 2D 4D output...

Page 67: ...OPTIONS key to toggle between general options and item selection MIDI General Options On Off Used to activate deactivate the MIDI port This option must be ON for MIDI communication Option is also ava...

Page 68: ...When the last value is reached To it jumps to the first value From and repeats From First value for the INTERNAL TC clock default 00 00 00 00 The value can be set in the events list Select Internal t...

Page 69: ...setup line and configuration press the OPTIONS key Ext Used to activate or deactivate the external triggers Sound Used to activate or deactivate the audio input These options are also available from M...

Page 70: ...t is only necessary to unzip the downloaded file to a folder on your PC Run the OLE by selecting the OLE file for example piccolo160wole exe with your mouse you can also make a link to your desktop if...

Page 71: ...Off Line Editor OLE 65 24 6 PC KeyBoard HotKeys For a quick way to use the OLE in addition to using a mouse corresponding hotkey functions are available via a PC keyboard...

Page 72: ...Leviton Piccolo Scan 66...

Page 73: ...67...

Page 74: ...notice Document Release July 2010 Rev A Part DI 000 PPICS 04A Software v1 70 Leviton Lighting Management Systems Division 20497 SW Teton Tualatin OR 97062 Mailing Address PO Box 2210 Tualatin OR 97062...

Reviews: