


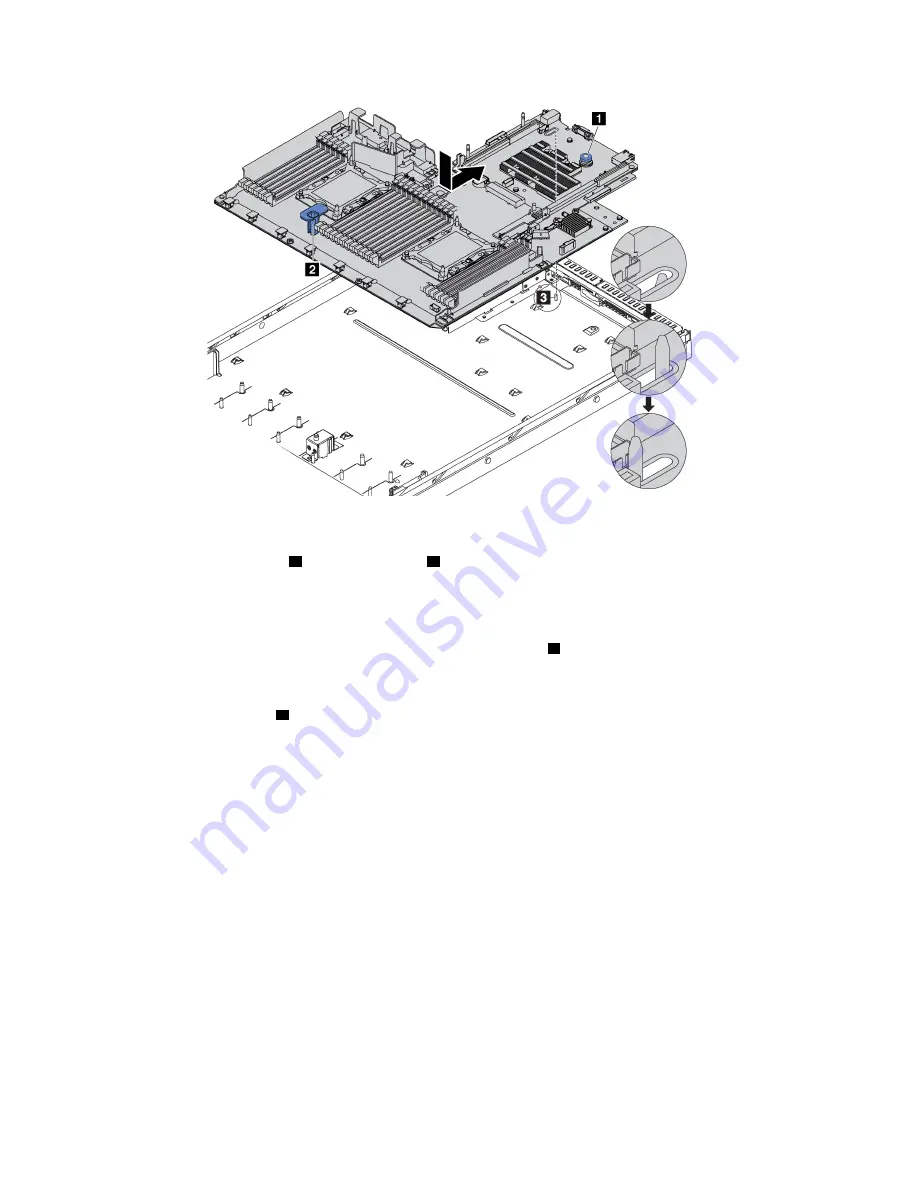
Figure 129. System board installation
Step 1. Hold the release pin
1
and the lift handle
2
at the same time to lower the system board into the
chassis.
Step 2. Slide the system board to the rear of the server until the system board snaps into position. Ensure
that:
• The new system board is engaged by the mounting stud
3
on the chassis.
• The rear connectors on the new system board are inserted into the corresponding holes in the
rear panel.
• The release pin
1
secures the system board in place.
After installing the system board:
1. Push the power supplies into the bays until they click into place.
2. Install any components that you removed from the failing system board. See the related topics in
Chapter 3 “Hardware replacement procedures” on page 39.
3. Complete the parts replacement. See “Complete the parts replacement” on page 141.
4. Update the Universal Unique Identifier (UUID). See “Update the Universal Unique Identifier (UUID)” on
5. Update the SMBIOS/DMI information. See “Update the DMI/SMBIOS data” on page 136.
6. Enable TPM/TCM. See “Enable TPM/TCM” on page 138.
7. Optionally, enable Secure Boot.
Update the Universal Unique Identifier (UUID)
The Universal Unique Identifier (UUID) must be updated when the system board is replaced. Use the Lenovo
XClarity Essentials OneCLI to update the UUID in the UEFI-based server. Lenovo XClarity Essentials OneCLI
is an online tool that supports several operating systems; make sure that you download the version for your
operating system.
134
ThinkSystem SR630 Maintenance Manual
Summary of Contents for thinksystem SR630
Page 1: ...ThinkSystem SR630 Maintenance Manual Machine Types 7X01 and 7X02 ...
Page 8: ...vi ThinkSystem SR630 Maintenance Manual ...
Page 20: ...12 ThinkSystem SR630 Maintenance Manual ...
Page 150: ...142 ThinkSystem SR630 Maintenance Manual ...
Page 168: ...160 ThinkSystem SR630 Maintenance Manual ...
Page 172: ...164 ThinkSystem SR630 Maintenance Manual ...
Page 181: ......
Page 182: ......


