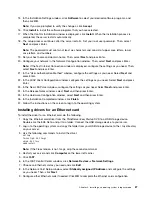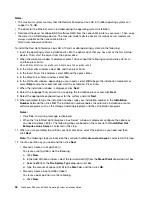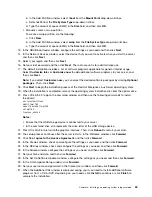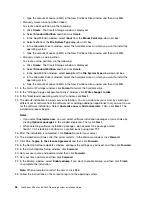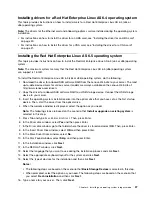
seconds without editing any options. When the Loading ESXi installer window is displayed, wait for a
few seconds. When the VMware ESXi 5.1.0 window is displayed, wait for a few seconds.
3. When the welcome window is displayed, press Enter.
4. Press F11 to accept the license agreement and continue with the installation.
5. Select a drive for installation and press Enter.
6. When the Confirm Disk Selection window is displayed, press Enter.
7. Select a keyboard layout and press Enter.
8. Set a root password and press Enter.
Note:
The root password must contain at least seven characters.
9. Press F11 to start the installation process.
10. When the Installation Complete window is displayed, press Enter to restart the server. The installation
finishes. Remove the disc from the optical drive.
Installing drivers for the VMware ESXi 5.1 Update 1 hypervisor
This topic provides instructions on how to install drivers for the VMware ESXi 5.1 Update 1 hypervisor.
To install drivers for the VMware ESXi 5.1 Update 1 hypervisor, do the following:
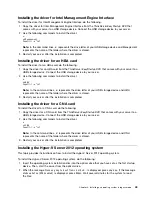
1. Download the driver file from the Lenovo Web site. Ensure that the name of the driver file you download
is offline-bundle.zip. The most up-to-date device drivers for various server models are always available
on the Lenovo Web site at:
http://www.lenovo.com/drivers
2. Log in to the ESXi host as an administrator using the vSphere Client.
3. Upload the offline-bundle.zip file to the ESXi host using the Datastore Browser.
4. In the vSphere Client inventory, right-click the host and select
Enter Maintenance Mode
.
5. Log in to the ESXi host as a root user using SSH or iLO/DRAC.
6. Use the following command to install the drivers:
esxcli software vib install –d /path/offline-bundle.zip
Example:
esxcli software vib install –d /vmfs/volumes/datastore/offline-bundle.zip
Note:
If you are prompted to verify the digital signature for the drivers, add
–no-sig-check
to the
command.
esxcli software vib install -v /vmfs/volumes/datastore/filename.vib –no-sig-check
7. Restart your server.
8. In the vSphere Client inventory, right-click the host and select
Exit Maintenance Mode
.
Installing the VMware ESXi 5.5 hypervisor
This topic provides instructions on how to install the VMware ESXi 5.5 hypervisor.
To install the VMware ESXi 5.5 hypervisor, do the following:
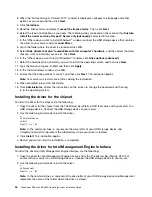
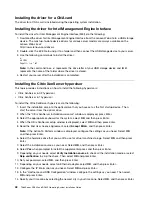
1. Insert the installation disc into the optical drive that you have set as the first startup device. Then,
start the server from the optical drive.
2. When the message
Press Tab to edit options
is displayed, you can press Tab and then edit options
as you need. The following steps are based on the scenario that you have waited for around eight
seconds without editing any options. When the Loading ESXi installer window is displayed, wait for a
few seconds. When the VMware ESXi 5.5.0 window is displayed, wait for a few seconds.
40
ThinkServer RD340 and RD440 Operating System Installation Guide
Summary of Contents for ThinkServer RD340
Page 1: ...ThinkServer RD340 and RD440 Operating System Installation Guide ...
Page 6: ...iv ThinkServer RD340 and RD440 Operating System Installation Guide ...
Page 8: ...2 ThinkServer RD340 and RD440 Operating System Installation Guide ...
Page 56: ...50 ThinkServer RD340 and RD440 Operating System Installation Guide ...
Page 68: ...62 ThinkServer RD340 and RD440 Operating System Installation Guide ...
Page 69: ......
Page 70: ......


