Installing drivers for the Windows Small Business Server 2011 Standard
operating system
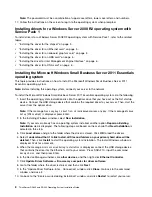
To install drivers for the Windows Small Business Server 2011 Standard operating system, refer to the
related topics.
•
“Installing the driver for the chipset” on page 5 .
•
“Installing the driver for an Ethernet card” on page 5 .
•
“Installing the driver for an onboard graphics card” on page 5 .
•
“Installing the driver for an HBA card” on page 6 .
•
“Installing the driver for Intel Management Engine Interface” on page 6 .
•
“Installing the driver for a CNA card” on page 6 .
Installing the Microsoft Windows Small Business Server 2011 Premium
Add-on operating system
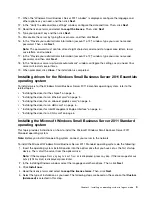
This topic provides instructions on how to install the Microsoft Windows Small Business Server 2011
Premium Add-on operating system.
To install the Microsoft Windows Small Business Server 2011 Premium Add-on operating system, do the
following:
1. Insert the operating system installation disc into the optical drive that you have set as the first startup
device. Then, start the server from the optical drive.
Note:
If the message
Press any key to boot from cd
is displayed, press any key. If the message
Windows
Setup [EMS Enabled]
is displayed, press Enter.
2. In the Installing Windows window, select the language and other options. Then, click
Next
.
3. Click
Install now
.
4. Select the operating system that you want to install, and then click
Next
.
5. Read the license terms and select
I accept the license terms
. Then, click
Next
.
6. Select the type of installation as you need. The following steps are based on the scenario that
Custom
(Advanced)
is selected in this step.
7. In the “Where do you want to install Windows?” window, connect the USB storage device that contains
the driver to your server and click
Load Driver
.
8. Go to the folder where the driver is stored and click
OK
.
9. Select the driver that you want to install and click
Next
to install the driver.
10. In the “Where do you want to install Windows?” window, click
Drive options (advanced)
.
11. Select the hard disk drive on which you want to install the operating system, and then click
New
.
12. Type the amount of space (in MB), and then click
Apply
.
13. In the Install Windows window, click
OK
.
14. Ensure that the drive partition is correct, and then click
Next
. The installation begins.
15. Change your password when prompted.
Note:
The password must be a combination of upper case letters, lower case letters, and numbers.
16. Follow the instructions on the screen to log in to the operating system when prompted.
Chapter 2
.
Installing an operating system in legacy mode
11
Summary of Contents for ThinkServer RD340
Page 1: ...ThinkServer RD340 and RD440 Operating System Installation Guide ...
Page 6: ...iv ThinkServer RD340 and RD440 Operating System Installation Guide ...
Page 8: ...2 ThinkServer RD340 and RD440 Operating System Installation Guide ...
Page 56: ...50 ThinkServer RD340 and RD440 Operating System Installation Guide ...
Page 68: ...62 ThinkServer RD340 and RD440 Operating System Installation Guide ...
Page 69: ......
Page 70: ......


