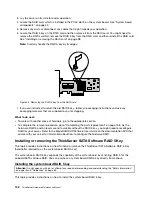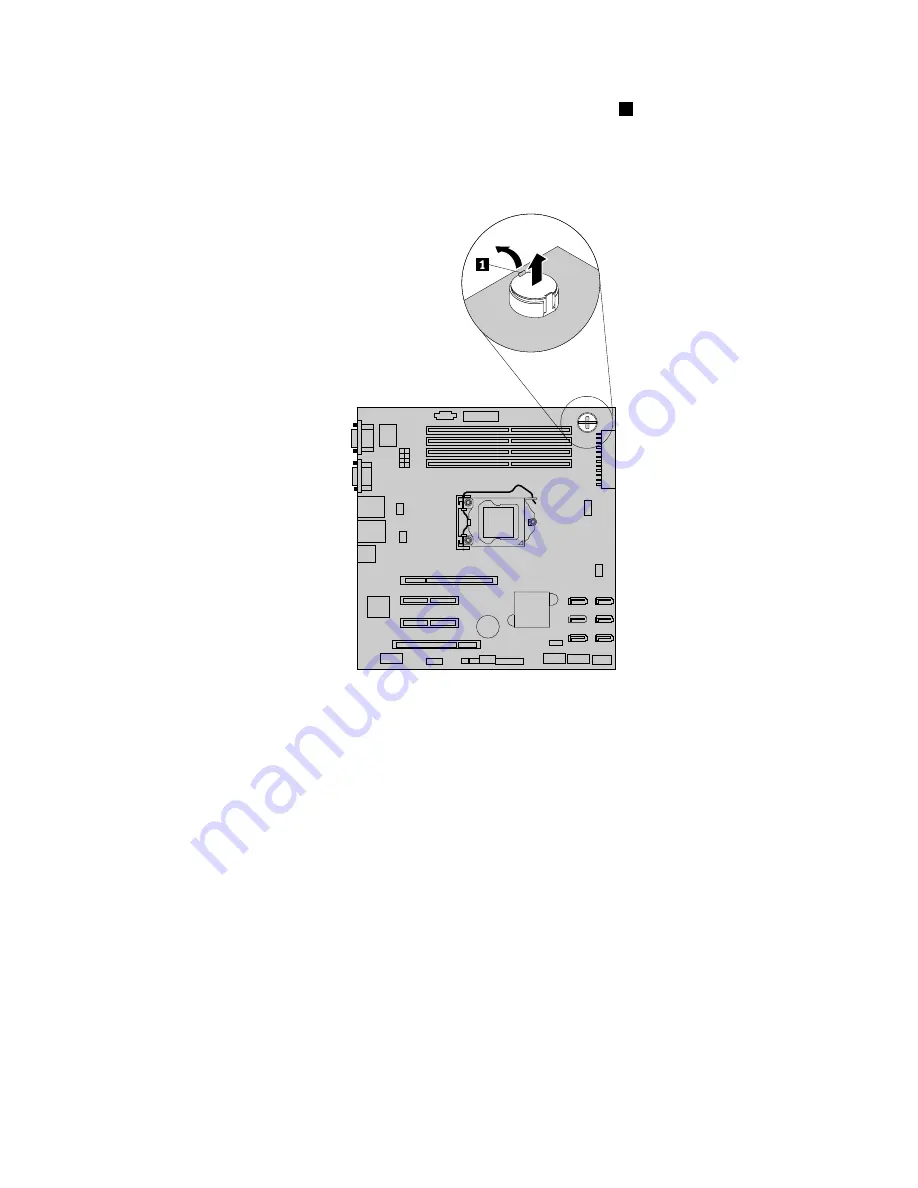
4. Locate the iButton socket on the system board. Open the retaining clip
1
on the iButton socket to
release the system board RAID 5 key and then completely remove the key from the iButton socket.
Note:
If necessary, remove any parts or disconnect any cables that might impede your operation.
Figure 46. Removing the system board RAID 5 key
5. If you are instructed to return the old system board RAID 5 key, follow all packaging instructions and
use any packaging materials that are supplied to you for shipping.
What to do next:
• To work with another piece of hardware, go to the appropriate section.
• To complete the removal procedure, go to “Completing the parts replacement” on page 168. As the
onboard SATA software RAID 5 is not available without the system board RAID 5 key, you might need to
reconfigure RAID for your server. See “Configuring RAID” on page 71.
Installing or removing the ThinkServer iKVM Remote Management
Module
This topic provides instructions on how to install or remove the ThinkServer iKVM Remote Management
Module (hereinafter referred to as the iKVM key).
The iKVM key offers convenient, remote KVM access and control through the LAN or Internet. You can use
the iKVM key to gain location-independent remote access to respond to critical incidents and to undertake
necessary maintenance. Therefore, working as an integrated solution in your server, the iKVM key provides
Chapter 6
.
Installing, removing, or replacing hardware
105
Summary of Contents for THINKSERVER 387
Page 16: ...4 ThinkServer Hardware Maintenance Manual ...
Page 18: ...6 ThinkServer Hardware Maintenance Manual ...
Page 94: ...82 ThinkServer Hardware Maintenance Manual ...
Page 190: ...178 ThinkServer Hardware Maintenance Manual ...
Page 228: ...216 ThinkServer Hardware Maintenance Manual ...
Page 246: ...234 ThinkServer Hardware Maintenance Manual ...
Page 247: ......
Page 248: ......


