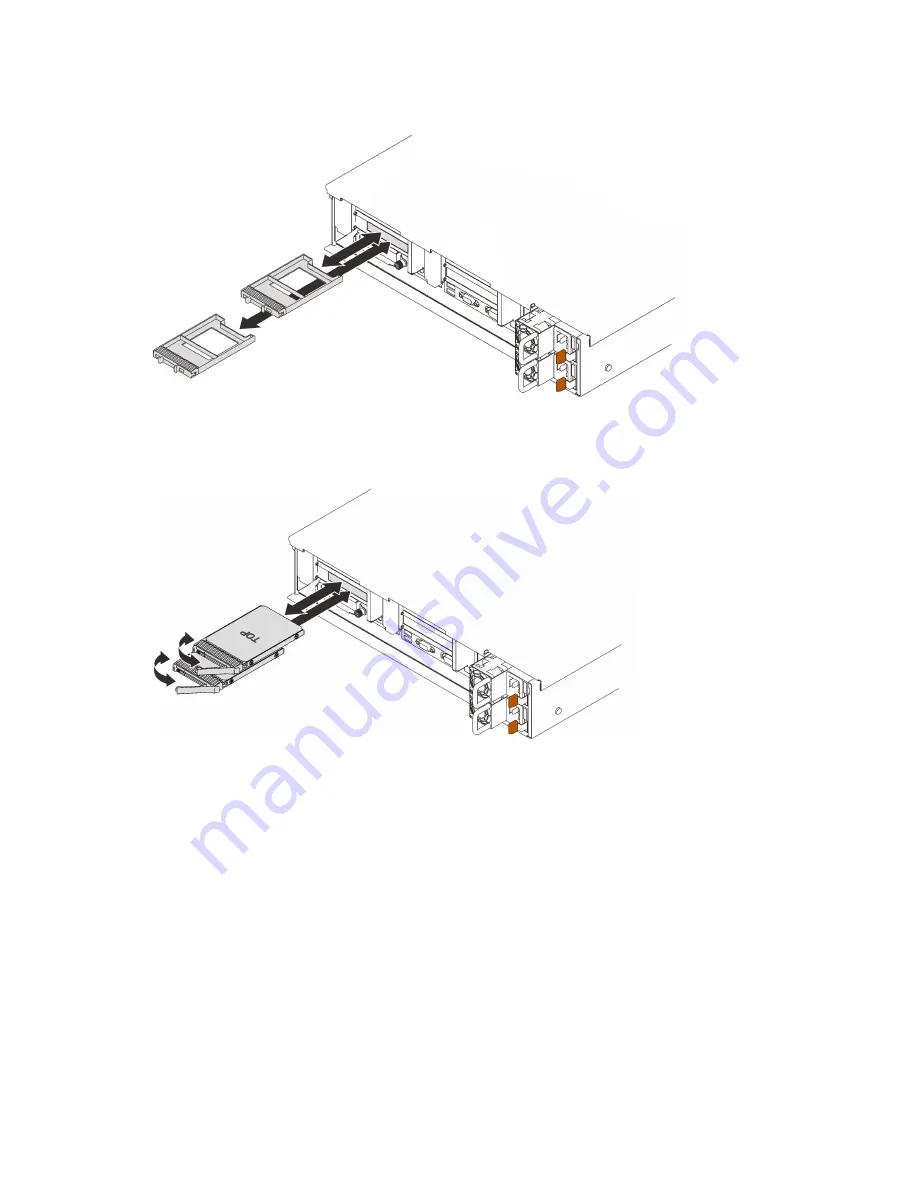
Step 1. If a drive filler has been installed in the drive bay, remove it.
Figure 38. Removing 7mm drive fillers
Step 2. Gently rotate the release latch away to unlock the drive handle.
Figure 39. Installing 7mm drives
Step 3. Slide the drive into the drive bay, and push it until it stops.
Step 4. Rotate the handle back to the locked position.
After this task is completed
Check the drive status LED to verify if the drive is operating correctly:
• If the yellow LED is lit continuously, it is malfunctioning and must be replaced.
• If the green LED is flashing, the drive is functioning.
Note:
If the server is configured for RAID operation through a ThinkSystem RAID adapter, you might have to
reconfigure your disk arrays after you install drives. See the ThinkSystem RAID adapter documentation for
additional information about RAID operation and complete instructions for using ThinkSystem RAID adapter.
120
ThinkSystem SR850 V2 Maintenance Manual
Summary of Contents for 7D31
Page 1: ...ThinkSystem SR850 V2 Maintenance Manual Machine Types 7D31 and 7D32 ...
Page 8: ...vi ThinkSystem SR850 V2 Maintenance Manual ...
Page 52: ...44 ThinkSystem SR850 V2 Maintenance Manual ...
Page 60: ... Three backplanes on page 57 52 ThinkSystem SR850 V2 Maintenance Manual ...
Page 70: ...62 ThinkSystem SR850 V2 Maintenance Manual ...
Page 71: ...Chapter 3 Internal cable routing 63 ...
Page 78: ...70 ThinkSystem SR850 V2 Maintenance Manual ...
Page 114: ...106 ThinkSystem SR850 V2 Maintenance Manual ...
Page 236: ...Figure 133 System board and expansion board LEDs 228 ThinkSystem SR850 V2 Maintenance Manual ...
Page 258: ...250 ThinkSystem SR850 V2 Maintenance Manual ...
Page 260: ...252 ThinkSystem SR850 V2 Maintenance Manual ...
Page 264: ...256 ThinkSystem SR850 V2 Maintenance Manual ...
Page 273: ......
Page 274: ......


