152 / Detailed guide /
Record mode
Saving the single pictures as animation
4. Press the
MENU
button (1.25) to return to the
sub-menu, select the menu line
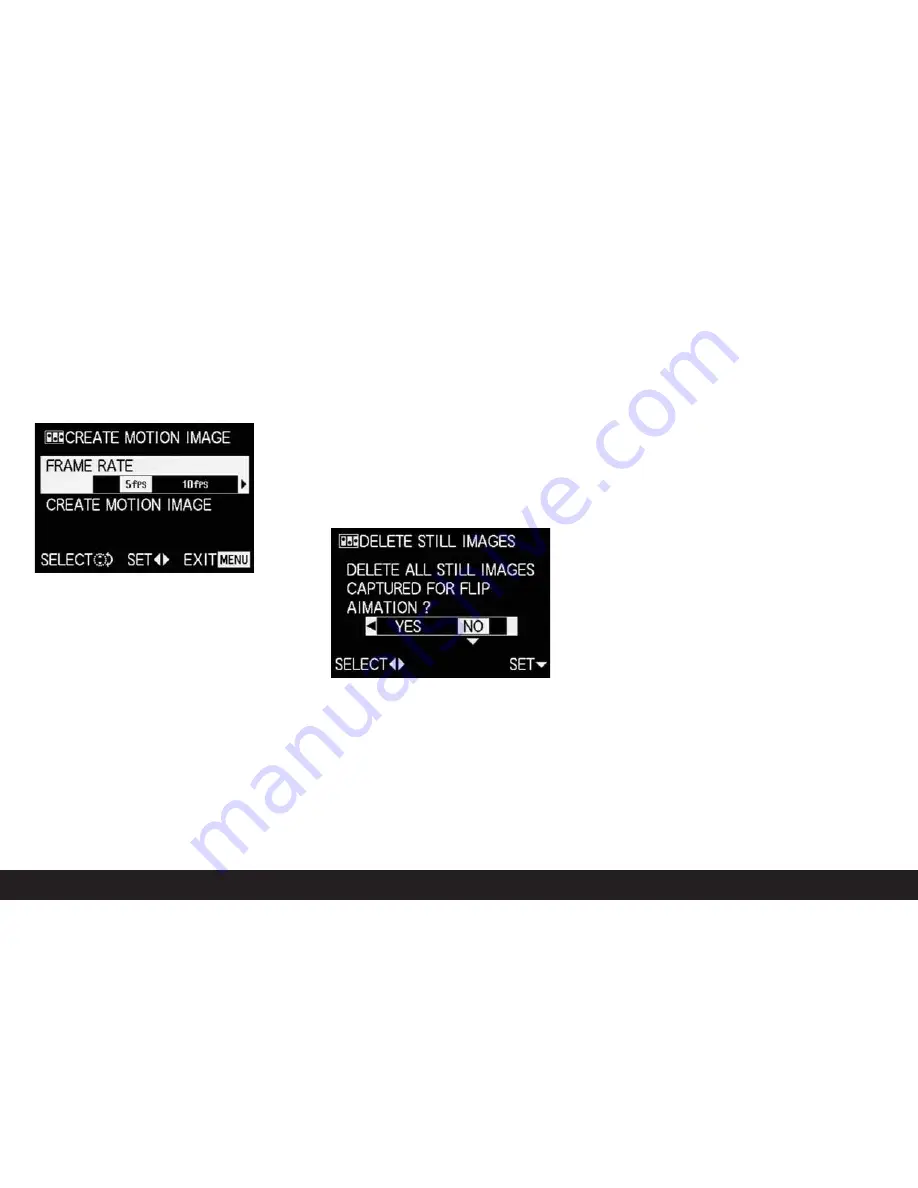
CREATE MOTION
IMAGE
, and open up the second sub-menu with the
direction pad.
5. Select the desired picture frequency for playback
(
FRAME RATE
) and then save the series of pictures
(
CREATE MOTION IMAGE
again) according to the
menu instructions.
• In the viewfinder/monitor (1.19/32) the picture
disappears and the corresponding confirmation
of the procedure including the folder number
appears briefly instead.
Important:
If you do not delete a series of pictures
(see below), it forms a part of a new animation file
when the animation function is used again. In this
case, each series is saved in the order of its creation
and they are saved together as one new animation
file.
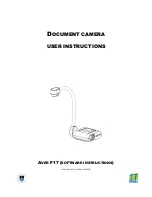
Deleting the most recently created picture series
4. Press the
MENU
button to return to the sub-menu,
select the menu line
DELETE STILL IMAGES
and
follow the further menu instructions.
Important:
With this function, only all pictures of the
most recently created picture series can be deleted.
Using a computer (see p. 173) it is even possible to
subsequently delete single pictures, and thus also
single recording series.
Ending the animation function
This is done with the
MENU
button according to the
relevant menu instructions; this may have to be
pressed up to 3 x.
Viewing an animation
This is done precisely as described as in the section
“Reviewing video recordings” (p. 158).
Notes:
• Even if an animation file is made up of several
recording series, it is always played back as one
unit, i. e. without interruption, with all recording
series in a row and in the order in which they were
saved.
• When ‘scrolling’ in the animation files saved on the
card, however, only the first single picture of the
animation file concerned is ever shown. If there are
several animation files, this first picture of the first
recording series is only ever shown irrespective of
the time of recording and the order (including any
‘normal’ recordings made in the meantime), i. e. the
pictures shown in this case are always the same
ones.
• Animation files are not deleted when the menu
function
DELETE ALL
(see p. 160) is used.
Summary of Contents for Digilux 2
Page 1: ...LEICA DIGILUX 2 Anleitung Instructions ...
Page 3: ...1 39 1 40 1 44 1 41 1 38 1 37 1 37 1 52 1 53 1 52 1 50 1 51 1 48 1 49 1 45 1 46 1 45 1 47 ...
Page 4: ...LEICA DIGILUX 2 Anleitung English instructions pages 97 189 ...
Page 6: ...3 ...
Page 97: ......
Page 98: ......
Page 99: ...LEICA DIGILUX 2 Instructions Illustrations inside front and rear covers ...


