9.2.3 Step-by-Step Guide
1.
Open the Alignment toolbox.
The
Alignment
measurement mode is activated automatically.
2.
Press
Start.
3.
Measure the alignment sphere as described in chapter 9.2.3. Data measured in
Alignment
mode is displayed in green by default to distinguish it from other data.
4.
Press
Stop
.
5.
If data was acquired that does not belong to the sphere (e.g. mounting, table, ...) you
can manually remove this data (see “Interactive Clipping” toolbox) or have this data
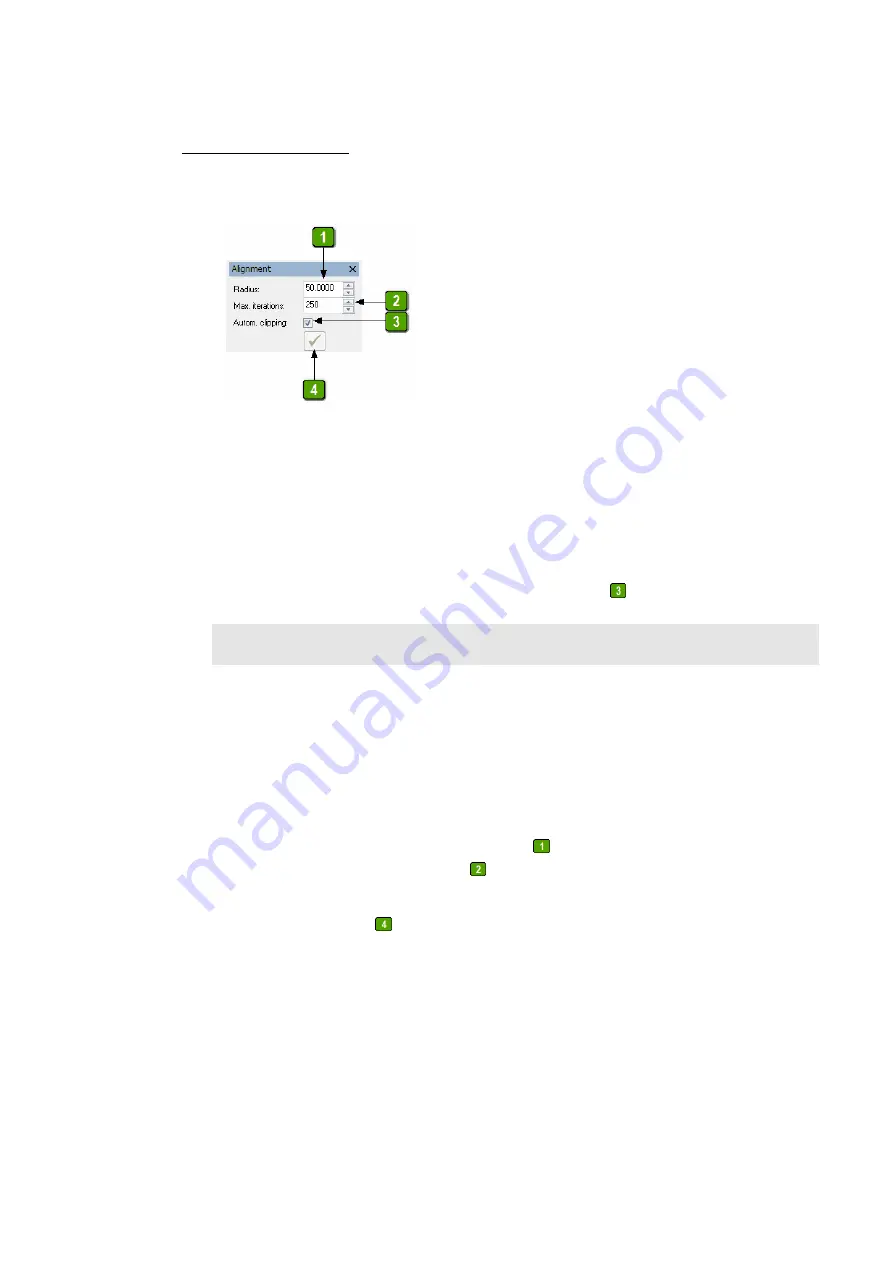
removed automatically. For this, activate
Autom. clipping
in the toolbox.
Note
Automatic clipping might lead to unexpected results if the initial data is inappropriate.
For example, if the majority of the data consists of the mounting or table, etc. (but not
the sphere) or if the scanner is way out of calibration, data fragments might remain
which normally should be removed. In this case, the data needs to be clipped manually.
6.
You need to measure at least 400 000 points in order to continue. It is recommended
to measure between 400 000 und 1 000 000 points.
7.
In the toolbox, enter the radius of the sphere
given in the calibration certificate and
the maximum number of iterations
. The recommended value is 250; however, the
algorithm often takes fewer iterations.
8.
Press
Start calculation
.
9.
The calculation may take several minutes, depending on the performance of the
computer and the initial calibration state.
10.
After this calculation, a sphere fit is executed automatically.
11.
A dialog appears, showing the results of the calibration and of the sphere fit:


