Network Video Recorder
Instruction
Manual
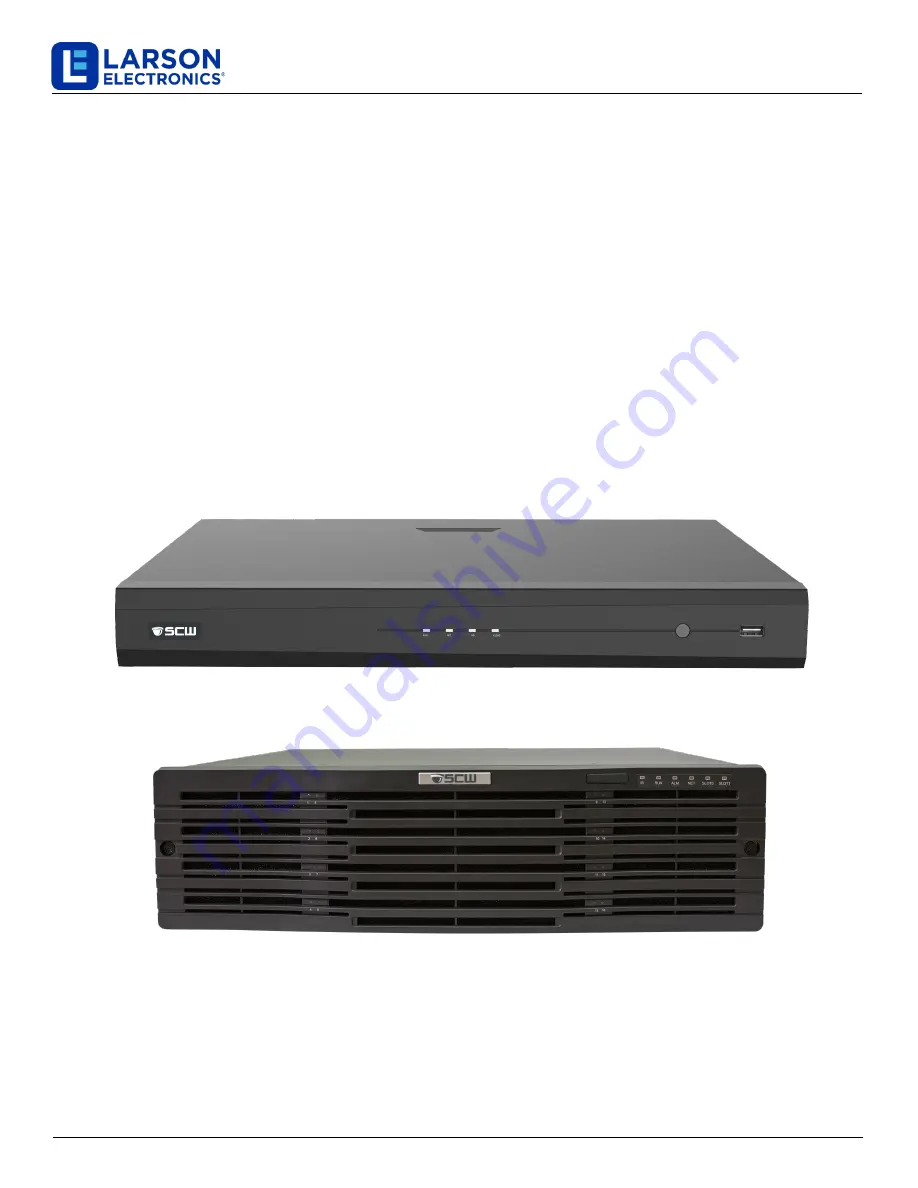
NVR-NDAA-POE-4CH
Larson Electronics, LLC
Phone: (800) 369-6671
Fax: (903) 498-3364
www.larsonelectronics.com
Page 1: ...Network Video Recorder Instruction Manual NVR NDAA POE 4CH NVR NDAA POE 4CH Larson Electronics LLC Phone 800 369 6671 Fax 903 498 3364 www larsonelectronics com...
Page 2: ...n 8 characters only one of the following groups upper case letters lower case letters special characters and numbers To the maximum extent permitted by applicable law the product described with its ha...
Page 3: ...e version or model of your device The screenshots in this manual may have been customized to meet specific requirements and user preferences Some examples and functions shown may differ from those dis...
Page 4: ...4 CAUTION Indicates a situation which if not avoided could result in damage data loss or malfunction to product NOTE Indicates useful or supplemental information about the use of product...
Page 5: ...Live View Status 21 Window Toolbar 21 Screen Toolbar 22 Shortcut Menu 23 Sequence Operation 24 Zoom 25 Image Configuration 26 Preview Configuration 26 Preview Configuration 26 Advanced Configuration 2...
Page 6: ...ording and Snapshot 54 Motion Detection Recording and Snapshot 54 Alarm Triggered Recording and Snapshot 56 Manual Recording and Snapshot 58 Holiday Recording and Snapshot 58 Other Recording and Snaps...
Page 7: ...ual Alarm 81 10 VCA 82 VCA Configuration 82 VCA Search 91 11 Network Configuration 95 Basic Configuration 95 Platform Configuration 101 Advanced Configuration 107 12 Disk Configuration 113 Disk Manage...
Page 8: ...uery 135 Import Export 136 System Restoration 137 Automatic Maintenance 138 System Upgrade 138 15 Shutdown 140 Part II Web Based Operations 141 1 Before You Begin 141 2 Login 142 3 Live View 143 4 Pla...
Page 9: ...on the Web interface In this manual the terms IP camera and IPC both refer to network camera which requires a connection to the network The IP device mentioned in this manual refers to either an IP ca...
Page 10: ...l or is delivered with a remote control you may also control your NVR by pressing the front panel buttons or using the remote control The NVR has an embedded web server that allows web based operation...
Page 11: ...login only It should be immediately changed to a strong password Strong Passwords contain at least nine characters that include letters numbers and special characters 1 Right click anywhere in the win...
Page 12: ...on area Right button Click Show the shortcut menu Exit zoom Exit the current window when Cancel or Exit is displayed Wheel Scroll up or down Scroll up or down a list or a window or zoom in or out on a...
Page 13: ...ton and hold until a message appears on the monitor about 3 seconds Click Yes Note This shutdown operation can be performed only when you are logged in to the system Table 1 3 Front Panel Buttons 2 Bu...
Page 14: ...witch the screen layout in live view or playback mode Enter 6 M N or O or enable or disable arming Enter 7 P Q R or S or take a snapshot Enter 8 T U or V Enter 9 W X Y or Z Enter 0 or a space Delete S...
Page 15: ...shut down the NVR To shut down press this button and hold until a message appears on your monitor about 3 seconds Click Yes Note This shutdown operation can be performed only when you are logged in to...
Page 16: ...screen Press DOWN to open the playback window Press ENTER to confirm an operation or to display a selected drop down list In playback mode press ENTER to play or pause in full screen mode UP and DOWN...
Page 17: ...the rear panel of the NVR Verify that the hard disk s are correctly installed For detailed steps to install a hard disk please refer to the quick guide shipped with your NVR Device Login The login pag...
Page 18: ...18 2 Change the password into a strong one then click OK 3 Set the unlock pattern...
Page 19: ...19 Note To disable unlock pattern click System User See User Configuration for details Wizard The wizard can guide you to complete the most basic setup The following page appears after your login...
Page 20: ...in the discovered device list click Add and then click Yes to complete configuration Note To add devices through PoE ports see Option 3 in Adding an IP Device for details The devices added can get on...
Page 21: ...for PTZ cameras only Click to display the PTZ control window Set mount mode and display mode for fisheye camera This icon appears only for fisheye cameras Record live video in the window to the hard d...
Page 22: ...Toolbar Icon Description Click to access the main menu Select the screen layout Previous or next screen Start or stop sequence Playback Rest the mouse pointer on this icon to view encoding information...
Page 23: ...u Quick access to Camera Net Config and Backup Corridor Choose a corridor mode Corridor mode can also be set in the Preview Windows drop down list under System Preview To display images in corridor mo...
Page 24: ...ure the screen layout windows linked cameras and the sequence interval This example describes how to configure sequence for five cameras based on a 4 window screen layout 1 Click 4 Windows on the scre...
Page 25: ...stem Preview You may drag video to the desired window on the screen Zoom Zoom in on an area of images in a window for details 1 Click the window and then click on the window toolbar 2 Move your mouse...
Page 26: ...p by following the wizard You can click System Preview and edit preview setting as needed including video output image resolution default layout and sequence interval The video output and the number o...
Page 27: ...g D1 is not linked to any window Step 2 Click window 2 on the right and then click D1 under Camera on the left Now D1 appears in window 2 Click Apply to save the settings Advanced Configuration Click...
Page 28: ...rovides multiple options to add an IP device Some options are only applicable to certain NVR models Choose one as appropriate Option 1 1 Click Camera Camera Camera The system automatically searches fo...
Page 29: ...a network cable The connected camera will be added to the NVR automatically Check status under Camera Camera Camera means live video from the camera is available Click to view live video If the camer...
Page 30: ...address and port number enter the username and password c Click OK By MyDDNS a On the IP device s Web interface go to Setup Network DDNS enable DDNS select MyDDNS set a domain name and get the server...
Page 31: ...DDNS at the same time When an IP device is added by MyDDNS domain name NO IP or DynDNS or IP public IP public port and it is not connected to the same router as the NVR alarm is configurable but alarm...
Page 32: ...IP field displays the IP address that the current channel links to and you may change the address so the channel links to another device The username and password must be consistent with that of the I...
Page 33: ...click Sort Camera and then follow the steps below 1 In the left list select the check box for channel 1 and then click Channel 1 now appears in the right list Perform the same operations to channel 4...
Page 34: ...er line in the list by selecting the corresponding check box Save cannot be clicked when the right list is not empty You need to clear the list first Fisheye Configuration Only certain NVR models can...
Page 35: ...ve view Click Fisheye Mode on the window toolbar The figure below appears Set mounting mode and display mode Three mounting modes are available ceiling wall desktop Ceiling and desktop mounting modes...
Page 36: ...mic 8PTZ Operations Example Ceiling Mount and Fisheye 3PTZ camera On a PTZ image drag the mouse to rotate the image or use the scroll wheel to zoom in or out A box appears on the fisheye image as the...
Page 37: ...Cloud or By Disk to upgrade cameras in batches OSD Configuration On Screen Display OSD are characters displayed with video images for example camera name date and time and people counting statistics C...
Page 38: ...ay a different camera name on video image a Deselect Sync OSD Camera Name b Enter the camera name in Name field c Enter the OSD camera name 3 Set time to display Select Show Time and select date and t...
Page 39: ...and recorded videos Image enhancement 1 Click the Image Enhancement tab 2 Adjust the settings as needed Some important parameters are described in the table below Parameter Description Brightness The...
Page 40: ...mera must be installed correctly rotated 90 clockwise or counterclockwise Exposure 1 Click the Exposure tab 2 Adjust the settings as needed Some important parameters are described in the table below P...
Page 41: ...tput optimum images Night The camera outputs high quality black and white images according to the ambient lighting condition Day The camera outputs high quality color images according to the ambient l...
Page 42: ...o the lighting condition the color tends to be blue Finetune Allow you to adjust the red or blue offset manually Red Offset Adjust the red offset manually Blue Offset Adjust the blue offset manually A...
Page 43: ...ra Privacy Mask 2 Select the desired camera select Enable Privacy Mask click Add Area and then use the mouse to specify areas to mask Up to eight areas are allowed The areas are differentiated by diff...
Page 44: ...descriptions 2 Click the Set button The PTZ Management window appears can also be opened by clicking Camera PTZ Table 5 1 PTZ Control Window Buttons Button Description Control the rotation direction o...
Page 45: ...eset position Delete a preset Note and are displayed for saved presets only Preset patrol recorded patrol and auto guard For detailed information see Setting a Preset Patrol Setting a Recorded Patrol...
Page 46: ...o the preset position NOTE Presets can also be triggered by alarms See Alarm Triggered Actions for details Setting a Preset Patrol Set the PTZ camera to patrol by presets go from one preset to the nex...
Page 47: ...to save the settings The preset is added as a keypoint 3 Repeat the above steps to add all presets keypoints and adjust the sequence of these presets by clicking or Modify or delete a preset by clicki...
Page 48: ...ute the time that the camera stays at a certain direction rotation speed zoom focus and focus 1 Click to start recording Steer the camera to the desired directions adjust the zoom focus iris as needed...
Page 49: ...49 1 Click Auto Guard and then select Enable 2 Select the desired mode from the drop down list and then complete other settings accordingly Click Apply to save the settings...
Page 50: ...cording Encoding Settings Recording The parameters and options displayed may vary with camera model and version Some functions may be unavailable if the camera version is too low In this case you need...
Page 51: ...motion detection alarms Sub Stream low resolution video is intended for local or remote real time monitoring Video Compression Video compression standard for example H 264 H 265 The listed options dep...
Page 52: ...e Interval Number of frames between two adjacent I frames I Frame Range Range of I frames Currently the range is fixed Smoothing Use the slider to control the sudden increase of bit rate Audio Stream...
Page 53: ...the Edit button The operations for recording and snapshot are similar so this section only describes how to make a recording schedule 1 Click Storage Recording 2 Select the camera from the list Sched...
Page 54: ...fault and may be edited as needed to record video in specified periods only See Draw or Edit a Schedule for the detailed steps Make sure the schedule type is Normal The set schedule appears in blue wh...
Page 55: ...motion is detected 3 In the preview window on the left side click and drag your mouse to specify a motion detection area red grid Use the slider to adjust detection sensitivity 4 Configure motion det...
Page 56: ...r Actions In the window displayed click the Snapshot tab select the desired camera and then click OK 2 Set a snapshot schedule under Storage Snapshot For the detailed steps see Draw or Edit a Schedule...
Page 57: ...a schedule under Storage Recording For the detailed steps see Draw or Edit a Schedule Make sure the schedule type is Alarm The set schedule appears in red which stands for alarm triggered recording T...
Page 58: ...click on the preview window select Manual in the shortcut menu Click the Manual Recording tab select the desired camera and then click Start To stop manual recording select the camera and then click...
Page 59: ...ayed Complete the settings including the holiday name start and end dates By default a holiday is enabled when added and does not repeat 3 Click OK The holiday appears in the list 4 Click Storage Reco...
Page 60: ...VCA Any of these types will trigger event recording snapshot Motion detection and alarm triggered M and A for short recording or snapshot is triggered only when a motion detection alarm AND an input a...
Page 61: ...ed during the last 5 minutes and 30 seconds If no recording is found there is no recording during this period 1 Click the desired window and then click on the toolbar to start instant playback 2 You m...
Page 62: ...deo playing in the highlighted window The second indicates the overall playback progress for all the selected cameras Timeline Zoom in or out on the timeline Note Alternatively scroll your mouse wheel...
Page 63: ...nd playback by POS POS OSD duration how long POS OSD appears on screen varies with playback mode For playback by camera and date the duration is fixed to 5 seconds For playback by POS the duration is...
Page 64: ...hen click to start playback Double clicking the date will start playback directly NOTE The calendar uses different flags to indicate different recording types No flag means no recording The blue flag...
Page 65: ...manage the added tags click on the screen toolbar and then rename or delete tags as needed Playback by Tag 1 In the playback window click Video Retrieval select Tag Search from the drop down list in...
Page 66: ...riggered by video loss during a specified time period NOTE Make sure video loss alarm is enabled and alarm triggered recording has been configured before you use this function See Video Loss and Alarm...
Page 67: ...ayed By default the full screen is the smart search area To clear all click to restore the full screen search area click 4 Set smart search rules including detection area and sensitivity 5 Click to st...
Page 68: ...hen click Search 4 Click the desired file to start playback Playback by POS Use this function to play recordings of a POS machine 1 In the playback window click Video Retrieval select POS Search from...
Page 69: ...m the output interface and the number of windows displayed when the snapshot is taken 2 Lock files Use this function to lock a recording file so it will not be overwritten To lock a recording file wil...
Page 70: ...60 DVD burner Make sure the DVD R disc is empty and the burner is correctly connected to the NVR Permission is required The recording to back up is stored on a hard disk of the NVR NOTE The default fi...
Page 71: ...cate the progress where X indicates the current number being backed up and Y indicates the total number of recordings To cancel the operation click Cancel A backup file is named in this format camera...
Page 72: ...selected video clips are saved to the specified directory Image Backup The default format of image backup is JPG 1 Click Backup Image 2 Set search conditions and then click Search Search results are...
Page 73: ...Enable to enable alarm input 3 Select the normally open N O or normally closed N C trigger mode and then click OK 4 Click under Trigger Actions and then set action s to trigger For more details see Al...
Page 74: ...same arming schedule to other days select the intended days and then click Copy To To apply the same settings to other cameras click Copy select cameras and then click OK Alarm Output 1 Click Alarm In...
Page 75: ...ea covers the full screen and recording is triggered only for the current camera The settings remain if you disable motion detection and then enable it 1 Click Alarm Motion 2 Select the desired camera...
Page 76: ...as needed and set up to eight different periods for each day Time periods cannot overlap To apply the same arming schedule to other days select the intended days and then click Copy To 6 Click Apply t...
Page 77: ...ther cameras 6 Click Apply to save the settings Human Body Detection Human body detection alarms occur when the presence of human beings is detected in the specified area 1 Click Alarm Human Body Dete...
Page 78: ...ss alarm for a channel click which then changes to 2 Click under Trigger Actions and set action s to trigger For more details see Alarm Triggered Actions NOTE Video loss alarm cannot trigger recording...
Page 79: ...address Recording Snapshot Abnormal Storage resource cannot be found for example when all hard disks are removed or when there is no disk in disk group 1 see Disk Group for more information Perform th...
Page 80: ...rm message to a specified email address when an alarm occurs Alarm Triggered Pop up Window A window pops up when an alarm occurs Alarm Triggered Recording The NVR records video from a specified camera...
Page 81: ...al Alarm 2 To trigger an alarm output manually select the desired channel and then click Trigger To clear an alarm output manually select the desired channel and then click Clear Manual Buzzer Follow...
Page 82: ...Face Detection 2 Select the camera and then select Enable Face Snapshot 3 Select the detection area You may choose full screen or specify an area to detect If you select Specify Area click Draw Area...
Page 83: ...settings Set the total number of snapshots to take for a face during the detection Up to 30 snapshots are allowed Set the maximum and minimum face width Face width in the picture within this range wil...
Page 84: ...etection area An alarm occurs when the threshold or the percentage is exceeded 4 Click right to Trigger Actions and set action s to trigger For more details see Alarm Triggered Actions 5 Optional Clic...
Page 85: ...hen a camera detects a sudden change in sound volume 1 Click VCA VCA Config Audio Detection 2 Select the camera and then select Enable to enable audio detection 3 Click right to Trigger Actions and se...
Page 86: ...cus detection and scene change detection 1 Click VCA VCA Config People Counting 2 Select the camera and then select Enable Shoulder Demarcation Draw a virtual line on the screen to set the minimum wid...
Page 87: ...ming Schedule and then set the time when actions will be triggered 5 Set detection sensitivity and then click Apply to save the settings Scene Change Detection Use scene change detection to detect the...
Page 88: ...tomatically tracks the first object detected 1 Click VCA VCA Config Auto Tracking 2 Select the desired camera and then select Enable to enable auto tracking 3 Click right to Trigger Actions and set ac...
Page 89: ...ing to the tracking distance and thus captures more details on the tracking object Current Zoom means the camera maintains the original zoom ratio during tracking and thus attends to the whole scene 6...
Page 90: ...5 Click right to Trigger Actions and set action s to trigger For more details see Alarm Triggered Actions 6 Optional Click right to Arming Schedule and then set the time when actions will be triggere...
Page 91: ...s see Alarm Triggered Actions 6 Optional Click right to Arming Schedule and then set the time when actions will be triggered 7 Click Apply to save the settings VCA Search VCA means Video Content Analy...
Page 92: ...detected around 10 seconds before and after click the play button The following shows an example Vehicle Search Search vehicle snapshots based on vehicle control events 1 Click VCA VCA Search Vehicle...
Page 93: ...during a specified period day week or year 1 Click VCA VCA Search Counting 2 Select the camera counting type people entered or left report type daily weekly monthly or yearly set a time period and the...
Page 94: ...94 3 Click Backup to export the counting statistics to a storage device...
Page 95: ...ng mode if the NVR has two NICs Multi address mode The two NICs work independently and can be configured separately Either NIC can be chosen as the default route data will be forwarded through this NI...
Page 96: ...o save the settings NOTE For an NVR with multiple NICs you can configure the NICs and choose a default route currently NIC1 If your NVR has a PoE port or a switching port you can configure an internal...
Page 97: ...P2P The NVR allows access from the cloud website or from the mobile surveillance app You need to sign up for a cloud account at www star4live com first 1 Click Network Basic P2P 2 P2P is enabled by de...
Page 98: ...s is inconvenient when you remotely access your NVR with an IP address To avoid this issue you can register with an DDNS server to obtain a domain name for your NVR and then access your NVR by visitin...
Page 99: ...her devices on the network and establish network services such as data sharing and communication To use UPnP in your NVR enable UPnP in the connected router With UPnP enabled for Network Address Trans...
Page 100: ...ts under UPnP Status 4 Click Apply to save the settings Manual Port Mapping If your router does not support UPnP configure the internal and external ports manually NOTE The principle of port mapping i...
Page 101: ...ormation in the address bar of your web browser router s WAN port IP address external HTTP port For example if 10 2 2 10 is the IP address and 82 is the HTTP port then you enter http 10 2 2 10 82 Plat...
Page 102: ...Use this function to send alarm signals to an external alarm device for example alarm control panel when an alarm or an alert occurs on the NVR 1 Click Network Platform Alarm Service 2 Select Enable A...
Page 103: ...vary depending on the platform communication type you choose Some settings are described below TMS Server IP address of the NVR TMS Server Port Database port configured on the NVR Platform Communicat...
Page 104: ...control allows you to view license plate recognition results To use this function you need to configure in Video Image Database add plate list and set vehicle monitoring task Video Image Database See...
Page 105: ...export the template to a USB storage device first Then edit the list and click Batch Import to import the edited file After importing is completed click Cancel to return to Plate List Note The import...
Page 106: ...screen toolbar Right click and select Preview Mode Smart Note In smart mode click in the upper right corner to set the display content To exit smart mode right click and select Preview Mode Normal Vid...
Page 107: ...lows access through Point to Point over Ethernet PPPoE 1 Click Network Advanced PPPoE 2 Enable PPPoE by selecting the check box 3 Enter the username and password provided by your Internet Service Prov...
Page 108: ...channel of the current NVR from another NVR See Option 5 in Adding an IP Device for more information 3 Click Apply to save the settings Email After Email is enabled as a triggered action in Trigger A...
Page 109: ...you need to enter the correct username and password Click Test to send a test email NOTE Enter a valid SMTP server address and port number and then select Enable TLS SSL if required Select Attach Ima...
Page 110: ...and upload interval NOTE Click Test to verify whether an FTP connection can be established If the remote directory is not specified the system will create different folders directly by IP time and cam...
Page 111: ...onal Apply the same settings to other cameras by clicking right to Copy and then selecting desired cameras 6 Click Apply to save the settings NOTE To apply the same settings to other cameras click rig...
Page 112: ...255 some are for special use 224 0 1 0 238 255 255 255 can be used on the Internet 224 0 0 0 244 0 0 255 only for use on LAN 224 0 0 1 all hosts group address which refers to all the multicast capable...
Page 113: ...y 1 Click Storage Hard Disk 2 To add a disk click Add In the dialog box displayed select disk usage recording snapshot or backup and disk type currently NAS only enter the server address and directory...
Page 114: ...hen click Format When a confirmation message appears Click Yes NOTE Local disks will be formatted automatically when installed Extended disks will not Format a disk with caution All data will be remov...
Page 115: ...more disks are available RAID 5 is created If more than four disks are available a global hot spare disk will be created Arrays created in this way are named ARRAYx for example ARRAY1 ARRAY2 3 To cre...
Page 116: ...that consists of 4 disks as an example The array is degraded when one disk is lost When two disks are lost the array is damaged A degraded array can be automatically rebuilt in ten minutes if these co...
Page 117: ...assigned to any disk group Disk group information will be initialized if any disk in the group is formatted 1 Click Storage Disk Group 2 Select Enable Disk Group By default all disks belong to Disk Gr...
Page 118: ...group only when disk group is enabled under Storage Disk Group For more information see Advanced Configuration 3 Click Apply to save the settings 4 Optional Click Copy to apply the same settings to ot...
Page 119: ...rdings snapshots will still be overwritten when the space is used up Other values The camera s new recordings snapshots will not be saved when its allocated space is used up 3 Click Apply to save the...
Page 120: ...y disk is risky Faulty disks should be replaced immediately Contact your local dealer for information about hard disks Bad Sector Detection Bad sector detection checks for bad sectors in hard disks 1...
Page 121: ...the latest areas lines or VCA data configured for face detection intrusion detection and cross line detection will be displayed on the Preview Behavior and Alarm windows in real time Intelligent mark...
Page 122: ...NTP server and the update interval 4 Click Apply to save the settings DST 1 Click System Time DST 2 Enable DST by selecting the check box and then set the start time end time and DST bias correctly 3...
Page 123: ...ll cause chaotic recordings POS Configuration This function is intended for the scenario such as in a caf or a supermarket where the NVR is connected to a POS machine When configured properly the NVR...
Page 124: ...the position font and color of POS information displayed on the screen Serial Port Configuration Only certain NVR models support this function Serial port settings in the NVR should be consistent wit...
Page 125: ...ess to live view and two way audio If the default user is denied access the corresponding channel is locked when no user is logged in and appears in the window Operator Has basic permissions and acces...
Page 126: ...en click Add NOTE If Blacklist is selected the NVR denies remote access from the IP address es on the list If Whitelist is selected the NVR only allows remote access from the IP address es on the list...
Page 127: ...desired NIC and then select Enable ARP Protection 3 Obtain the gateway s MAC address automatically or select Custom and input the MAC address 4 Click Apply to save the settings 802 1x 802 1x is a port...
Page 128: ...Password Mode Password mode specifies the permission of strong or weak password in different modes friendly password and enhanced password 1 Click System Security Password Mode 2 Friendly password is...
Page 129: ...when the working device fails the hot spare takes over service of the working data When the working device restores normal status it takes over service from the hot spare and data saved to the hot spa...
Page 130: ...devices that the current hot spare serves are listed NOTE After the working mode is changed the NVR will restart with some parameters and settings changed For a working device that switches to a hot s...
Page 131: ...odel serial number firmware version build date and operation time Camera status Click the Camera tab to view camera status online or offline with possible offline cause and status of alarm functions s...
Page 132: ...n about users who are currently logged in Disk status Click the Disk tab to view the hard disk status and disk properties Decoding card status Click the Slot Status tab to view the decoding card statu...
Page 133: ...rate enter the test address and then click Test NOTE The test packet size is 3000 bytes by default and can be changed as needed To capture and save packets select the USB storage device specify the p...
Page 134: ...st after the dial up succeeds and you may capture packets sent to and from this NIC Network Settings Click Maintain Network Info Network to view network settings PoE Network Port Status Only certain N...
Page 135: ...ation about user performed operations and device status By analyzing logs you can keep track of device operation status and view detailed alarm information 1 Click Maintain Log 2 Set query conditions...
Page 136: ...guration file contains camera information the related camera will be added to all the NVRs Only administrative users can perform these operations 1 Click Maintain Import Export 2 To export device conf...
Page 137: ...hannels and then click Export at the bottom To export current diagnosis info click Export right to Current Diagnosis Info NOTE For IPC diagnosis info is recorded based on channel which means if an IPC...
Page 138: ...Function 4 Set an auto restart time and choose a way to delete files automatically CAUTION Files deleted automatically cannot be recovered System Upgrade Upgrade the NVR under Maintain Upgrade locally...
Page 139: ...Make sure power is not interrupted during upgrade A power failure during system upgrade may cause startup failure Use an Uninterrupted Power Supply UPS if necessary Ensure network connectivity for a c...
Page 140: ...ess the power button on the front panel if available for about three seconds untill an on screen message appears and then click Yes CAUTION Unsaved settings will be lost if the NVR is shut down unexpe...
Page 141: ...ows 10 operating system A Web browser has been installed on the PC Microsoft Internet Explorer 8 0 or higher is recommended Mozilla Firefox Google Chrome and Apple Opera browsers are also supported Yo...
Page 142: ...ON The default password is intended only for your first login We strongly recommend you set a strong password to ensure account security Strong contains at least 8 characters from at least three of th...
Page 143: ...scription Button Description Two way audio Main Sub stream Start or stop live view in all windows Previous and next screen Switch screen layout Full screen Select stream type Shows the current frame r...
Page 144: ...ed in this format IP_camera ID_snapshot time The snapshot time is in YYYYMMDDHHMMSSMS format By default snapshots are saved in this directory C Users username Surveillance Snap system date The system...
Page 145: ...ample Table 4 1 Playback Control Buttons Button Description Button Description Play Pause Stop Reverse Slow down or speed up Rewind or forward 30 seconds Rewind or forward by frame Previous or next pe...
Page 146: ...146 5 Configuration Click Setup on the top and then click the menus on the left to configure parameters...
Page 147: ...o the NVR directly or via a switch And you manage the NVR and the connected IP cameras through the monitor or using a web browser on the PC Typical Application 2 The NVR IP cameras and PC are connecte...
Page 148: ...the connected IP cameras are located on a private network or LAN and you manage these devices through the cloud server a cloud solution for device management over Internet After registering a cloud a...
Page 149: ...erts Group MTU Maximum Transfer Unit NAT Network Address Translation NIC Network Interface Card NTP Network Time Protocol NVR Network Video Recorder ONVIF Open Network Video Interface Forum PoE Power...
Page 150: ...program on your computer Enable your Internet Explorer IE to check for newer versions of the stored pages every time you visit the webpage Tools Internet Options General Settings Add your NVR s IP ad...
Page 151: ...ong password If it indicates insufficient bandwidth delete other online IP devices in the NVR The NVR displays live video for some cameras and No Resource for others Set the camera to encode the sub s...
Page 152: ...t Check that the arming schedule is properly configured A hard disk cannot be identified by the NVR Use the power adapter delivered with your NVR Power down the NVR and then mount the hard disk again...
Page 153: ...ges or modifications not expressly approved by the party responsible for compliance could void the user s authority to operate the equipment NOTE This equipment has been tested and found to comply wit...
Page 154: ...es 5 Tighten the screws 6 Connect the power cable to the 7 Connect the data cable to the motherboard motherboard 8 Put the cover back in place and tighten the screws 0 4 or 8 HDD Installation 1 Loosen...
Page 155: ...See the following two examples eSATA interface RS232 for maintenance CVBS output I F Alarm input output C 7 1 AC powe r r 1 t HDMI output USB VGA output __ _________ HDMI output LED Description PWR Po...
Page 156: ...y and can be edited under Menu Storage Recording 0 Access Using a Web Browser Access the NVR using a Web browser e g Internet Explorer from a connected computer 1 Enter the NVR s IP address in the add...
Page 157: ...place out of the reach of children when not in use Inspect for good working condition prior to storage and before re use REPLACEMENT PARTS The NVR NDAA POE 4CH is designed to provide years of reliabl...