Job Accounting
7-8
OPERATION GUIDE
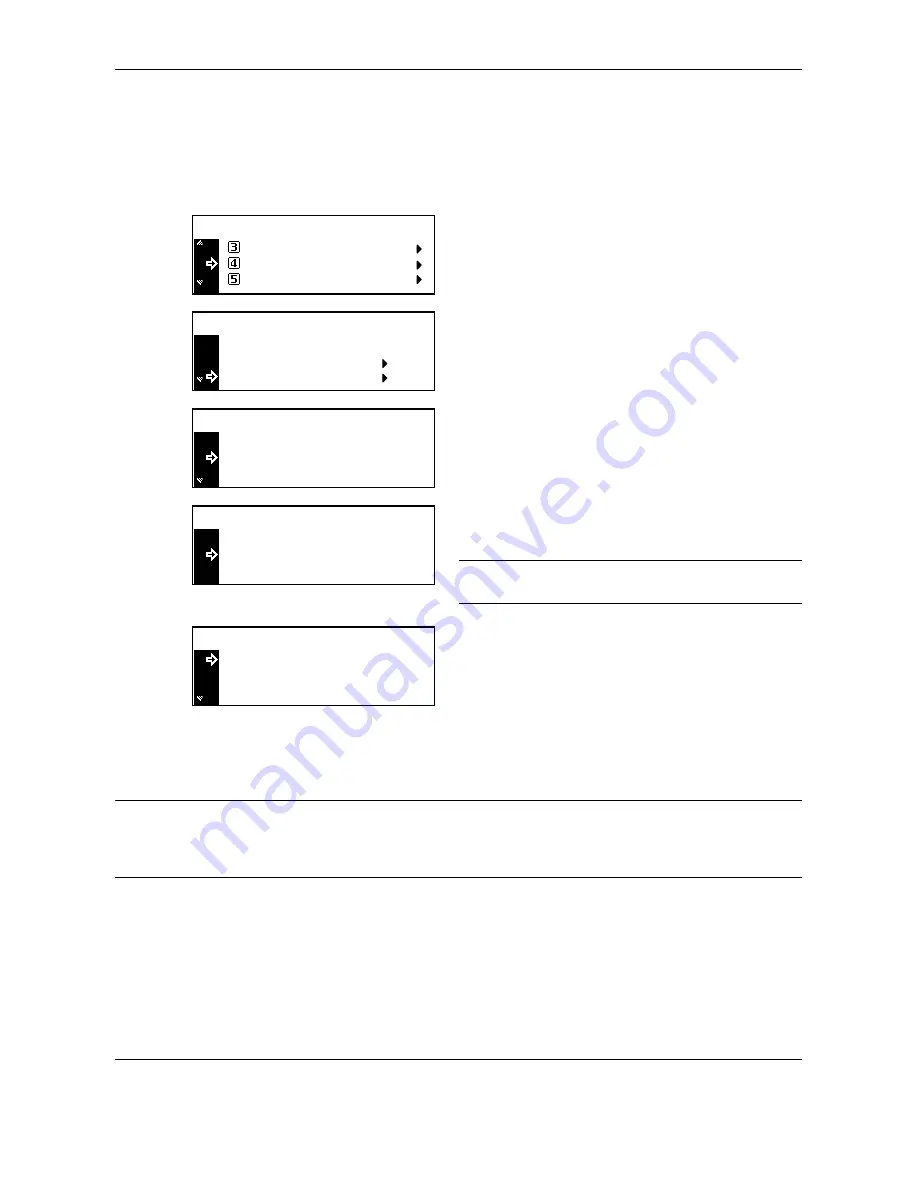
Deleting an Account
Delete a registered account.
1
Display the Job Accounting screen. (See
How to
Display the Job Accounting Screen on page 7-3
.)
2
Press
U
or
V
to select
Edit Job Accounting
,
and then press the
Enter
key.
3
Press
U
or
V
to select
Delete
, and then press the
Enter
key.
4
Press
U
or
V
to select the ID-code to delete, and
then press the
Enter
key.
The confirmation screen is displayed.
5
Press
U
or
V
to select
Yes
, and then press the
Enter
key.
NOTE:
To delete another account, repeat steps 4 and
5.
6
Press
U
or
V
to select
End
, and then press the
Enter
key.
Changing Limit of Use
Change the limit of use that has been set for each account.
IMPORTANT:
To set the limit of use in managing accounts, you must set Copier Job Accounting and Printer
Job Accounting in the default settings from
Off
to
On
. If the optional network scanner kit or fax kit is installed,
set Scanner Job Accounting or Fax Job Accounting in the default settings to
On
. (See
Default Settings on page
7-13
.)
1
Display the Job Accounting screen. (See
How to
Display the Job Accounting Screen on page 7-3
.)
Job Accountg Def . Set.
Job Accounting :
Each Job Accounting TL
Edit Job Accounting
[
]
On
Delete
Edit Job Accounting :
End
New registration
22222222
Delete:
End
11111111
: 000.234
: 123.456
Delete?
Yes
No
33333333
Delete:
End
22222222
: 006.101
: 000.234
Summary of Contents for TASKalfa 181
Page 1: ......
Page 68: ...Basic Operation 3 8 OPERATION GUIDE ...
Page 152: ...Printing Functions 5 52 OPERATION GUIDE ...
Page 204: ...Job Accounting 7 18 OPERATION GUIDE ...
Page 270: ...Index Index 6 OPERATION GUIDE ...
Page 271: ... Memo ...
Page 272: ... Memo ...
Page 273: ...A1 ...
Page 274: ......
Page 275: ......


