


9
9-5
Maintenance
Toner Container Replacement
When the message display displays
Add toner
, replace the toner.
Every time you replace the toner container, be sure to clean the parts as instructed below. Dirty parts may deteriorate
output quality.
CAUTION:
Do not attempt to incinerate the toner container. Dangerous sparks may cause burns.
Toner Container Replacement
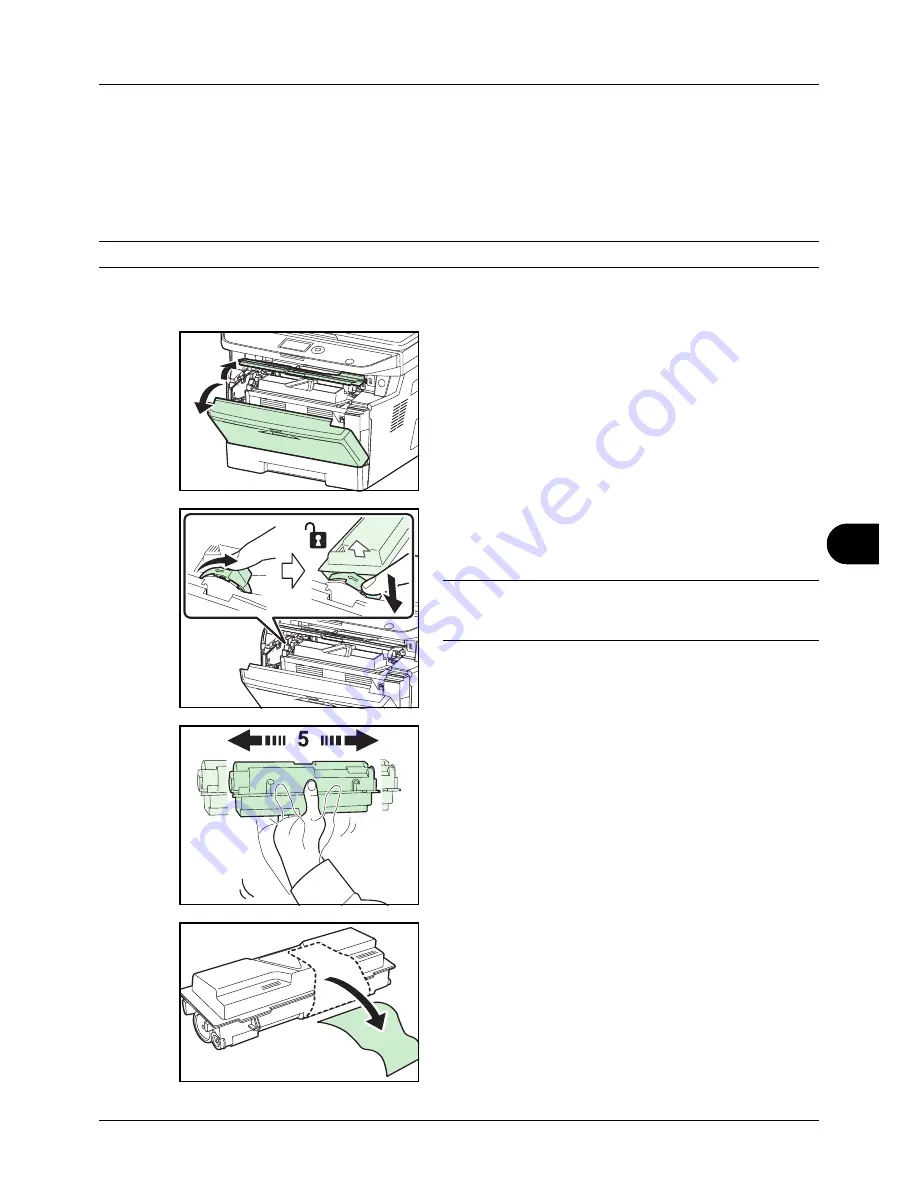
1
Open the front cover.
2
Turn the toner container lock lever to the unlock position.
Push the toner container lock lever to the position
marked by the arrow and pull out the toner container.
NOTE:
Put the old toner container in the plastic bag
(supplied with the new toner kit) and discard it later
according to the local code or regulations for waste disposal.
3
Take the new toner container out of the toner kit. Shake
the new toner container at least 5 times as shown in the
figure in order to distribute the toner evenly inside the
container.
4
Remove the label from the toner container.
Summary of Contents for ECOSYS FS-1035MFP/DP
Page 1: ...FS 1030MFP FS 1130MFP FS 1035MFP FS 1135MFP ...
Page 120: ...3 30 Basic Operation ...
Page 138: ...4 18 Copying Functions ...
Page 162: ...5 24 Sending Functions ...
Page 174: ...6 12 Document Box ...
Page 344: ...8 150 Default Setting System Menu ...
Page 432: ...Appendix 26 ...
Page 438: ...Index 6 Index Index ...
Page 439: ......
Page 440: ......
Page 441: ......
Page 442: ...Rev 1 2011 11 2MHKMEN001 ...


