


Specifying Copy Settings
11
Di2510/Di3010/Di3510
11-23
Copying a Bound Document
The scanning position for bound documents can be adjusted.
The binding width can be seen by making copies with the “Single-Sided >
Double-Sided” or the “Double-Sided > Single-Sided” settings selected.
1
Position the document(s) to be copied.
H
For details, refer to “10 Original Documents”.
2
Touch [Orig. > Copy].
3
Touch [Margin].
4
Select the appropriate binding
margin position.
H
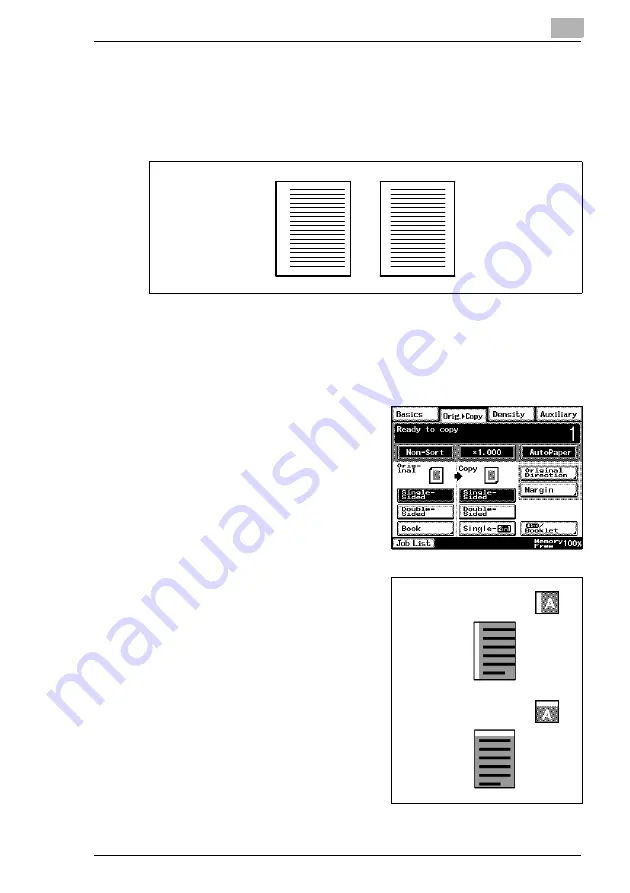
There are two locations for the
binding position, as shown in the
illustrations at the right.
Original document
with
binding margin
Original document
without
binding margin
Left binding position
Top binding position
Summary of Contents for DI2510
Page 2: ... ...
Page 44: ...2 Safety Information 2 16 Di2510 Di3010 Di3510 ...
Page 58: ...3 Available Features 3 14 Di2510 Di3010 Di3510 6 Press the Start key ...
Page 63: ...Available Features 3 Di2510 Di3010 Di3510 3 19 9 Touch Enter ...
Page 64: ...3 Available Features 3 20 Di2510 Di3010 Di3510 ...
Page 90: ...4 Before Making Copies 4 26 Di2510 Di3010 Di3510 ...
Page 180: ...8 Administrator Management Operations 8 24 Di2510 Di3010 Di3510 ...
Page 200: ...9 Copy Paper 9 20 Di2510 Di3010 Di3510 ...
Page 232: ...10 Original Documents 10 32 Di2510 Di3010 Di3510 ...
Page 266: ...11 Specifying Copy Settings 11 34 Di2510 Di3010 Di3510 ...
Page 276: ...12 Touch Panel Messages 12 10 Di2510 Di3010 Di3510 8 Open then shut the misfeed clearing door ...
Page 315: ...Appendix 14 Di2510 Di3010 Di3510 14 11 14 3 Function Combination Table ...
Page 316: ...14 Appendix 14 12 Di2510 Di3010 Di3510 ...


