SERVICE PROCEDURE
MAINTENANCE
4-28
CHECK TRANSMISSION OIL LEVEL, ADD OIL
4
WARNING
The parts and oil are at high temperature immediately after the engine is stopped, and may cause burns.
Wait for the temperature to go down before starting the work.
Carry out this procedure if there is any sign of oil on the trans-
mission case, or if there is oil mixed with the cooling water.
1.
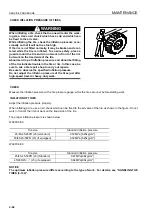
Stop the engine and remove the cap from oil filler (F).
2.
Use sight gauge (G) to check the oil level.
3.
If the oil level is not within the range at upper area “A“ of
the sight gauge, add oil through oil filler (F).
When adding oil, it is possible to use the frame lock bar as
a step.
For details of the oil to use, see “USE OF FUEL, COOL-
ANT AND LUBRICANTS ACCORDING TO AMBIENT
TEMPERATURE (4-12)“.
4.
If the oil level is above the A mark on sight gauge (G),
remove drain plug (1), loosen drain plug (2), drain the
excess oil, then check the oil level again.
5.
If the oil level is correct, tighten the cap of oil filler port (F)
securely.
Make an oil level check before starting engine or 60 min-
utes or more after the engine is stopped. If oil remains at
various portions, the correct oil level cannot be measured.
The oil level can also be checked at low idling. In this case, the oil should be within the range at bottom area “B“ of
the sight gauge. However, the time taken for the oil level to become steady will differ according to the idling speed
and the oil temperature.
Summary of Contents for WA800-3E0
Page 2: ......
Page 3: ...FOREWORD 11...
Page 27: ...SAFETY SAFETY LABELS 2 5 LOCATION OF SAFETY LABELS 2...
Page 66: ...GENERAL VIEW OPERATION 3 4...
Page 84: ...EXPLANATION OF COMPONENTS OPERATION 3 22 SWITCHES 3...
Page 224: ...TROUBLESHOOTING OPERATION 3 162...
Page 309: ...SPECIFICATIONS 15...
Page 330: ...HANDLING MACHINES EQUIPPED WITH VHMS ATTACHMENTS OPTIONS 6 20...
Page 331: ...INDEX 17...
Page 332: ...INDEX 7 2...
Page 335: ...COLOPHON 18...


