5.10
Section 5
Fuel System and Governor
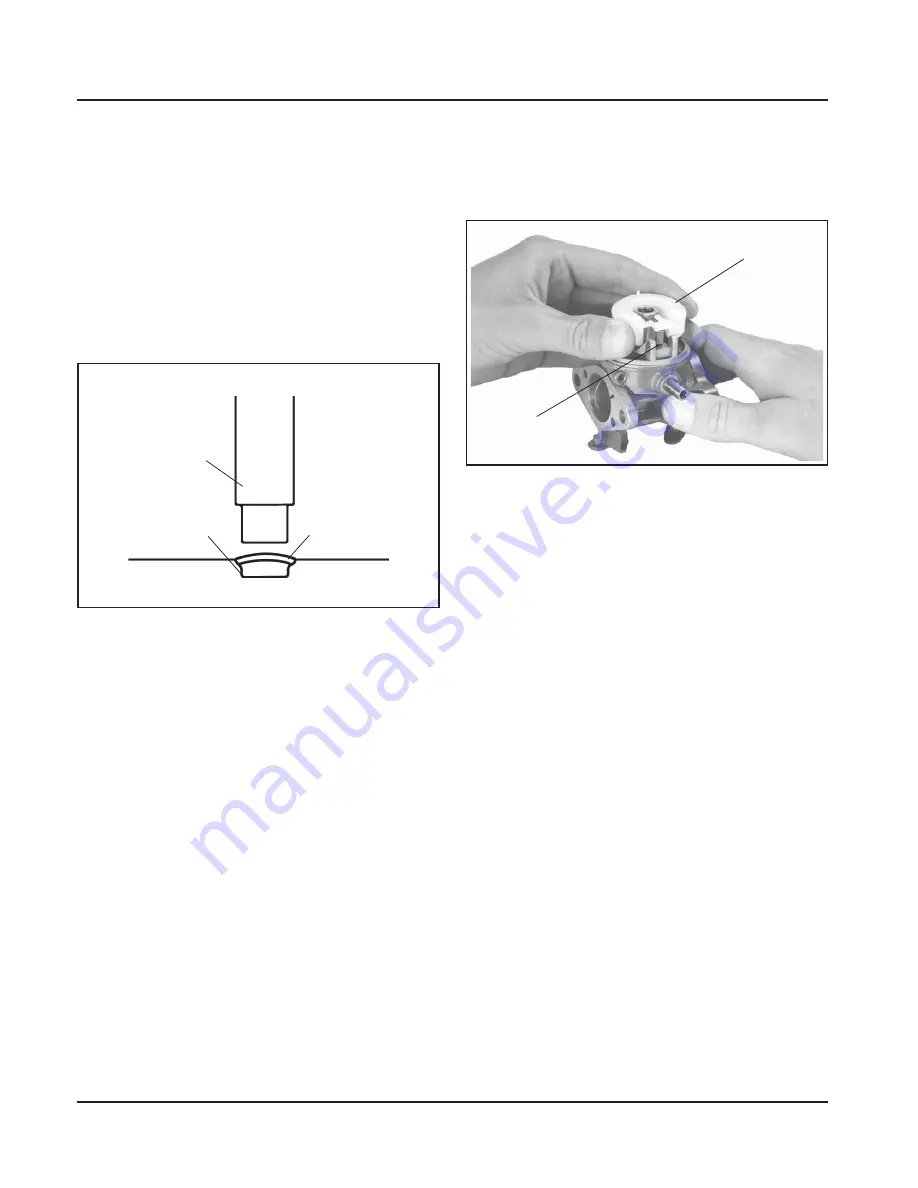
Figure 5-14. Installing Float and Fuel Inlet Needle.
5. Install the bowl gasket, fuel bowl, bowl retaining
screw gasket, and bowl retaining screw or fuel
solenoid.
Torque the bowl retaining screw to
5.1-6.2 N·m
(45-55 in. lb.)
.
High Altitude Operation
When operating the engine at altitudes of 1830 m
(6000 ft.) and above, the main fuel mixture tends to
get overrich. An overrich mixture can cause conditions
such as black, sooty exhaust smoke, misfi ring, loss
of speed and power, poor fuel economy, and poor or
slow governor response.
To compensate for the effects of high altitude, a
special high altitude main fuel jet can be installed.
High altitude jets are sold in kits which include the jet
and necessary gaskets. Refer to the Parts Manual for
the engine being serviced for the correct kit number.
Fuel Shut-off Solenoid (Optional)
Some gasoline-fueled engines are equipped with
the optional fuel shut-off solenoid, which is installed
in place of the bowl retaining screw, to eliminate
backfi ring when the engine is shut down. If a solenoid-
equipped engine will not start, check whether suffi cient
voltage is reaching the solenoid. A minimum of 7.3
volts DC is required to activate the solenoid. Also
check to see that the ground lead from the carburetor
body to the air cleaner base mounting stud is properly
connected.
Figure 5-13. Installing Welch Plugs.
4. After the plugs are installed, seal them with
Glyptal
™
(or an equivalent sealant). Allow the
sealant to dry.
NOTE: If a commercial sealant is not available,
fi ngernail polish can be used.
Carburetor Reassembly
1. Install the low idle speed adjusting screw and
spring.
2. If removed during disassembly, install the low
idle fuel adjusting needle and spring. Turn the
adjusting needle
in
(clockwise) until it bottoms
lightly
.
NOTE: The tip of the idle fuel adjusting needle is
tapered to critical dimensions. Damage
to the needle and the seat will result if
the needle is forced.
3. Turn the low idle fuel adjusting needle out
(counterclockwise) 1 turn.
Float
Fuel Inlet Needle
Welch Plug Installation–Walbro Carburetors
Use Tool No. KO1017 and install new plugs as follows:
1. Position the carburetor body with the welch plug
cavities to the top.
2. Place a new welch plug into the cavity with the
raised surface
up
.
3. Use the end of the tool that is about the same
size as the plug and
fl atten
the plug. Do not force
the plug below the surface of the cavity. See
Figure 5-13.
Tool No. KO1017
Carburetor Body
New Welch Plug
4. Insert the fuel inlet needle into the fl oat. Lower
the fl oat/needle into the carburetor body. See
Figure 5-14.
Install
the
fl oat shaft.
Summary of Contents for CV11-16
Page 1: ...1 SERVICE MANUAL VERTICAL CRANKSHAFT CV11 16 CV460 465 CV490 495...
Page 2: ......
Page 4: ......
Page 22: ...2 4 Section 2 Special Tools...
Page 30: ...4 4 Section 4 Air Cleaner and Air Intake System...
Page 56: ...6 6 Section 6 Lubrication System...
Page 112: ...9 16 Section 9 Disassembly...
Page 148: ...11 24 Section 11 Reassembly...
Page 149: ......


