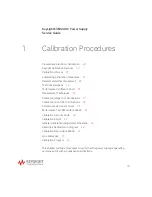
Calibration Procedures
1
Keysight E3632A Service Guide
33
MEAS:CURR?
6
Record the value displayed on the controller. This value should be within the
limit of I
O
±5 mA.
7
Program the output current to the full rated value (7.0 A) by sending the
commands:
CURR 7.0
8
Divide the voltage drop (DVM reading) across the current monitoring resistor
(RM) by its resistance to convert to amps and record this value (I
O
). This value
should be within the limit of 7 A ±24 mA.
9
Readback the output current over the remote interface by sending the
command:
MEAS:CURR?
10
Record the value displayed on the controller. This value should be within the
limit I
O
±15.5 mA.
CC load regulation
This test measures the immediate change in output current resulting from a
change in the load from full-rated output voltage to short circuit.
1
Turn off the power supply and connect the output to be tested as shown in
with the digital voltmeter connected across the 0.01
Ω
current
monitoring resistor (R
M
).
2
Turn on the power supply. Select the 15 V/7 A range, enable the output, and
set the display to the limit mode. When the display is in the limit mode,
program the output voltage to the maximum programmable value and the
output current to the full rated value (7.0 A).
3
Operate the electronic load in constant voltage mode and set its voltage to
15.0 V. Check that the CC annunciator is on. If it is not, adjust the load so that
the output voltage drops slightly. Record the current reading by dividing the
voltage reading on the digital voltmeter by the resistance of the current
monitoring resistor.
4
Operate the electronic load in short (input short) mode. Record the current
reading immediately by dividing the voltage reading on the digital voltmeter
by the resistance of the current monitoring resistor. The difference between
the current readings in step 3 and 4 is the load regulation current. The
Summary of Contents for E3632A
Page 1: ...Keysight E3632A DC Power Supply Service Guide ...
Page 12: ...Keysight E3631A Service Guide 14 THIS PAGE HAS BEEN INTENTIONALLY LEFT BLANK ...
Page 14: ...16 Keysight E3631A Service Guide THIS PAGE HAS BEEN INTENTIONALLY LEFT BLANK ...
Page 16: ...18 Keysight E3631A Service Guide THIS PAGE HAS BEEN INTENTIONALLY LEFT BLANK ...
Page 68: ...2 Service 70 Keysight E3632A Service Guide ...
Page 70: ...72 Keysight E3632A Service Guide Component locator diagram for the front panel top ...

