32
R
emote Setup
Chapter Two : Setting Up PowerTouch
Chapter Two: Setting Up PowerTouch
Your new PowerTouch controls your new receiver and can
be set up to control most components attached to it.
PowerTouch appears and functions a little differently from
traditional remotes. It incorporates sophisticated engineer-
ing and design to allow you to simply touch the screen to
press buttons and operate controls. You can touch the screen
with your finger or with the stylus stored at the top of the
PowerTouch.
Because it can control so many different devices, it presents
a separate set of controls for each device on an LCD screen.
Touch an icon on the screen to access further menus or con-
trols for devices.
Only devices previously identified and connected to the
receiver will appear as icons on the display screen. If you
are “missing” an icon on your display screen, make sure
you have identified the device to PowerTouch. This chapter
describes identifying devices to PowerTouch.
Installing the Batteries
Before you can set up any PowerTouch item, you need to
install batteries.
•
The batteries that came with your new PowerTouch are
intended for you to use for an operation check—they
may not last as long as ordinary batteries. We recom-
mend replacing them with alkaline batteries for nor-
mal use.
To install the batteries:
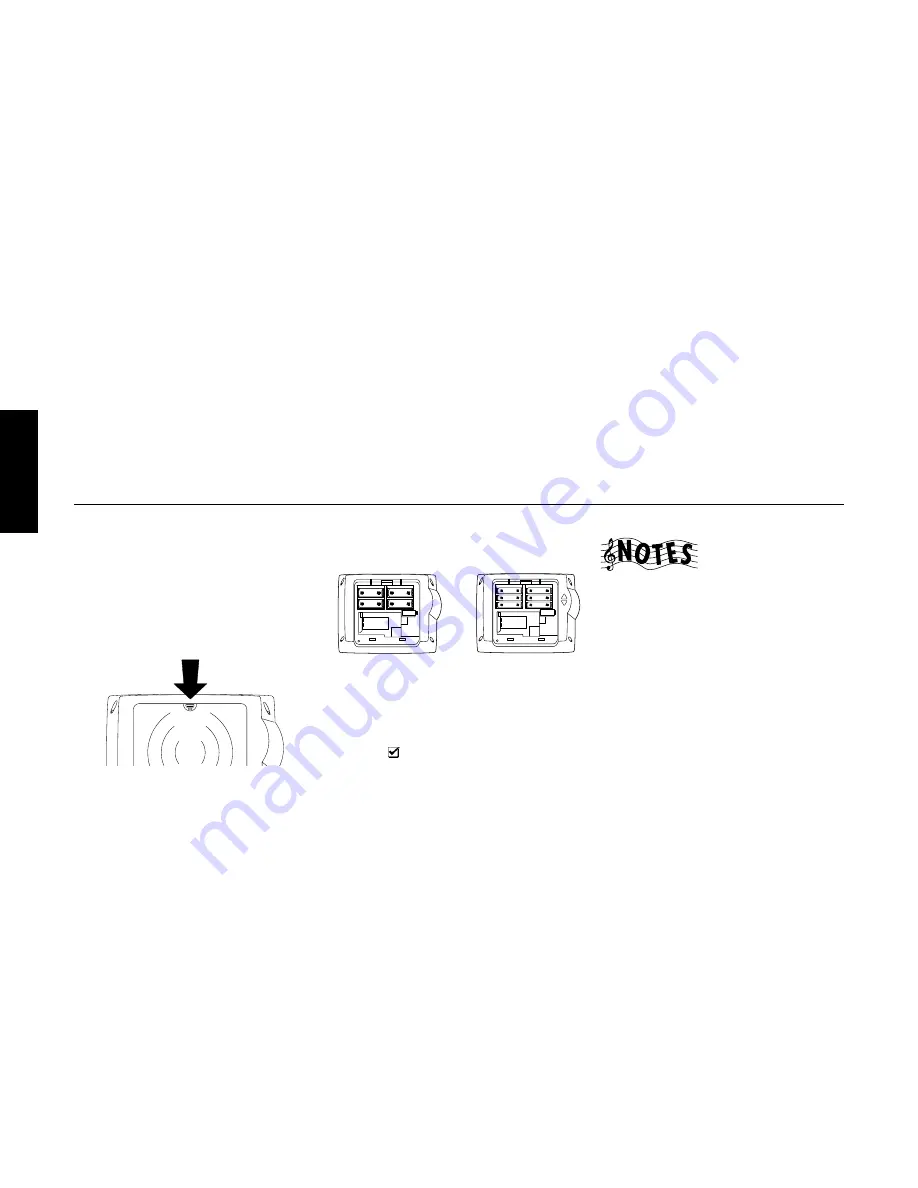
1. Press down and back on the battery cover to remove it.
2. Insert four C (LR14) batteries (for VR-4900/VR-4700)
or six AA (LR6) batteries (for KRF-V9993D) as shown:
RC-R1110:
(For VR-4900/VR-4700)
RC-R1010:
(For KRF-V9993D)
3. Close the cover.
If you use PowerTouch outside of it’s range (see “How is
PowerTouch Powered?” on page␣ 5 of the
Users’ Guide
)
PowerTouch’s display may show incorrect information.
When your batteries begin to run low, PowerTouch displays
a Low Battery message. Clear the message by touching check
mark icon (
) and replace all batteries as described here.
Maximize the life of your batteries by turning the Backlight
off if you are not trying to use PowerTouch in the dark. For
more information on the Backlight, see the
Users’ Guide
.
If you cannot see anything on the screen after replacing
batteries, try to adjust the screen contrast. See 63 page of
the
Users’ Guide
.
This chapter contains the following sections:
Installing the Batteries
page 32
Calibrating the Touch Screen
page 33
Selecting the Model Type
page 33
Navigating PowerTouch Interface
page 34
Setting Up Speakers
page 34
Identifying Devices For PowerTouch Control
page 37
Storing Radio Stations in Memory
page 40
Under some circumstances (for example, if you plan to use
multiple remotes), you can set PowerTouch up to commu-
nicate via a hardwired cable and be powered by a AC
adapter/wall cube. If you choose this setup option, you
should contact the store where you purchased your receiver
or a qualified, competent custom installer. For more infor-
mation , call 1-800-KENWOOD or visit the Kenwood Web
site at http://www.kenwoodusa.com. (For USA and Canada
only)
If you are installing the receiver in a home entertainment
closet, a simpler installation option is to use the IR-9991
External Infrared Receiver. For more information, see “To
Connect a KENWOOD IR-9991 IR Receiver:” on page␣ 49.
NOTE : IR-9991 is not available as option in Europe.
Summary of Contents for KRF-V9993D
Page 48: ...42 Remote Setup Chapter Two Setting Up PowerTouch ...
Page 63: ...B60 4660 10 01 CH K T M X 9911 VR 4900 VR 4700 KRF V9993D OC ...
Page 70: ...vi ...
Page 74: ...What s on PowerTouch Moving Around 4 ...
Page 161: ...Rooms 89 How Do I Operate Devices ...
Page 180: ...108 Moving Around Index ...


