Page
9
2
SOUNDS
Step 3
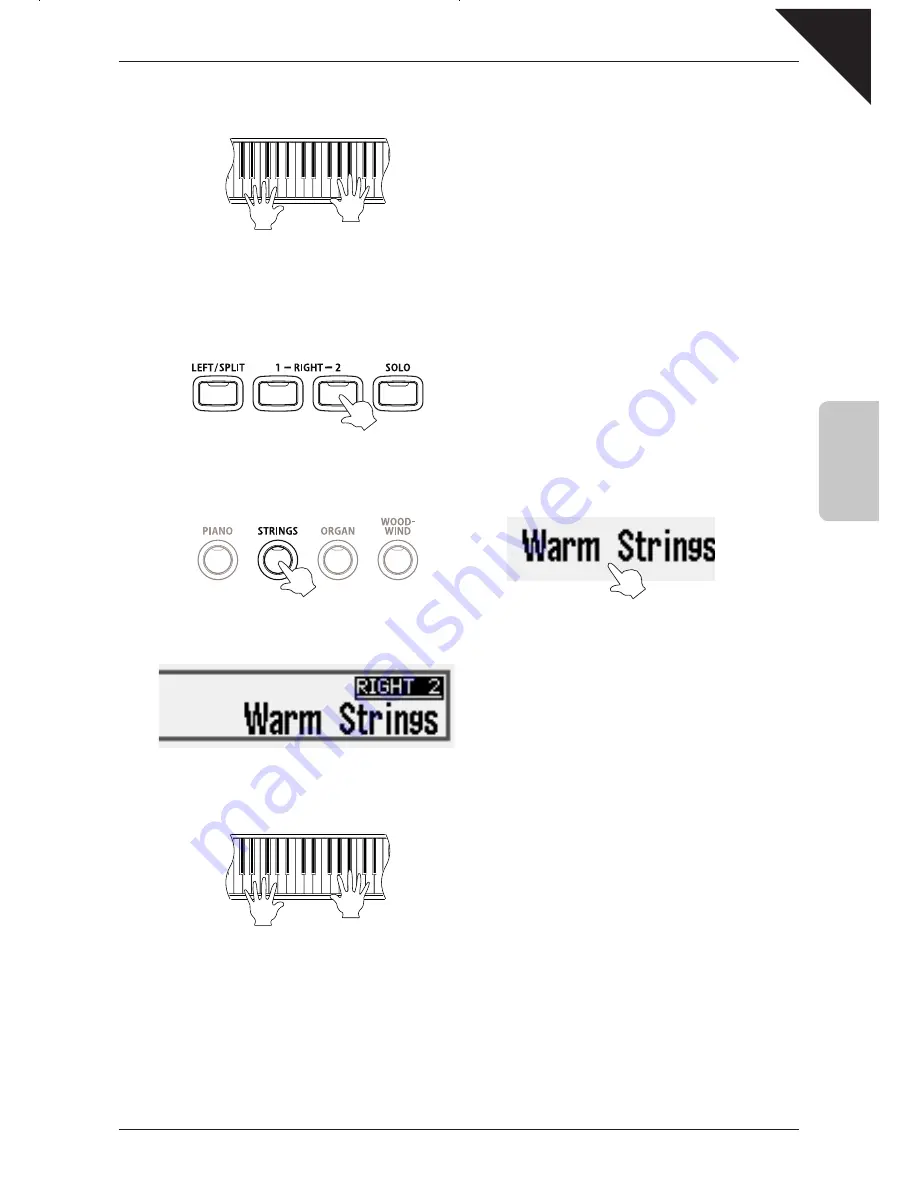
Play the keyboard.
No sound will be heard. This is because the
RIGHT 1
part is now inactive.
Let's activate the
RIGHT 2
part and assign a sound to it.
Step 4
Press the
RIGHT 2
panel button.
The
RIGHT 2
box will become highlighted to indicate
that the part is active.
The LED indicator for the
RIGHT 2
panel button will
also turn on.
Step 5
Select the
Warm Strings
sound for
RIGHT 2
.
Press the
EXIT
panel button, or wait for a few seconds, to return to the MAIN screen.
The
RIGHT 2
box will be highlighted and
Warm
Strings
will be written in large letters to indicate that
the Warm Strings sound is selected, and that the
part is active.
Step 6
Play the keyboard.
The beautiful sound of Warm Strings will be heard.
The procedure above allows us to assign different sounds to the
RIGHT 1
and
RIGHT 2
parts, activating and deactivating each
part as desired, without having to reselect the same sounds multiple times. As noted previously, it is also possible to combine
both the
RIGHT 1
and
RIGHT 2
parts (often referred to as '
DUAL MODE
'), allowing sounds to be layered together.
¨
Summary of Contents for Concert Performer CP139
Page 1: ...1 OVERVIEW OF CONTROLS 2 SOUNDS 3 STYLES 4 RECORDER 5 USB USAGE Quick Start Guide ...
Page 2: ......
Page 38: ...Page 38 USER NOTES ...
Page 39: ...Page 39 ...
Page 42: ...All descriptions and specifications in this manual are subject to change without notice ...
Page 217: ...Page 177 11 Appendices User Notes ...
Page 218: ......
Page 219: ......


