Page
39
3
Pla
ying the Piano
(Basic Controls)
¡
To set the Solo Priority and Trigger Mode:
Step 1
Press and hold the PERFORMANCE button.
The Performance screen will be displayed.
Step 2
Touch SOLO PRIORITY or TRIGGER MODE and use the dial to assign a setting.
Step 3
Press the PERFORMANCE button to exit.
SOLO MODE
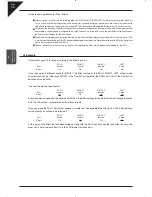
When using Solo part, you can select between two Solo Modes.
Layer
The sound assigned to the SOLO part will be layered on top of the RIGHT 1 and RIGHT 2 Parts.
Split
Only the sound assigned to the SOLO part will be heard when you play above a specified key (split point) on the keyboard.
The default split point is C5 but you can freely change the split point to any key on the keyboard. When the SOLO Part
is activated in Split mode the split point will be displayed in the LCD screen using the same 88 note diagram that is used
to display the Left/Split split point. The keys assigned to the Solo part above the specified split point will be shown with a
black bar above them. There is no arrow to indicate the Solo split point because the split point for the Solo Part cannot be
changed on the main screen.
¡
To set the Solo Mode and Solo Split point:
Step 1
Press and hold the PERFORMANCE button.
The Performance screen will be displayed.
Step 2
Touch SOLO MODE and use the dial to select the mode.
Step 3
If the Solo Mode is set to Split, then touch SOLO SPLIT POINT and use the dial or keyboard to set the
split point.
Step 4
Press the PERFORMANCE button to exit.
Left and Center pedal override and Performance button assign settings are not memorized by the registrations.
Registrations do memorize the system settings for these functions. This is so the Performance Button settings can
operate as an override to the Registration settings for these functions.
The Performance button settings will remain as long as the power is turned. Once the power is turned Off the performance
button settings will return to the factory defaults. If you would like to have the CP remember your Performance button
settings you can save your settings by selecting “Save Current Settings” from the Power Up Settings screen (See Power
Up settings on page 120).
Summary of Contents for Concert Performer CP139
Page 1: ...1 OVERVIEW OF CONTROLS 2 SOUNDS 3 STYLES 4 RECORDER 5 USB USAGE Quick Start Guide ...
Page 2: ......
Page 38: ...Page 38 USER NOTES ...
Page 39: ...Page 39 ...
Page 42: ...All descriptions and specifications in this manual are subject to change without notice ...
Page 217: ...Page 177 11 Appendices User Notes ...
Page 218: ......
Page 219: ......


