JANOME Embroidery Software Instruction Book
Chapter 20 Stitch Editing
155
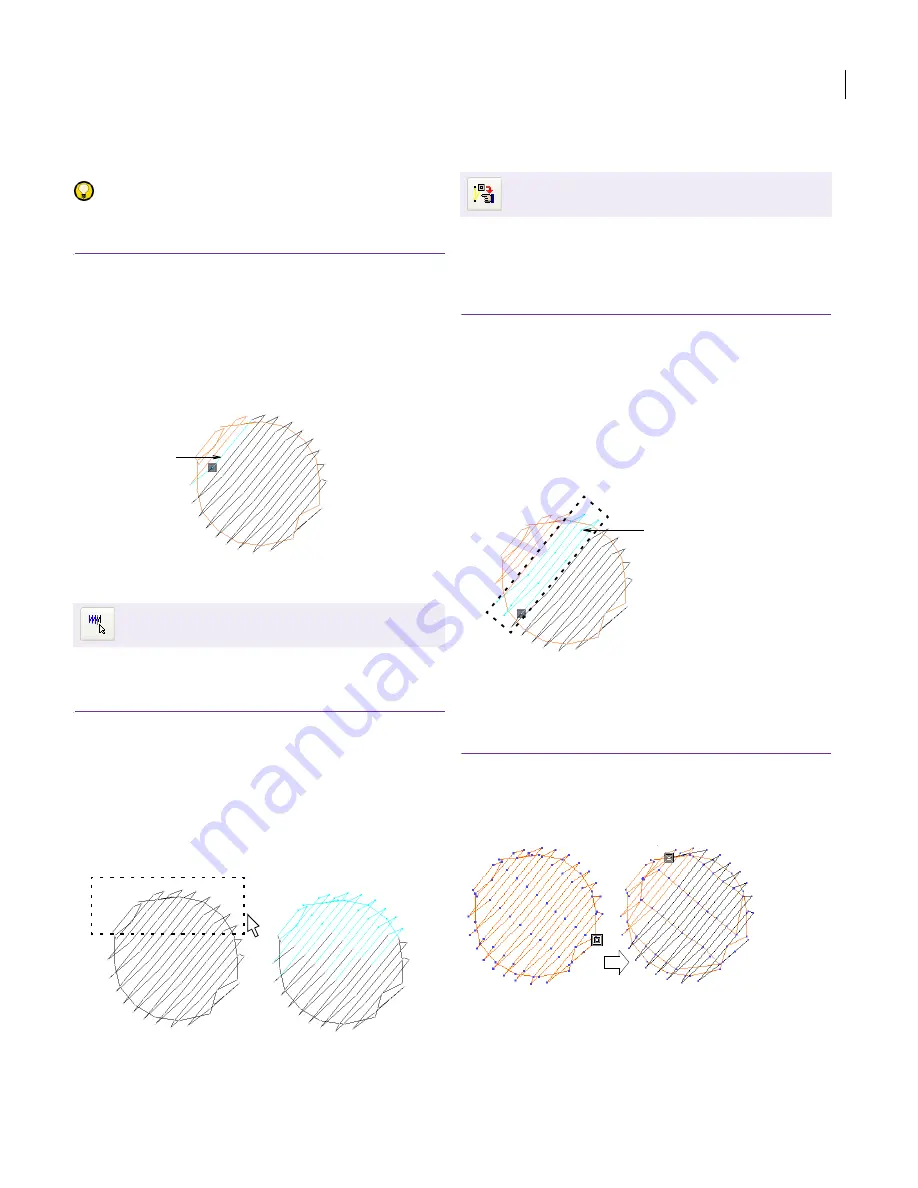
You can select individual stitches in Stitch Mode
by selecting their needle points.
Try this! Zoom in and display the needle points
for easier selection.
To select stitches by needle point
1
In
EasyEdit
, click the
Stitch Mode
icon.
2
Click a needle point.
The needle point changes color and the needle
position marker moves to the selected stitch. All
stitches after the needle position marker in the stitching
sequence appear in black.
Selecting stitches with a bounding box
In EasyEdit you can quickly select all stitches in a
group by dragging a bounding box around them.
To select stitches with a bounding box
1
Click the
Stitch Mode
icon.
2
Drag a bounding box around the stitches you want to
select.
Stitches are selected when you release the mouse
button.
Selecting stitches while traveling
In EasyEdit, you can select stitches as you ‘travel’
through the design. Traveling is usually associated
with checking the stitching sequence. See also
Stitch Editing
.
To select stitches while traveling
1
In
EasyEdit
, use the travel tools to travel to the first
stitch you want to select.
2
Click the
Stitch Select While Traveling
tool on the
Edit
toolbar.
3
Click the
Stitch Mode
tool.
Continue traveling through the design. As you select,
the stitches/objects become selected.
4
When you have finished selecting, click the
Stitch
Select While Traveling
tool again to turn it off.
Editing stitches
In EasyEdit you can insert stitches in an object to
fill gaps. You can move or delete individual or
clusters of selected stitches.
Click Edit > Stitch Mode to select stitches with a
bounding box.
Selected stitch
Bounding box
Stitches selected
Use View > Stitch Select While Traveling to select
stitches while traveling.
Stitches selected
Stitches
inserted
Summary of Contents for DigitizerPro
Page 236: ...234 Part IX Software Feature Table ...


