49
XtrapulsCD1-a
Chapter 7 - Troubleshooting
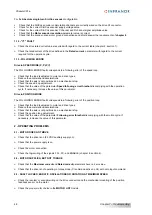
Check the value of the
Motor parameters
in the
Advanced Functions
menu and execute the
AUTO-
PHASING
command again, with unloaded motor, if necessary (see chapter 6, section 3).
2.4 - DISCONTINUOUS MOTOR ROTATION WITH ZERO TORQUE POSITIONS
Check the connection of the 3 phase cables between motor and drive.
2.5 - MOTOR DRIFT WITH ANALOG INPUT COMMAND AT ZERO SPEED
Check that the input command wiring between the controller and the drive is complying with the
recommendations of chapter 4 (CV- at diff. low of the NC and 0 Volt cable).
Check the offset compensation and, if necessary, execute the
Offset compensation
command.
2.6 - LOUD CRACKLING NOISE IN THE MOTOR AT STANDSTILL
Check that the motor-drive-controller ground connections are complying with the recommendations of chapter
4.
Check that the CV speed input command wiring between controller and drive are complying with the
recommendations of chapter 4 and check the shield connection of the resolver cables on motor side and drive
side.
2.7 - LOUD NOISE IN THE MOTOR AT STANDSTILL AND WHEN RUNNING
Check the rigidity of the mechanical transmission chain between motor and load (backlash and elasticity in the
gears and couplings).
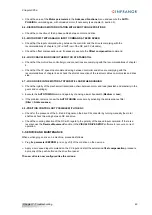
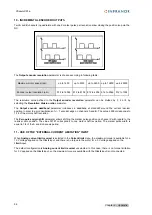
Execute the
AUTOTUNING
command again by choosing a lower bandwidth (
Medium
or
Low
).
If the problem remains, renew the
AUTO-TUNING
procedure by activating the antiresonance filter
(
Filter = Antiresonance
).
2.8 - POSITION CONTROL NOT POSSIBLE WITH THE NC
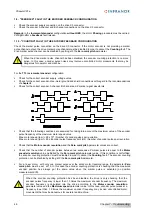
Check for the presence of the A, B and Z signals on the drive X2 connector by turning manually the motor
shaft and check the wiring between NC and drive.
Check the counting direction of the NC with regard to the polarity of the speed input command. If there is a
reversal, use the
Reverse Movement
function in the
VISUAL DRIVE SETUP
software to recover a correct
operation.
3 - SERVICE AND MAINTENANCE
When exchanging an drive on a machine, proceed as follows:
Plug the
parameter EEPROM
(or a copy of it) of the old drive on the new one.
Apply a zero speed input command on the CV input and start the automatic
offset compensation
procedure
by means of the push-button on the drive front panel.
The new drive is now configured like the old one
.

