42
IOIO-BOT
: Android Robotics
5.2 Interfacing Android device with IOIO-BOT by
using microUSB cable
(5.2.1) Apply the supply voltage to IOIO-BOT.
(5.2.2) Plug the microUSB cable between IOIO-Q and Android device. The cable does
not supply power to the boar d IOIO-Q. But the IOIO-Q apply the power to the Android
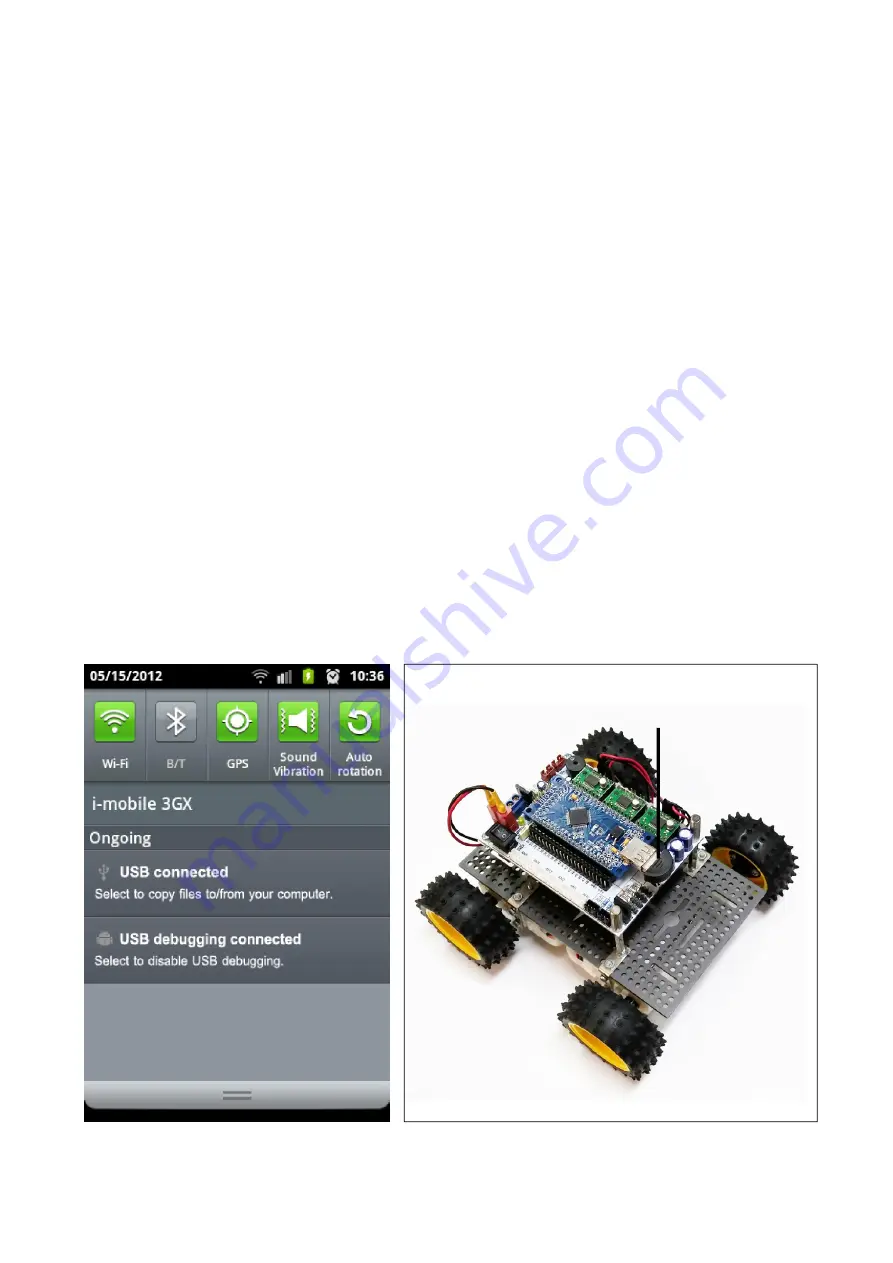
device instead. During connecting the Notification of Android device will inform charging
battery and USB Debugging start following the figure 5-4. If no any notification, must back
to check about enabling USB Debugging option again.
5.3 Interfacing Android device with IOIO-BOT
wirelessly over Bluetooth
(5.3.1) Plug the USB Bluetooth dongle to USB connectot of IOIO-Q on the IOIO-BOT
following the figure 5-5. The Status LED will blink shortly at once.
(5.3.2) At the Android device, select to menu
Setting > Wireless and Networks >
Bluetooth Settings.
Tab to checkmark at
Bluetooth
to enable this option. Wait a moment,
Android device will found the Bluetooth dongle in name start with IOIO and ID Bluetooth
dongle. Next, pair this Bluetooth dongle. (See the figure 5-6)
Figure 5-4 : Notification about USB
Debugging of Android device
Bluetooth dongle
Figure 5-5 : Shows the IOIO-BOT that plug the
USB Bluetooth dongle already
Summary of Contents for IOIO-BOT
Page 1: ...IOIO BOT Android Robotics 1 IOIO BOT Android Robotics...
Page 2: ...2 IOIO BOT Android Robotics...
Page 4: ...4 IOIO BOT Android Robotics...
Page 12: ...12 IOIO BOT Android Robotics...
Page 38: ...38 IOIO BOT Android Robotics...
Page 46: ...46 IOIO BOT Android Robotics...
Page 51: ...IOIO BOT Android Robotics 51 Figure 6 5 IOIO Bot app flowchart final...
Page 55: ......
Page 56: ......


