


Setup Menu
26
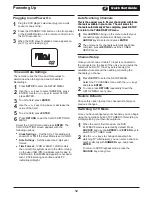
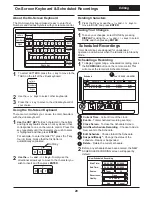
Here is where you can customize your channel list by
SKIPPING or SHOWING any channel you choose.
Use the
5
/
6
keys to select a channel you wish to
SKIP and press
ENTER
. The SKIPPED icon
appears to the right of the channel, letting you know
that it will no longer be accessible when you scan
through the channels with the
5
/
6
keys while
watching TV. You can, however, select any channel
directly with the
NUMBER
keys.
2
To show any channel again after it has been
skipped, simply select the channel and press the
4
key to select the “SKIP ITEM” icon and press
ENTER
. The SKIPPED icon is removed.
3
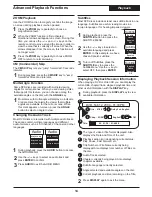
TV Channel Setup
Set Channels
Select the TV CHANNEL option from the SETUP
MENU and press
ENTER
. You will see a list of all
possible channels. The SKIPPED icon to the right of
a channel means it was not detected during the
AUTO SCAN.
1
Channel 34
Channel 35
Channel 36
Channel 37
Channel 38
Channel 34
Channel 35
Channel 36
Channel 37
Channel 38
Channel 34
Channel 35
Channel 36
Channel 37
Channel 38
Press
SETUP
to exit the SETUP MENU.
4
AUTO SCAN automatically scans for available channels.
The unit saves those channels received at sufficient
signal strength. This subject was discussed earlier.
Further topics include skipping/showing channels.
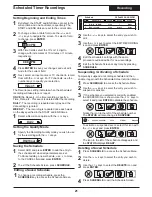
HELP Menu
1) Connect your
Antenna or Cable TV ...
How to setup channel
How to record
How to scan
How to delete
How to add
How to edit
1
Press
SETUP
, and use the
5
/
6
keys to select
HELP
and press
ENTER.
2
Use the
5
/
6
keys to select a HELP topic. Use the
3
/
4
keys to navigate between the windows and
the
5
/
6
keys to scroll through content.
You can use this friendly feature to easily access step-
by-step instructions and other helpful information on
various subjects related to your unit.
Help Topic
3
Press
ENTER
to exit the HELP menu and
SETUP
to exit.
Use channel up/down to select different keyboard