


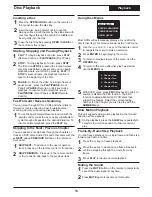


When the DVD player's splash screen appears on
your TV, you're ready to go!
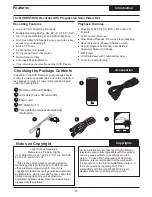
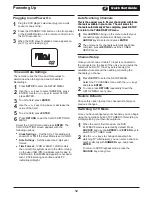
Plug the DVD player's electrical plug into a wall
socket or power strip.
1
Press the STANDBY / ON button on the front panel,
or the POWER button on the remote control to turn
the DVD recorder on.
3
2
Powering Up
Quick Start Guide
+
Plugging In and Power On
12
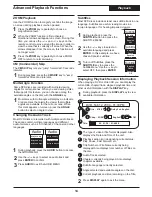
Quick Start Guide
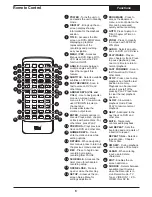
Use the
5
/
6
keys to select GENERAL, press
ENTER. Use the
5
/
6
keys to select CLOCK,
press ENTER.
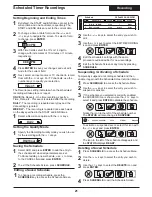
2
To edit a field, press
ENTER
.
3
Use the
5
/
6
keys to increase or decrease the
value of the field.
4
To exit a field, press
ENTER
.
The recorder uses the Time and Date values to
determine when to begin and end Scheduled
Recordings.
5
Press
RETURN
to exit the CLOCK SETTINGS
MENU.
Time and Date Settings
1
Press
SETUP
to enter the SETUP MENU.
6
Select the CLOCK menu and press
ENTER
. The
CLOCK SETTING screen appears with the
following options.
!
Clock Settings
- Set the time. This setting will
show AM or PM if the Hour Mode is set to 12HR.
!
Date Settings
- Set the date. Use 2-digit year
format.
!
Time Format
- 12HR or 24HR. 12HR mode is
the normal time system used in the USA, relying
on the use of AM /PM to indicate night or day. In
24HR mode, the AM/PM designation is not used,
with 12:00 indicating noon time and 24:00
indicating midnight.
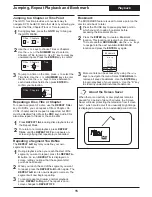
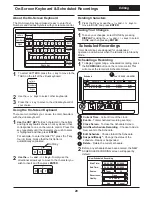
Channel Setup
Once your Antenna or Cable TV input is connected to
the connector on the back of the unit, you can setup the
recorder's built-in TV Tuner by auto-scanning for
available channels and then adding or deleting the
channels you choose.
2
You can press
RETURN
repeatedly to exit the
SETUP MENU at any time.
Press
SETUP
to enter the SETUP MENU.
Select the TV CHANNEL menu with the
5
/
6
keys
and press
ENTER
.
1
Restore Defaults
Auto Scanning Channels
This is the easiest way to fill your channel list with those
channels available in your area. The unit scans for
channels automatically. When complete, press SETUP
to return to the TUNER SETUP menu.
Press
ENTER
to bring up the menu to select your
connection type (Antenna or Cable), use the
ARROW
keys to select and press
ENTER
.
1
The unit scans for channels automatically. When
complete, press
RETURN
to exit the TUNER
SETUP menu.
2
This is the easiest way to fill your channel list with those
channels available in your area. The unit scans for
channels automatically. When complete, press SETUP
to return to the TUNER SETUP menu.
Choose this option to clear the channel list of all your
previous changes.
Once you have configured your channels, you can begin
using the recorder's built-in TV TUNER for Recording or
simply watching your favorite programs.
When the unit is first turned on, the DVD
PLAYBACK mode is selected by default. Press
SOURCE
and use the
ARROW
and
ENTER
keys to
switch to TV TUNER mode.
1
Use the
5
/
6
keys to change channels while
watching TV. Alternatively, you can enter a channel
number directly with
NUMBER
keys, and press
ENTER
.
To return to DVD Playback mode, press the
SOURCE
key at any time.
2
Switching to TV Mode
TM