


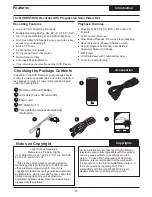


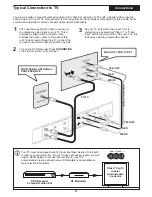


Press the
OPEN/CLOSE
button on the remote or
front panel to open the disc tray.
2
1
Insert the disc, being careful not to touch the
playing surface. Hold the disc by the sides and with
your fore finger through the hold in the middle and
insert gently into the tray.
Close the disc tray by pressing
OPEN / CLOSE
on
the remote or front panel.
3
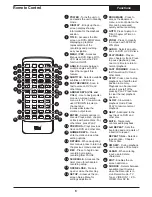
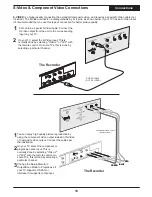
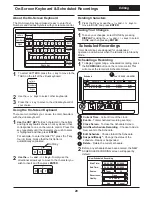
Use the
5
/
6
and
3
/
4
keys on the remote control
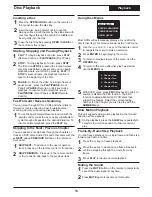
to navigate the menu to make a selection.
Press
ENTER
to begin playing the movie.
PLAY MOVIE
SPECIAL FEATURES
SCENE SELECTION
AUDIO SETUP
Most DVDs will automatically display a menu after the
disc is inserted. This menu is known as the "root" menu.
To return to the menu after disc play has started,
use the
MENU
key.
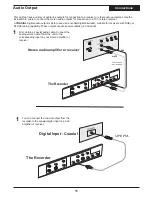
PLAY
- To begin playback of a disc, press
PLAY
(Remote Control) or
PLAY/PAUSE
(Front Panel).
STOP
- To stop playback of a disc, press
STOP
.
The first time
STOP
is pressed the location where
disc play was halted is saved, and you can begin
playback where you left off by pressing
PLAY
. If
STOP
is pressed twice, the playback location is
reset to the beginning of the disc.
1
2
PAUSE
- To freeze the video on a single frame or
pause music, press the
PLAY/PAUSE
(Front
Panel) or
PAUSE
(Remote Control) key during
playback. To resume normal playback, press
PLAY/PAUSE
(Front Panel) or
PLAY
(Remote
Control).
3
Disc Playback
Playback
Inserting a Disc
Using Disc Menus
2
1
4
Starting, Stopping and Pausing Playback
13
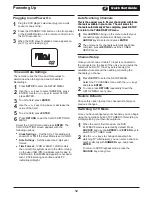
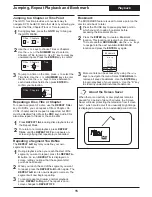
PLAY MOVIE
1. Chapter One
2. Chapter Two
3. Chapter Three
4. Chapter Four
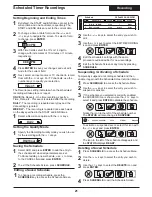
With SVCD discs, press
PBC
(Playback Control), to
enable or disable the PBC function. The PBC
function enables a MENU on SVCD discs that
support this feature. Select the corresponding
number for the Chapter you wish to play with the
NUMBER
keys.
5
Fast Forward / Reverse Scanning
To use the Fast Forward/Reverse function with the
remote control, press the
8
or
7
key repeatedly to
cycle through all speeds in the desired direction. To
resume normal playback, press the
PLAY
key.
1
You can scan through DVDs, VCDs and other discs in
forward or reverse direction. Fast forward/reverse
scanning will only work during disc playback.
SKIP NEXT
- To advance to the next chapter or
track, press
:
on the remote control or front panel.
1
2
You can advance or skip back through the chapters or
tracks on DVD discs, Audio CDs and other discs with the
:
NEXT
and
9
PREVIOUS
buttons on the remote or
front panel.
SKIP PREVIOUS
- Press
9
on the remote control
or front panel to skip back to the previous track.
Skipping to the Next / Previous Chapter
To return to previous layers of the menu, use the
RETURN
key.
3
This unit supports slow motion playback in the forward
direction at three speeds.
Slow Motion Playback
During playback, press the
SLOW
key repeatedly to
select a slow motion speed or to resume normal
play.
1
Frame-By-Frame Step Playback
Press the
;
key to freeze playback.
1
You can freeze playback on a single frame and then step
forward one frame at a time.
Press the
:
key to advance one frame. Repeat to
continue stepping through the movie frame by
frame.
2
Press
PLAY
to resume normal playback.
3
Press the
MUTE
button on the remote to temporarily
cancel the audio signal at any time.
1
2
Press
MUTE
again to resume normal audio.
Muting the Sound