


Recording
18
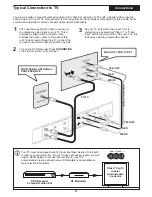
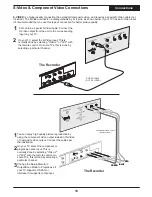
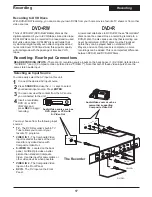
Recording- Front Input Connections
1
Connect the camcorder to the DV INPUT using a
Digital Video (also called 1394 or Firewire) Cable.
You can use this unit's remote to control most
camcorders that support the DV interface.
2
Press
SOURCE
and use the
3
/
4
keys to select
DV IN. Press
ENTER
.
3
You can now control the DV camcorder with this
unit's remote. Available functions are:
PLAY
,
STOP
,
FF/FR
and
PAUSE
.
Controlling a DV Camcorder
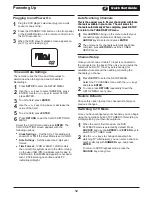
You can easily record from your TV.
2
Insert a recordable DVD disc.
Making a Recording
Recording TV programs
1
Press the
POWER
key on the remote control to turn
on the unit.
3
Press the SOURCE key on the remote control and
select the
TUNER
input.
4
Press the
CH+
or
CH-
keys to select the channel
you wish to record.
5
Press the RECORD key to start recording.
Recording continues until you press
STOP
or when
the disc is full. The RECORDING icon appears on-
screen, indicating the recording has begun.
1
Press
STOP
to end a recording. The STOP
RECORDING icon appears on screen.
2
After a few seconds, as the new Title you just
recorded is closed, the RECORD SUCCESS icon
appears on screen.
Stopping a Recording
When you stop a recording, a new Title is created.
You can pause the recorder during a Live Recording.
1
Simply press
PAUSE
to temporarily halt recording.
The PAUSE RECORDING icon appears on screen.
2
Press
REC
to resume recording session.
Pausing (CM SKIP) and Resume Recording
At this point, recording has started with no specific end
time, so you'll have to press the
STOP
key to manually
end the recording. Alternatively, you can specify the
length of the recording in 30-minute intervals by pressing
the
REC
key repeatedly.
Specifying the Recording Time
1
Press
REC
repeatedly to set the length of the
recording in 30-minute intervals. Choose
TIMEDREC OFF if you don't want to specify a
recording length.
3
Another option is to press the
CM SKIP
key which
will pause the recording for 30 seconds and
automatically resume recording afterwards.
Upon completion of recording to a disc, you must
FINISH
the disc to be able to playback on other players.
1
With the completed recorded disc inside, press the
OPEN/CLOSE key on the remote control or front
panel when finished recording.
2
A Notification window will appear.
Finished Recording?
3
Select ENTER to FINISH the disc, or press the
OPEN/CLOSE key again to eject the disc.
4
3
6
5
1
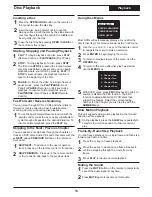
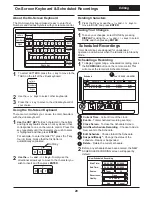
Press
DISPLAY
while recording. The DISPLAY
MENU appears as shown.
Disc Type
- Disc format: DVD+R or DVD+RW
Date and Time
- The system date and time.
Title
- Displays Current Title, and Total Titles.
Audio Mode
- Type of audio track being recorded.
Chapter
- Displays the Current and Total Chapters.
Input Source
- Displays selected input source.
Record Mode
- Displays recording quality setting.
Title
- Displays the length of the Title currently
being recorded and time remaining on the disc.
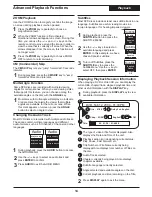
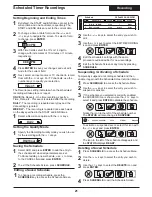
View useful information using DISPLAY.
1
2
DVD+RW Feb 18, 2004 - 06:19PM
01/01
Title:
03/03
Chap:
Dolby 2CH
TV
HQ
Title:
00:17:44 / 00.48.43
4
1
2
3
8
7
6
5
Using DISPLAY to View Recording Options
7
8
02 05 12:30
REPEAT ALL
TRACK 1
RECORD
STAND BY
L AUDIO R
VIDEO IN 2
DV IN
V
L
R
DV OUT
L
R
V
VIDEO
OUT
L
R
AUDIO
OUT