


ICC
68
Drive State: Indicates the current state of the Control Supervisor Object state machine. Refer to the
ODVA EtherNet/IP specification (object library) for detailed information on the Control Supervisor Object
state machine.
Speed Actual: Inverter operating speed in RPM. Maps to inverter register 2058 (function code M09 /
output frequency). The speed actual component of the AC/DC drive profile input instances is always in
units of RPM. Therefore, the interface card applies the Hz-to-RPM conversion indicated in Equation 6 in
order to determine the appropriate operating speed (in units of RPM) to be written to the network.
poles
motor
of
number
120
x
Hz
RPM
=
Equation 6
The “number of motor poles” term which appears in the denominator of Equation 6 is obtained from the
setting of inverter function code P01 (Motor 1 number of poles). Note that the value of P01 is read by
the interface card only at boot-up, so if the value of this function code is changed, then the interface card
must be rebooted in order for it to read the new value from the inverter.
8.2.3 ControlLogix Examples: Setup
This section will demonstrate how to initially setup a ControlLogix PLC (such as a 1756-L61) coupled
with a 1756-ENBT/A communication interface (adjust this procedure according to your specific
equipment). Later sections will provide specific read/write examples using this configuration with I/O or
explicit messaging.
1)
Run RSLogix 5000, and create a new configuration.
2)
To add a 1756-ENBT/A to your I/O configuration, first switch to offline mode.
3)
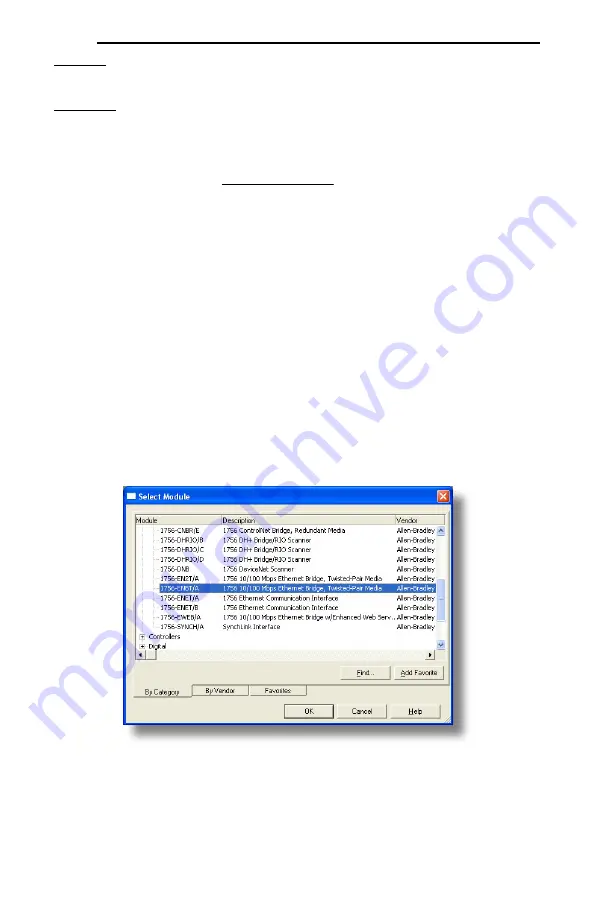
Right click on the I/O Configuration node in the controller organizer view and choose “New
Module…”
4)
The “Select Module” window will open.
5)
Under “Communications”, select “1756-ENBT/A”, and click OK. Refer to Figure 83.
Figure 83: Adding a New 1756-ENBT/A Module
6)
The “New Module” window will open. Refer to Figure 84.
7)
Assign the Ethernet module a name (we will use “EIP”) and an IP address, deselect “Open Module
Properties”, and click OK.
8) Download
the
configuration.


