


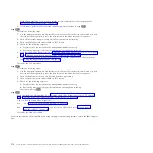


4.
When the ping is successful, start the blade server from the NIM server.
5.
Establish an SOL session.
If the Diagnostic Operating Instructions screen is displayed, the diagnostics program has started
successfully.
Note:
If the AIX login prompt is displayed, the diagnostics program did not load. See “Boot problem
resolution” on page 182; then, follow the steps for network boot problems.
6.
Press
Enter
to continue.
The Function Selection screen will display. See “Using the diagnostics program” for more information
about running the diagnostics program.
Note:
If the Define Terminal screen is displayed, type the terminal type and press Enter. The use of
“vs100” as the terminal type is recommended; however, the function keys (F#) may not work. In this
case, press Esc and the number in the screen menus. For example, instead of
F3
you can press
Esc
and
3
.
7.
When testing is complete, press
F3
until the Diagnostic Operating Instructions screen is displayed;
then press
F3
again to exit the diagnostic program.
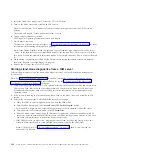
Using the diagnostics program
Follow the basic procedures for running the diagnostics program.
1.
Start the diagnostics from the AIX operating system, from a CD, or from a management server. See
“Starting AIX concurrent diagnostics” on page 179, “Starting stand-alone diagnostics from a CD” on
page 179, or “Starting stand-alone diagnostics from a NIM server” on page 180.
2.
The Function Selection menu is displayed. Use the steps listed to perform one of the following tasks:
v
Problem Determination
a.
From the Function Selection menu, select
Diagnostic Routines
and press Enter.
b.
From the Diagnostic Mode Selection menu, select
Problem Determination
c.
Select the resource to be tested and press
F7=Commit
.
d.
Record any results provided and go to “Service request numbers (SRNs)” on page 142 to
identify the failure and perform the action(s).
e.
When testing is complete, press
F3
to return to the Diagnostic Selection menu. If you want to
run another test, press
F3
again to return to the Function Selection menu.
v
System Verification
a.
From the Function Selection menu, select
Diagnostic Routines
and press Enter.
b.
From the Diagnostic Mode Selection menu, select
System Verification
.
c.
Select the resource to be tested and press
F7=Commit
.
d.
Record any results provided and go to “Service request numbers (SRNs)” on page 142 to
identify the failure and perform the action(s).
e.
When testing is complete, press
F3
to return to the Diagnostic Selection menu. If you want to
run another test, press
F3
again to return to the Function Selection menu.
v
Task selection
a.
From the Function Selection menu, select
Task Selection
and press Enter.
b.
Select the task to be run and press
Enter
.
c.
If the Resource Selection List menu is displayed, select the resource on which the task is to be
run and press
F7=Commit
.
d.
Follow the instruction for the selected task.
e.
When the task is complete, press
F3
to return to the Task Selection List menu. If you want to
run another test, press
F3
again to return to the Function Selection menu.
Chapter 2. Diagnostics
181