background image

1. Specifications Check

11

1.  Specifications Check 

1.1  Checking the Product 

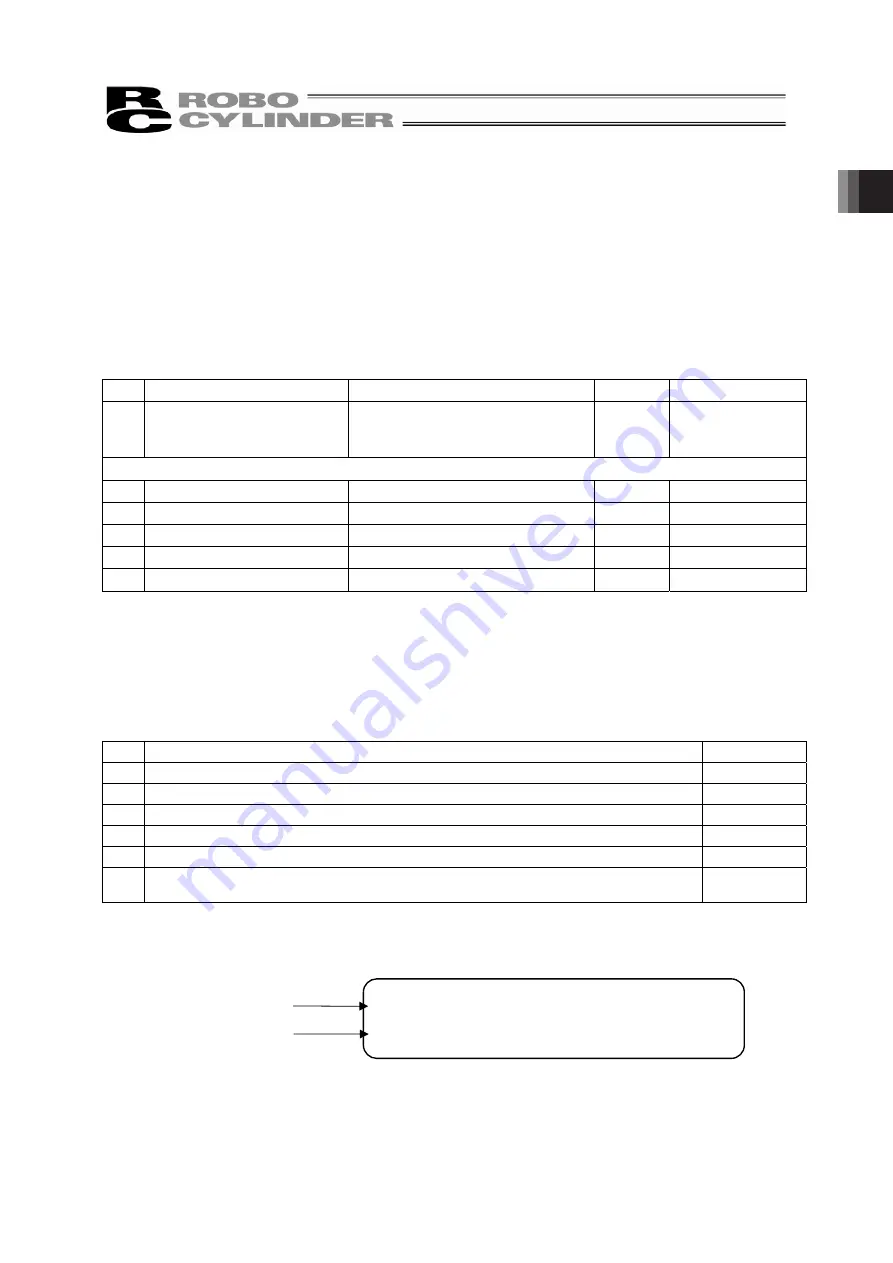
The standard configuration of this product is comprised of the following parts. 

See the component list for the details of the enclosed components. If you find any fault or missing parts, 

contact your local IAI distributor. 

1.1.1  Parts 

No. 

Name 

Model Number 

Quantity 

Remarks 

1  Actuator 

Refer to “How to Read the Model 

Nameplate” and “How to Read the 

Model Number.” 

1

Accessories 

2  Motor • Encoder Cables 

(Note1)


3  In-house Made Seals 


4  First Step Guide 


5  Instruction Manual (DVD) 


6  Safety Guide 


Note1  The motor • encoder cables supplied vary depending on the controller used. 

[Refer to 1.4, “Motor • Encoder Cables.”] 

1.1.2  Related Instruction Manuals for the Each Controller Supported by This Product 

Shown below is a list of the instruction manuals for the controllers related to this product which is 

recorded in Instruction Manual (DVD). 

No. 

Name 

Control No. 

1  Instruction Manual for PCON-CA/CFA Controller 

ME0289 

2  Instruction Manual for MSEP Controller 

ME0299 

3  Instruction Manual for MSEL Controller 

ME0336 

4  Instruction Manual for RC PC Software RCM-101-MW/RCM-101-USB 

ME0155 

5  Instruction Manual for Touch Panel Teaching Pendant CON-PTA/PDA/PGA 

ME0295 

6

Instruction Manual for Touch Panel Teaching Pendant TB-01/01D/01DR 

Applicable for Position Controller 

ME0324

1.1.3  How to Read the Model Nameplate 

Model

Serial Number 

MODEL RCP5-BA4 -WA-35P-48-1200-P3-P-B 
SERIAL No.100090267            MADE IN JAPAN 

Summary of Contents for RCP5

Page 1: ...IAI America Inc ROBO Cylinder RCP5 Actuator Belt Type Instruction Manual First Edition BA4 BA4U BA6 BA6U BA7 BA7U ...

Page 2: ......

Page 3: ...ever is handling this product can reference it quickly when necessary Important x This instruction manual is original x This product is not to be used for any other purpose from what is noted in this instruction manual IAI shall not be liable whatsoever for any loss or damage arising from the result of using the product for any other purpose from what is noted in the manual x The information conta...

Page 4: ......

Page 5: ...eft Horizontally Oriented Wall Mount Type Model SIL and Right Horizontally Oriented Wall Mount Type Model SIR 20 1 4 Motor Encoder Cables 21 1 4 1 Motor Encoder Integrated Cables 21 1 4 2 Motor Encoder Integrated Cables Robot Type 22 2 Installation 23 2 1 Transportation 23 2 2 Installation and Storage Preservation Environment 25 2 3 How to Install 26 2 3 1 Installation Orientation 26 2 3 2 Install...

Page 6: ...5 2 RCP5 BA6 BA6U 74 5 3 RCP5 BA7 BA7U 75 6 Life 76 6 1 How to Calculate Operation Life 76 6 2 Operation Life 77 7 Warranty 78 7 1 Warranty Period 78 7 2 Scope of the Warranty 78 7 3 Honoring the Warranty 78 7 4 Limited Liability 78 7 5 Conditions of Conformance with Applicable Standards Regulations Etc and Applications 79 7 6 Other Items Excluded from Warranty 79 Change History 80 ...

Page 7: ...nt safety parts of machinery Safety device etc Ɣ Do not use the product outside the specifications Failure to do so may considerably shorten the life of the product Ɣ Do not use it in any of the following environments 1 Location where there is any inflammable gas inflammable object or explosive 2 Place with potential exposure to radiation 3 Location with the ambient temperature or relative humidit...

Page 8: ... the safety factor of the hook in such factors as shear strength Ɣ Do not get on the load that is hung on a crane Ɣ Do not leave a load hung up with a crane Ɣ Do not stand under the load that is hung up with a crane 3 Storage and Preservation Ɣ The storage and preservation environment conforms to the installation environment However especially give consideration to the prevention of condensation Ɣ...

Page 9: ...ooseness Failure to do so may cause a fire electric shock or malfunction of the product Ɣ Never cut and or reconnect the cables supplied with the product for the purpose of extending or shortening the cable length Failure to do so may cause the product to malfunction or cause fire 4 Installation and Start 3 Grounding Ɣ The grounding operation should be performed to prevent an electric shock or ele...

Page 10: ... to secure safety Ɣ Do not insert a finger or object in the openings in the product Failure to do so may cause an injury electric shock damage to the product or fire Ɣ When releasing the brake on a vertically oriented actuator exercise precaution not to pinch your hand or damage the work parts with the actuator dropped by gravity 5 Teaching Ɣ When the work is carried out with 2 or more persons mak...

Page 11: ...minal block or any of the various setting switches in the power ON mode Failure to do so may result in an electric shock or malfunction 7 Automatic Operation Ɣ Check before starting the automatic operation or rebooting after operation stop that there is nobody in the safety protection fence Ɣ Before starting automatic operation make sure that all peripheral equipment is in an automatic operation r...

Page 12: ...lt in a damage to the product Ɣ When releasing the brake on a vertically oriented actuator exercise precaution not to pinch your hand or damage the work parts with the actuator dropped by gravity Ɣ The slider or rod may get misaligned OFF the stop position if the servo is turned OFF Be careful not to get injured or damaged due to an unnecessary operation Ɣ Pay attention not to lose the cover or un...

Page 13: ...he product is not handled correctly will result in death or serious injury Danger Warning This indicates a potentially hazardous situation which if the product is not handled correctly could result in death or serious injury Warning Caution This indicates a potentially hazardous situation which if the product is not handled correctly may result in minor injury or property damage Caution Notice Thi...

Page 14: ...inuous back and forth operation within a distance less than 30mm may cause wear of grease As a reference have approximately 5 cycles of back and forth operation in a distance more than 50mm in every 5 000 to 10 000 cycles to regenerate the oil film Keep using the actuator with the grease worn out may cause malfunction If it is extreme flaking may occur on the guide 8 The position will slightly mov...

Page 15: ...ternational Standards Compliances This actuator complies with the following overseas standard Refer to Overseas Standard Compliance Manual ME0287 for more detailed information RoHS Directive CE Marking c c ...

Page 16: ...In this manual the right and left sides of the actuator are expressed in the way it is placed horizontally as shown in the figure below and is looked at from the motor side Right side Left side Pulley cover Stainless steel sheet Slider Slider cover Motor cover Connector Side cover Base Tapped Hole for earth connection Front side Motor side ...

Page 17: ...ontroller used Refer to 1 4 Motor Encoder Cables 1 1 2 Related Instruction Manuals for the Each Controller Supported by This Product Shown below is a list of the instruction manuals for the controllers related to this product which is recorded in Instruction Manual DVD No Name Control No 1 Instruction Manual for PCON CA CFA Controller ME0289 2 Instruction Manual for MSEP Controller ME0299 3 Instru...

Page 18: ...Lower Mount BA7 Body width 70mm Belt Type Motor Upper Mount BA7U Body width 70mm Belt Type Motor Lower Mount Encoder type WA Battery less absolute Motor type 35P 35Ƒ size 42P 42Ƒ size 56P 56Ƒ size Lead 48 48mm or equiv Identification for IAI use only Note1 Options B Brake NM Reversed home specification CJT Cable exit direction changed Top Note 2 CJR Cable exit direction changed Right Note 2 CJL Ca...

Page 19: ...40 1120 1160 1200 BA6 BA6U 42P 48 or equiv 890 1070 1220 1340 1400 1440 1500 BA7 BA7U 56P 48 or equiv 890 1070 1220 1340 1450 1520 1550 1600 Stroke mm Size Motor Type Lead mm 2000 2100 2200 2300 2400 2500 2600 BA4 BA4U 35P 48 or equiv BA6 BA6U 42P 48 or equiv 1500 BA7 BA7U 56P 48 or equiv 1600 Caution Use the unit with velocity at 100mm s or more 150mm s or more for BA4 4U Operation with 100mm s o...

Page 20: ...etting is effective Payload kg Type Motor Type Lead mm Speed mm s Max Acceleration Speed 0 5G 0 1 5 200 1 5 800 1 5 1000 1 BA4 BA4U 35P 48 or equiv 1200 0 5 0 6 600 6 800 4 1000 3 BA6 BA6U 42P 48 or equiv 1500 1 0 16 100 16 1000 5 1400 2 BA7 BA7U 56P 48 or equiv 1600 2 ...

Page 21: ...load kg Speed Payload Horizontal BA7 BA7U Speed mm s Payload kg Speed Payload Horizontal Caution Do not attempt to establish the settings for the acceleration deceleration above the allowable range It may cause vibration malfunction or shortened life Setting of acceleration deceleration above the ratings may cause creeping ...

Page 22: ...ng is ineffective Payload kg Type Motor Type Lead mm Speed mm s Max Acceleration Speed 0 5G 0 1 200 1 800 1 1000 1 BA4 BA4U 35P 48 or equiv 1200 0 5 0 3 800 3 BA6 BA6U 42P 48 or equiv 1400 0 5 0 14 100 14 400 10 800 5 BA7 BA7U 56P 48 or equiv 1200 1 ...

Page 23: ... 0 200 400 600 800 1000 1200 1400 1600 Speed mm s BA7 BA7U Payload kg Speed Payload Horizontal 4 2 8 10 12 14 16 18 6 0 0 200 400 600 800 1000 1200 1400 1600 Speed mm s Caution Do not attempt to establish the settings for the acceleration deceleration above the allowable range It may cause vibration malfunction or shortened life Setting of acceleration deceleration above the ratings may cause cree...

Page 24: ...Type Lead Item Tolerance Positioning repeatability 0 08mm BA4 BA4U 48 or equiv Lost motion 0 1mm or less Positioning repeatability 0 08mm BA6 BA6U 48 or equiv Lost motion 0 1mm or less Positioning repeatability 0 08mm BA7 BA7U 48 or equiv Lost motion 0 1mm or less This is an option already attached when it is shipped out from the factory It does not include the consideration of time dependent chan...

Page 25: ...ngth L BA4 BA4U 16 16 31 2 6 14 6 14 11 9 Ma direction 120mm Mb Mc direction 120mm BA6 BA6U 44 5 44 5 89 2 15 7 15 7 31 6 Ma direction 150mm Mb Mc direction 150mm BA7 BA7U 80 7 80 7 175 33 2 33 2 72 3 Madirection 180mm Mb Mcdirection 180mm Ma and Mb Direction Moment Offset Datum Position BA4 BA4U BA6 BA6U BA7 BA7U Moment direction Overhang load length Mb Ma Mc L L 29 7 36 41 5 ...

Page 26: ... CJT CJR CJL or CJB for this option 1 3 4 Ceiling Mount Type Model CIM Left Horizontally Oriented Wall Mount Type Model SIL and Right Horizontally Oriented Wall Mount Type Model SIR It is an option that the actuator is adjusted so it can be installed in ceiling mount horizontally oriented wall mount with the motor unit on the left or horizontally oriented wall mount with the motor unit on the righ...

Page 27: ... LS Yellow AWG26 AWG26 Blue SA 12 11 SA Blue AWG26 AWG26 Orange SB 17 12 SB Orange AWG26 AWG26 Green A 1 13 A Green AWG26 AWG26 Brown A 6 14 A Brown AWG26 AWG26 Gray B 11 15 B Gray AWG26 AWG26 Red B 16 16 B Red AWG26 AWG26 Blue BK 20 9 BK Blue AWG26 AWG26 Orange BK 2 10 BK Orange AWG26 AWG26 Gray VCC 21 17 VCC Gray AWG26 AWG26 Red GND 7 19 GND Red AWG26 AWG26 Brown VPS 18 18 VPS Brown AWG26 AWG26 ...

Page 28: ...llow AWG26 AWG26 Blue SA 12 11 SA Blue AWG26 AWG26 Orange SB 17 12 SB Orange AWG26 AWG26 Green A 1 13 A Green AWG26 AWG26 Brown A 6 14 A Brown AWG26 AWG26 Gray B 11 15 B Gray AWG26 AWG26 Red B 16 16 B Red AWG26 AWG26 Blue BK 20 9 BK Blue AWG26 AWG26 Orange BK 2 10 BK Orange AWG26 AWG26 Gray VCC 21 17 VCC Gray AWG26 AWG26 Red GND 7 19 GND Red AWG26 AWG26 Brown VPS 18 18 VPS Brown AWG26 AWG26 Green ...

Page 29: ... instruction if there is any for the packaging condition x Do not step or sit on the package x Do not put any load that may cause a deformation or breakage of the package Pay attention especially on the stainless steel sheet not to apply any load on it 2 Handling the Actuator After Unpacking x Do not carry an actuator by motor unit and a cable or attempt to move it by pulling the cable x Be carefu...

Page 30: ...vent sudden movement during transport x If the tip of an actuator is overhanging have an appropriate way to fix it to avoid shake due to the external vibration In the transportation without the tip being fixed do not apply any impact with 0 3G or more x When hanging up with ropes have appropriate cushioning to avoid any deformation of the actuator body Also keep it in stable horizontal orientation...

Page 31: ...of the following locations provide sufficient shielding measures x Where noise generates due to static electricity etc x Where the actuator is subject to a strong electric or magnetic field x Where the actuator is subject to ultraviolet ray or radiation 2 Storage Preservation Environment x The storage and preservation environment should comply with the same standards as those for the installation ...

Page 32: ...l orientation type or ceiling mount type in horizontally oriented wall mount Also do not attempt to install the horizontally oriented wall mount type in standard horizontal orientation or ceiling mount Doing so may cause an operational error 2 Do not attempt to have the unit tilted or installed in vertical orientation It may cause an operational error 3 Although it is available to install in horiz...

Page 33: ...oint on the motor side of the reamed holes when a fine tuning such as perpendicularity is required 1 Installation of the Main Unit This actuator is equipped with through holes on the base for installation from the top Be aware that the through holes size is different for each model Refer to the figure below and 5 External Dimensions Avoid stainless steel sheet from getting any dent or scratch caus...

Page 34: ...able value specified below Female thread is made of steel material ĺ Same length as the nominal diameter Female thread is made of aluminum ĺ 1 8 times of nominal diameter Caution Pay special attention when selecting the bolt length In case that an inappropriate length of a bolt is applied it may cause a drop in the operation accuracy or an unexpected accident due to a damage to the female thread i...

Page 35: ...e of an unexpected accident x For upper motor type pay attention to the transferred work piece so it would not interfere with the motor motor cover Refer to next page Mounting screw Type A B C D E Screw Nominal Diameter Tightening torque BA4 BA4U 20 24 32 I3H7 depth 6 M3 depth 7 M3 0 83N m 0 085Kgf m BA6 BA6U 31 32 50 I5H7 depth 6 M5 depth 10 M5 3 42N m 0 35Kgf m BA7 BA7U 39 32 50 I5H7 depth 10 M5...

Page 36: ...2 Installation 30 Distance between slider center and motor cover at mechanical end A Type A BA4 BA4U 47 BA6 BA6U 66 5 BA7 BA7U 68 5 ...

Page 37: ...and the flatness should be 0 05mm or below x Have enough space for the maintenance work x The side and bottom surfaces of the base on the actuator work as the datum surfaces for the side of the slider x Use these surfaces as the datum surfaces for mounting 䢢 Follow the diagram below when installing the device using the reference surface 䢢 䢢 䢢 䢢 Type A Dimensions mm BA4 BA4U 3 to 5 5 or less BA6 BA...

Page 38: ... pull on the dedicated connection cable or bend it forcibly The actuator cable coming out of the motor unit is not meant to be bent Fix the cable so it would not be bent repeatedly Please consult with IAI if you require a different kind of cable than the one supplied RCP5 CR XX MSEP RCP5 XX MSEL Dedicated Controller Dedicated connection cable Dedicated connection cable Connect RCP5 with the dedica...

Page 39: ...ave an appropriate protection when there is a possibility of mechanical damage on a dedicated cable In case a dedicated cable is to be used at a moving part make sure to lay out the cable without applying any force to pull the connector or extreme bend on the cable Do not attempt to use the cable with a bending radius below the allowable value Make certain that the connectors are plugged properly ...

Page 40: ...bend concentrating on one point Steel Strap Piano Wire Tie them up softly Do not let the cable bend kink or twist Do not pull the cable with a strong force Pay attention not to concentrate the twisting force to one point on a cable Do not pinch drop a heavy object onto or cut the cable ...

Page 41: ...re independently routed in the duct Follow the instructions below when using a cable track If there is an indication to the cable for the space factor in a cable track refer to the wiring instruction given by the supplier when storing the cable in the cable track Avoid the cables to get twined or twisted in the cable track and also to have the cables move freely and do not tie them up Avoid tensio...

Page 42: ... inspect the stainless sheet everyday for looseness etc Adjust the stainless steel sheet attachment in case of any looseness found on it Refer to 4 7 Procedures for Replacement and Adjustment of Stainless Steel Sheet Note 3 Check the condition of grease and wipe off the grease before supplying new in case it is extremely dirty Grease Supply Timing of Guide Reference Perform grease supply when it h...

Page 43: ...f the sheet is to be conducted basically in our factory or at the site by a service engineer that we send 4 3 Cleaning Clean exterior surfaces as necessary Use a soft cloth to wipe away dirt and buildup Do not blow too hard with compressed air as it may cause dust to get in through the gaps Do not use oil based solvents as they can harm lacquered and painted surfaces To remove severe buildup wipe ...

Page 44: ...ing on the sheet which could lead to earlier degradation or abrasion Therefore to avoid a touch to the sheet edge insert a shim approx 0 1 to 0 2mm between the sheet and cover to put the sheet up when pushing in the cover Also make sure to follow the notice of caution when attaching side covers described in the next page when side covers are attached When attaching the side covers tighten the scre...

Page 45: ...ooth Check if any tooth missing Hardening softening and deformation of belt Check if the belt is hardened softened or deformed shrunk or expanded Abrasion on pulley teeth Check if any remarkable abrasion on pulley teeth Replace the belt if the situation suits to any of these below Refer to 4 8 Procedure for Belt Replacement and Tuning When an error was found in an inspection When back and forth op...

Page 46: ...e Supply 4 6 1 What Grease to Use IAI uses the following grease in our plant Guide Kyodo Yushi Multitemp LRL 3 Other companies also sell similar types of grease For more detailed information ask the supplier to find an equivalent for you by telling them the name of the grease Warning Never use any fluorine based grease Mixing with lithium based grease with other grease not only reduces the perform...

Page 47: ...tula to push the grease in between the slider and the base or supply grease with a grease injector and move the slider to spread the grease out evenly Confirm the ball feeding surface on the guide is glossy with oil of the grease Do the same work again and again till the grease gets spread out enough In case excess grease has been applied wipe it away Note For brake equipped type connect a control...

Page 48: ...ew 83 0N cm BA6 BA6U BA7 BA7U M3 cross recessed pan head machine screw 41 4N cm Caution x Pay attention not to have the stainless steel sheet bent forcefully or damaged when working Also there is a risk of getting hurt on the edge of the stainless sheet Make sure to have a safety countermeasure such as wearing gloves while working on x In case the grease got into your eye immediately go see the do...

Page 49: ...to 0 2mm between the sheet and cover to put the sheet up when pushing in the cover Note After the side covers are put back on move the slider from right to left in the full stroke to check such things as looseness of the stainless steel sheet Refer to 4 7 Procedures for Replacement and Adjustment of Stainless Steel Sheet When attaching the side covers tighten the screws with the tightening torque ...

Page 50: ...er x Adhesive tape 2 Stainless steel sheet tension The degradation and consumption of the stainless steel sheet is influenced by how it is tensed If the stainless steel sheet is tensed with high force and the clearance to the slider is too big it may cause breakage with fatigue On the other hand if the tension is too loose the stainless steel sheet may interfere with the back face of the slider co...

Page 51: ...pe on one end of the new stainless steel sheet Adhesive tape Stainless steel sheet Stainless steel sheet 4 Put the stainless steel sheet with an adhesive tape on the side cover Fold the tape over to cover up the edge of the stainless steel sheet At this time have approximately 3mm of overhang from the stainless steel sheet Cut the tape on the excess parts Stainless steel sheet Side cover Sheet end...

Page 52: ...ld move the slider to put through the stainless steel sheet 6 After the stainless steel sheet passes through the slider pull one end of the stainless steel sheet out to the position of the stainless steel retainer plate Take off the adhesive tape once positioning is finished ...

Page 53: ...tainless steel sheet Redo the process from Step 7 in case of any problem Caution x Pay attention not to have the stainless steel sheet bent forcefully or damaged when working Also there is a risk of getting hurt on the edge of the stainless sheet Make sure to have a safety countermeasure such as wearing gloves while working on There are two slits on the body as a guide for stainless steel attachme...

Page 54: ...side 3 mm BA6 BA6U BA7 BA7U Opposite side 3mm Opposite side 4 mm x Tension gauge with capacity of 18kgf of tension or more Procedures 1 Remove the screws 2 places in circles holding the stainless steel sheet and stainless steel sheet retainer plates with using a Phillips screwdriver 2 Remove the four M2 6 for BA4 BA4U or M3 for BA6 BA6U BA7 BA7U screws holding the pulley cover with a hex wrench to...

Page 55: ...with a tension gauge After reached the specified load tighten the hex socket flange head cap screw with a 2 5mm sized for BA4 BA4U or 3mm sized for BA6 BA6U BA7 BA7U hex wrench to hold the pulley unit Tension Type For belt tensile strength adjustment BA4 BA4U 58N 5 92kgf BA6 BA6U 88N 8 98kgf BA7 BA7U 88N 8 98kgf Hex socket flange head cap screw Pulley unit Hex socket flange head cap screw Pulley u...

Page 56: ...or BA4 BA4U or M3 for BA6 BA6U BA7 BA7U screws Type Tightening Torque BA4 BA4U 45 8N cm BA6 BA6U BA7 BA7U 83 0N cm 6 Affix the stainless steel sheet retaining plate with screws 2 places in circles with using a Philips screwdriver Screws Pulley cover Stainless steel sheet retainer plate ...

Page 57: ...width 9 GATES UNITTA ASIA x Tension adjustment wire provide a commercially available wire like the one shown in the photograph at right x Hex wrench BA4 BA4U Opposite side 2 5mm Opposite side 3mm BA6 BA6U BA7 BA7U Opposite side 3mm Opposite side 4mm x Tension gauge with capacity of 9kgf of tension or more Procedures 1 Remove the two attachment screws holding the slider cover with using a Philips s...

Page 58: ...ate Caution x Pay attention not to have the stainless steel sheet bent forcefully or damaged when working Also there is a risk of getting hurt on the edge of the stainless sheet Make sure to have a safety countermeasure such as wearing gloves while working on Stainless steel sheet retainer plate Stainless steel sheet Stainless steel sheet retainer plate Motor side Opposite side of the motor ...

Page 59: ...ve the one in red circle Detach the side covers with the sheet plate remained on For some stroke patterns there is another attachment screw on the side cover between two screws on right and left ends Make sure to remove them all 4 Remove the four M2 6 for BA4 BA4U or M3 for BA6 BA6U BA7 BA7U screws holding the pulley cover with a hex wrench to detach the pulley cover Screws Pulley cover ...

Page 60: ... head cap screws holding the pulley unit to detach the pulley unit 6㸧 Remove the M3 screw holding the belt under the slider with using a hex wrench Slide away the belt and the belt retainer appears Detach the belt and belt retainer Hex socket flange head cap screw Pulley unit Screws Belt retainer Belt Belt ...

Page 61: ...er through the hole on the slider and affix them with M3 screws Note Make sure the rolled bushings are seated on the slider and the belt retainer Note Make sure the belt is not pinched in between the rolled bushing and slider and in between rolled bushing and belt retainer Tightening Torque 157N cm Screw Belt retainer Belt Belt Screws Belt retainer Belt Motor unit Belt Pulley unit Rolled bushing B...

Page 62: ...scribed in the table below with a tension gauge After reached the specified load tighten the hex socket flange head cap screw with a 2 5mm sized for BA4 BA4U or 3mm sized for BA6 BA6U BA7 BA7U hex wrench to hold the pulley unit Tension Type When replacing with new belt BA4 BA4U 58N 5 92kgf BA6 BA6U 176N 17 96kgf BA7 BA7U 176N 17 96kgf Hex socket flange head cap screws Pulley unit Hex socket flange...

Page 63: ...nt screws at arrows for the side covers Screw size M2 5 M3 BA4 BA4U M3 BA6 BA6U BA7 BA7U For some stroke patterns there is another attachment screw on the side cover between two screws on right and left ends Make sure to remove them all Type Bolt Diameter Tightening Torque M2 6 hex socket head cap screw 45 8N cm BA4 BA4U M3 cross recessed pan head machine screw 41 4N cm M3 hex socket head cap scre...

Page 64: ...ng Also there is a risk of getting hurt on the edge of the stainless sheet Make sure to have a safety countermeasure such as wearing gloves while working on There are two slits on the body as a guide for stainless steel attachment Allocate the stainless steel sheet so it comes in the center between two slits Attach the stainless steel sheet without any looseness Stainless steel sheet retaining pla...

Page 65: ...M2 6 cross recessed flat head machine screw 43 1N cm BA6 BA6U M3 cross recessed flat head machine screw 76 8N cm BA7 BA7U M4 cross recessed flat head machine screw 179N cm 14 Move the slider manually in the full stroke range to confirm that there is no looseness or flexure on the stainless steel sheet If any trouble redo attaching the stainless steel sheet Scerws Slider cover ...

Page 66: ...le wire like the one shown in the photograph at right x Hex wrench BA4 BA4U opposite side 2 5mm opposite side 3mm BA6 BA6U BA7 BA7U opposite side 3mm opposite side 4mm x Tension gauge with capacity of 9kgf of tension or more Procedures 1 Remove the two attachment screws holding the slider cover with using a Philips screwdriver and detach the slider cover Screws Slider cover ...

Page 67: ...ution x Pay attention not to have the stainless steel sheet bent forcefully or damaged when working Also there is a risk of getting hurt on the edge of the stainless sheet Make sure to have a safety countermeasure such as wearing gloves while working on Stainless steel sheet retaining plate Stainless steel sheet Stainless steel sheet retaining plate Motor side Opposite side of the motor ...

Page 68: ...ve the one in red circle Detach the side covers with the sheet plate remained on For some stroke patterns there is another attachment screw on the side cover between two screws on right and left ends Make sure to remove them all 4 Remove the four M2 6 for BA4 BA4U or M3 for BA6 BA6U BA7 BA7U screws holding the pulley cover with a hex wrench to detach the pulley cover Screws Pulley cover ...

Page 69: ... head cap screws holding the pulley unit to detach the pulley unit 6 Remove the M3 screw holding the belt under the slider with using a hex wrench Slide away the belt and the belt retainer appears Detach the belt and belt retainer Hex socket flange head cap screws Pulley unit Screws Belt retainer Belt Belt ...

Page 70: ...he motor can be taken off in the condition that the motor cover is detached For BA4 BA4U and BA6 BA6U turn around the actuator if it is a type with the motor unit mounted on the top remove the screws shown in the figure below 4 places in circles and take off the motor Remove the four screws of M3 for BA4 BA4U and BA6 BA6U or M4 for BA7 BA7U affixing the motor with using a hex wrench to take off th...

Page 71: ... the detached pulley to the replacement motor with keeping gap of Dimension G Tighten the four M4 BA4 BA4U BA6 BA6U or M5 BA7 BA7U hex socket set screws holding the pulley with using a hex wrench to affix the pulley Type G BA4 BA4U BA6 BA6U 3 BA7 BA7U 2 5 Type Tightening Torque BA4 BA4U BA6 BA6U 167N cm BA7 BA7U 353N cm Pulley Hex socket set screws holding Pulley Pulley Hex socket set screws holdi...

Page 72: ...in the figures below and tighten the four screws of M3 BA4 BA4U and BA6 BA6U to hold the motor For BA7 BA7U tighten the motor from the top with four M4 screws Type Tightening Torque BA4 BA4U BA6 BA6U 83N cm BA7 BA7U 176N cm 13 Plug the motor encoder connector to the motor Screws Motor Connector Connector ...

Page 73: ...4 Maintenance and Inspection 67 14 Put on the motor cover and tighten the four attachment screws holding the motor cover and end cover with using a Philips screwdriver ...

Page 74: ...er through the hole on the slider and affix them with M3 screws Note Make sure the rolled bushings are seated on the slider and the belt retainer Note Make sure the belt is not pinched in between the rolled bushing and slider and in between rolled bushing and belt retainer Tightening Torque 157N cm Screws Belt retainer Belt Belt Screws Belt retainer Belt Motor unit Belt Pulley unit Belt retainer R...

Page 75: ... a tension gauge After reached the specified load tighten the hex socket flange head cap screw with a 2 5mm sized for BA4 BA4U or 3mm sized for BA6 BA6U BA7 BA7U hex wrench to hold the pulley unit Tension Type When reusing existing belt When replacing with new belt BA4 BA4U 58N 5 92kgf 58N 5 92kgf BA6 BA6U 88N 8 98kgf 176N 17 96kgf BA7 BA7U 88N 8 98kgf 176N 17 96kgf Hex socket flange head cap scre...

Page 76: ...rows for the side covers Screw size M2 5 M3 BA4 BA4U M3 BA6 BA6U BA7 BA7U For some stroke patterns there is another attachment screw on the side cover between two screws on right and left ends Make sure to remove them all ࠋ Type Bolt Diameter Tightening Torque M2 6 hex socket head cap screw 45 8N cm BA4 BA4U M3 cross recessed pan head machine screw 41 4N cm M3 hex socket head cap screw 83 0N cm BA...

Page 77: ...ng Also there is a risk of getting hurt on the edge of the stainless sheet Make sure to have a safety countermeasure such as wearing gloves while working on There are two slits on the body as a guide for stainless steel attachment Allocate the stainless steel sheet so it comes in the center between two slits Attach the stainless steel sheet without any looseness Stainless steel sheet retaining pla...

Page 78: ...M2 6 cross recessed flat head machine screw 43 1N cm BA6 BA6U M3 cross recessed flat head machine screw 76 8N cm BA7 BA7U M4 cross recessed flat head machine screw 179N cm 22 Move the slider manually in the full stroke range to confirm that there is no looseness or flexure on the stainless steel sheet If any trouble redo attaching the stainless steel sheet Screw Slider cover ...

Page 79: ...pth 3 From seating surface M3 depth 6 Same on opposite side For earth connection 140 With brake 171 Detail S Scale 2 1 Section X X Scale 1 1 Datum surface range Top side of slider Datum surface Body attachment hole S E M E S E HOME G φ3 5 For earth connection Mass kg BA4 BA4U Stroke L G H J K Q W O Brake With Brake W O Brake With Brake 300 517 391 300 4 0 291 1 7 1 9 1 9 2 1 400 617 491 400 6 1 91...

Page 80: ... end S E M E S E HOME 22 Mass kg BA6 BA6U Stroke L G H J K Q W O Brake With Brake W O Brake With Brake 300 558 430 340 4 0 330 2 2 2 6 2 4 2 8 400 658 530 440 6 1 80 2 4 2 8 2 6 3 0 500 758 630 540 6 1 180 2 7 3 1 2 9 3 3 600 858 730 640 6 1 280 2 9 3 3 3 1 3 5 700 958 830 740 6 1 380 3 1 3 5 3 3 3 7 800 1058 930 840 8 2 130 3 3 3 7 3 5 3 9 900 1158 1030 940 8 2 230 3 5 3 9 3 7 4 1 1000 1258 1130 ...

Page 81: ...578 435 340 4 0 335 3 8 4 4 4 0 4 6 400 678 535 440 4 0 435 4 1 4 7 4 3 4 9 500 778 635 540 6 1 135 4 4 5 0 4 6 5 2 600 878 735 640 6 1 235 4 8 5 4 5 0 5 6 700 978 835 740 6 1 335 5 1 5 7 5 3 5 9 800 1078 935 840 6 1 435 5 4 6 0 5 6 6 2 900 1178 1035 940 8 2 135 5 8 6 4 6 0 6 6 1000 1278 1135 1040 8 2 235 6 1 6 7 6 3 6 9 1100 1378 1235 1140 8 2 335 6 5 7 1 6 7 7 3 1200 1478 1335 1240 8 2 435 6 8 7...

Page 82: ... 5 000km Standard rated life of ROBO Cylinder In addition have a calculation for the drop of life with the formula below if there is a concern that the life could drop due to the condition of vibration or way to be attached L 5 000km L Operation life Km CM Allowable dynamic load moment N m M Moment to work N m fws Standard operational coefficient fws Load coefficient fĮ Attachment coefficient 5 00...

Page 83: ...place to figures for RCP5 Belt Type and select the attachment coefficient Even when in attachment in whole area and the actuator is seated in the whole length of the product select 1 2 or 1 5 for the attachment coefficient depending on the position of screw fixing For attachment in whole area use all of the through holes on the seat surface to fix 6 2 Operation Life The operation life depends on t...

Page 84: ... warranty 1 Anything other than our product 2 Modification or repair performed by a party other than us unless we have approved such modification or repair 3 Anything that could not be easily predicted with the level of science and technology available at the time of shipment from our company 4 A natural disaster man made disaster incident or accident for which we are not liable 5 Natural fading o...

Page 85: ...ining to maintenance or management of human life or health 2 A mechanism or mechanical equipment intended to move or transport people such as a vehicle railway facility or aviation facility 3 Important safety parts of mechanical equipment such as safety devices 4 Equipment used to handle cultural assets art or other irreplaceable items 3 Contact us at the earliest opportunity if our product is to ...

Page 86: ...Correction made to External Dimensions of BA6U 1D edition Pg 12 18 Note added to state option to change direction for cable ejection has to be selected Pg 13 14 Note added that it is performance when high output setting is effective Pg 49 IAI maintenance part codes added for belt for replacement 1E edition Pg 15 Correction made Graph horizontal axis unit m s ĺ mm s Pg 16 17 Specifications added fo...

Page 87: ......

Page 88: ... 889524 SHANGHAI JIAHUA BUSINESS CENTER A8 303 808 Hongqiao Rd Shanghai 200030 China TEL 021 6448 4753 FAX 021 6448 3992 website www iai robot com Technical Support available in USA Europe and China Head Office 2690 W 237th Street Torrance CA 90505 TEL 310 891 6015 FAX 310 891 0815 Chicago Office 110 East State Parkway Schaumburg IL 60173 TEL 847 908 1400 FAX 847 908 1399 TEL 678 354 9470 FAX 678 ...

Reviews: