


Precautions
l
Remove and insert a cable with even force. Excessive force may damage the cable.
l
Only Dorado18000 V3 supports SmartKit-based replacement of mini SAS HD cables. If
your storage system is another model, skip
and
.
Tools and Materials
l
ESD wrist strap
l
ESD bag
l
Label
Procedure
Step 1
Check status before replacement.
1.
Check system status.
Start SmartKit and choose
Home
>
Storage
>
Routine Maintenance
>
Health Check
.
On the
Health Check
page, perform inspection as instructed. For details, see
.
NOTE
If some items fail in the inspection, rectify the faults by performing the recommended actions in
the inspection reports. Ensure that all other parts except the parts to be replaced are working
properly.
2.
Check the status of the parts to be replaced.
Start SmartKit and choose
Home
>
Storage
>
Parts Replacement
>
Parts
Replacement
. On the
Parts Replacement
page, click
FRU Replacement
. Then
complete the check before the replacement as prompted. For details, see
.
You can proceed to next steps only when all items pass the pre-replacement check and the
replacement page is displayed. If any item fails, rectify the fault as prompted.
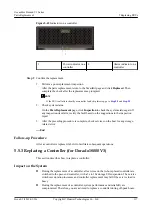
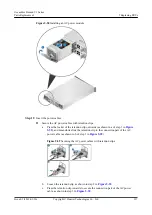
Step 2
Wear an ESD wrist strap.
Step 3
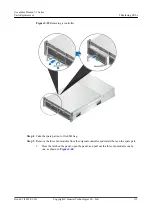
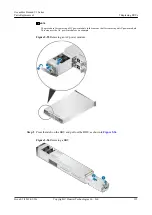
Confirm the position of the cable to be replaced and record the cable's label.
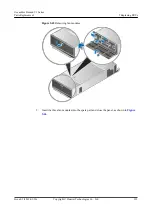
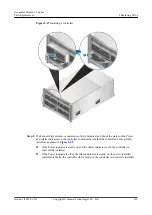
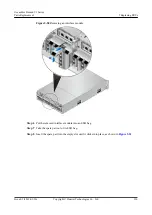
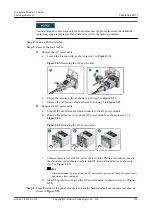
Step 4
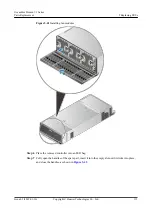
Cut the binding tapes and remove the cable to be placed.
Do not look into the optical port without eye protection. The laser beams inside an optical
port can cause damage to your eyes.
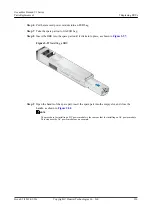
NOTE
Before removing a SAS cable, gently push the connector of the cable inward. Then pull the plastic ring
on the connector outward until the cable is completely removed from the expansion module.
OceanStor Dorado V3 Series
Parts Replacement
5 Replacing FRUs
Issue 05 (2019-01-30)
Copyright © Huawei Technologies Co., Ltd.
125


