


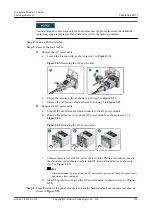


Step 5
Put the removed cable into an ESD bag.
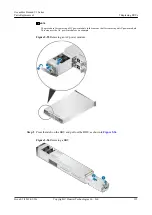
Step 6
Take the spare part out of its ESD bag.
Step 7
to a new label and attach the new label to the cable to be
installed.
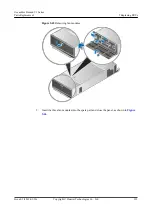
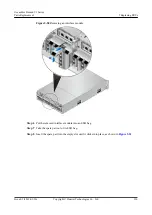
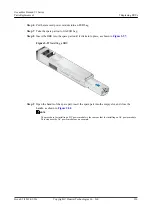
Step 8
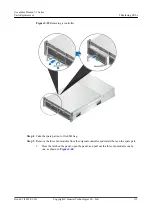
Insert the spare part to the position of the original cable.
If various cables at different locations have been replaced simultaneously, ensure that the
cables before and after the replacement are of the same type.
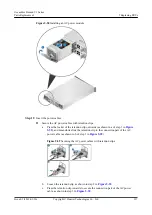
Do not look into the optical port without eye protection. The laser beams inside an optical
port can cause damage to your eyes.
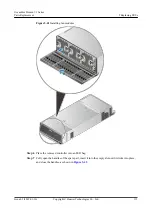
Step 9
Optional:
View the indicator of the cable port, and determine whether the installation is
successful if you replace the cable in online mode.
NOTE
Meanings of different indicator colors vary for different interface modules. In general, a red indicator
indicates that the system has alarms or is abnormal. For details, see the
Product Description
specific to
your product.
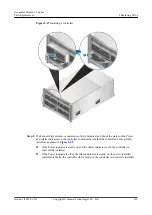
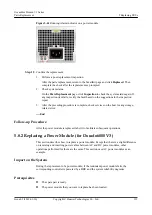
Step 10
Bind the cables.
Step 11
Confirm the replacement.
1.
Perform a post-replacement inspection.
After the parts replacement, return to the SmartKit page and click
Replaced
. Then
complete the check after the replacement as prompted.
2.
Check system status.
On the
Parts Replacement
page, click
Inspection
to check the system status again. If
any inspection item fails, rectify the fault based on the suggestions in the inspection
report.
3.
After the preceding procedure is complete, check services on the host for any storage-
related error.
----End
Follow-up Procedure
After the cable is replaced, label it for subsequent operations.
5.7 Replacing an Interface Module
This section describes how to replace an interface module.
OceanStor Dorado V3 Series
Parts Replacement
5 Replacing FRUs
Issue 05 (2019-01-30)
Copyright © Huawei Technologies Co., Ltd.
126


