Operation and Configuration
Changing the Administration Menu Password
Chapter 3
3-13
Operation
and
C
onf
ig
urat
io
n
Changing the Administration Menu Password
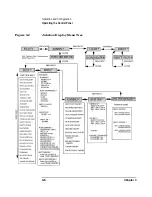
READY
>
ADMIN *
>
PSWD 000 000 000
>CONFIG *
NOTE
The following procedure is normally not used by service.
1. Follow the steps on the previous page to enter the customer’s
password (or the default, factory-set password
000 000 000
).
2.
TEST *
displays. Press
NEXT
until
CONFIG *
displays, and then press
ENTER
.
3. Press
NEXT
or
PREV
or until
NEW PASSWORD
displays and then press
ENTER
.
4.
NEW 000 000 000
displays and the first set of three zeros flashes.
Press
NEXT
or
PREV
until the new number you want to assign to the
first part of the password displays and then press
ENTER
. The second
set of three zeros flashes.
5. Press
NEXT
or
PREV
until the new number you want to assign to the
second part of the password displays and then press
ENTER
. The third
set of three zeros flashes.
6. Press
NEXT
or
PREV
until the new number you want to assign to the
third part of the password displays and then press
ENTER
.
7.
PASSWORD CHANGED
displays. Press
CANCEL
three times to return to
READY
CAUTION
Turning off the jukebox in the next step could cause data loss if not done
correctly.
Do not turn off power to the jukebox until you are sure the SCSI bus
is
inactive
. Removing power from a SCSI device when the bus is
active can result in data loss and/or indeterminate bus states. Check
the host system manuals for information about checking the SCSI bus
status.
8. Turn the jukebox OFF, then ON to save the password to the jukebox
Summary of Contents for Surestore 160ex - Optical Jukebox
Page 10: ...TOC x Contents ...
Page 14: ...Tables TOC xiv ...
Page 15: ...Chapter 1 1 1 Product Information 1 Product Information ...
Page 26: ...Product Information Environmental Specifications Chapter 1 1 12 ...
Page 27: ...Chapter 2 2 1 Installation 2 Installation ...
Page 30: ...Installation Identifying Controls and Features Chapter 2 2 4 Figure 2 2 Left Side ...
Page 47: ...Chapter 3 3 1 Operation and Configuration 3 Operation and Configuration ...
Page 75: ...Chapter 4 4 1 Troubleshooting and Diagnostics 4 Troubleshooting and Diagnostics ...
Page 122: ...Troubleshooting and Diagnostics Running an Internal Test Chapter 4 4 48 ...
Page 123: ...Chapter 5 5 1 Removal and Replacement 5 Removal and Replacement ...
Page 129: ...Removal and Replacement Service Access Chapter 5 5 7 Removal and Replacement Front Panel ...
Page 188: ...Removal and Replacement Replaceable Parts Chapter 5 5 66 Figure 5 43 Exploded View 1 of 3 ...
Page 190: ...Removal and Replacement Replaceable Parts Chapter 5 5 68 Figure 5 45 Exploded View 3 of 3 ...
Page 192: ...Removal and Replacement Replaceable Parts Chapter 5 5 70 Figure 5 47 Rope and Pulley System ...
Page 193: ...Chapter 6 6 1 Theory of Operation 6 Theory of Operation ...
Page 218: ...Theory of Operation Optical Drive Mechanism Chapter 6 6 26 ...
Page 219: ...Appendix A A 1 Safety and Regulatory A Safety and Regulatory Information ...


