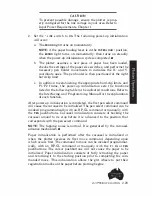
2.
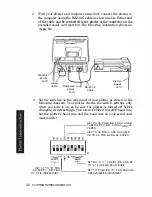
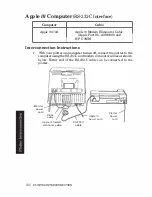
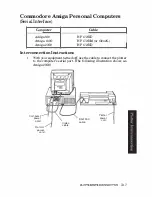
With your plotter and computer turned off, connect the plotter
to
the computer using the
RS-232-C
cable as shown below. Either end
of the cable can be connected to the plotter or the connector on the
installed serial card (port
#2).
The following illustration shows an
Apple IIe.
Monitor
power
cord
Video
cable
computer
power
cord
RS-232-C
cable
Plotter
power
cord
3.
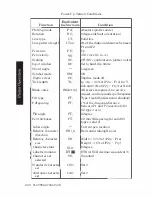
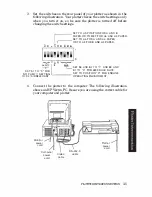
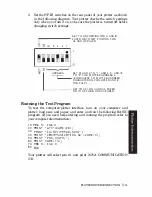
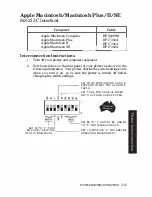
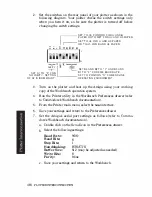
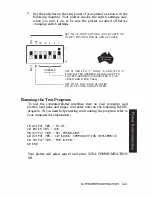
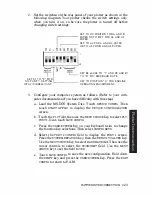
Set the switches on the rear panel of your plotter as shown in the
following diagram. Your plotter checks the switch settings only
when you turn it on, so be sure the plotter is turned off before
changing switch settings. (You
are
not limited
to
a
2400
baud rate,
but the plotter's baud rate and the baud rate on your serial card
must match.)
SET TO US POSITION FOR A AND B
PAPER OR TO MET FOR A4 AND A3
PAPER.
SET TO A4 FOR A AND A4 PAPER
OR TO A3 FOR B AND A3 PAPER.
0
PARITY
T
SET Sl TO "0" FOR
BAUD
SET 84 TO
�
,
.
AND 81 , 82, AND 83
TO "0· FOR 2400 BAUD RATE.
NO PARITY. SETTING
SET TO POSITION
"
0
"
FOR ENDLlNE
OF S2 IS IRRELEVANT.
OPERATING ENVIRONMENT .
3-8
PLO'ITER
INTERCONNECTION
Summary of Contents for 7475a
Page 1: ... FliOW HEWLETT PACKARD HP 7475A Graphics Plotter ...
Page 2: ...OPERATION HP 7475A AND Graphics Plotter INTERCONNECTION MANUAL ...
Page 8: ...f i oil I V J ...
Page 18: ......
Page 51: ...NOTES ...
Page 52: ......
Page 80: ......
Page 86: ...NOTES ...
Page 100: ...NOTES ...

