


Connect via USB
The default connection type is
USB Client
To change the connection type or to verify it is set to USB, select
Start > Settings > Control Panel > PC Connection
.
Tap the Change button. From the popup list, choose
USB Client
This will set up the mobile device to use the USB port. Tap OK and ensure the check box for “Allow connection with desktop
computer when device is attached” is checked.
Tap OK to return to the Control Panel. If desired, any control panel windows may be closed.
IMPORTANT – DO NOT PUT THE MOBILE DEVICE INTO SUSPEND WHILE CONNECTED VIA USB. The device will be
unable to connect to the host PC when it resumes operation.
Connect the correct cable to the PC (the host) and the mobile device (the client) as detailed below. USB will start automatically
when the USB cable is connected, not requiring you to select “Connect” from the start menu.
Cable for USB ActiveSync Connection:
If a desktop cradle is used:
HX2312DSKCRDL
or
HX2313DSKCRDL
- HX2-labelled desktop cradle
Use with
standard USB cable
with type A plug for PC/Laptop USB port and type B plug for HX2 desktop cradle USB type B
client port.
l
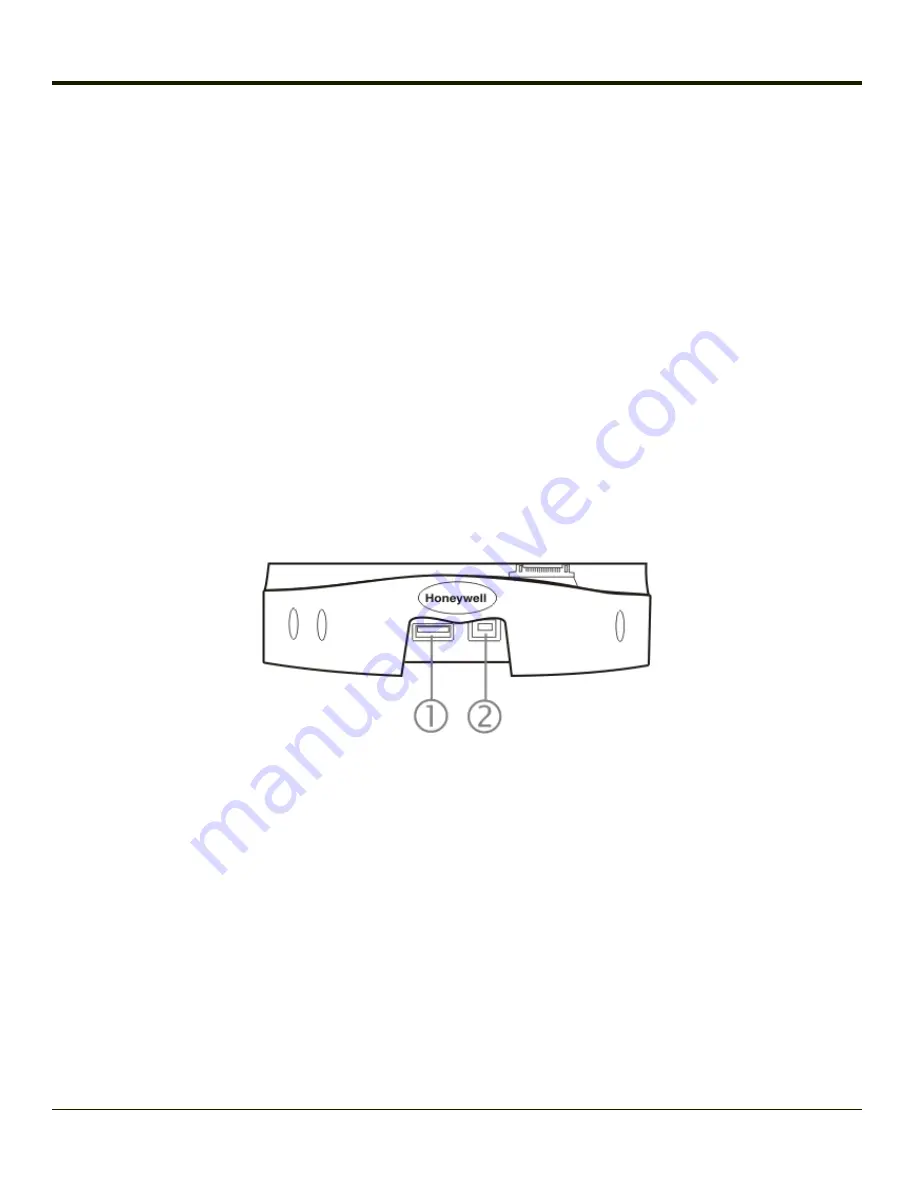
Plug the type B end of the standard USB cable plug into the USB type B port on the HX2 desktop cradle (port #2).
l
The USB type A connector on the standard cable connects to a USB port on a PC or laptop.
l
The USB client (port #1) connector on the cradle does not need to be connected.
4-24
Summary of Contents for HX2
Page 1: ...HX2 Wearable Computer Microsoft Windows CE 5 Operating System Reference Guide ...
Page 14: ...xii ...
Page 28: ...1 14 ...
Page 42: ...3 6 ...
Page 142: ...4 100 ...
Page 160: ...Enter user name password and domain to be used when logging into network resources 4 118 ...
Page 166: ...4 124 ...
Page 192: ...Hat Encoding 4 150 ...
Page 193: ...4 151 ...
Page 230: ...5 30 ...
Page 273: ...6 43 ...
Page 278: ...Click the Request a certificate link Click on the advanced certificate request link 6 48 ...
Page 279: ...Click on the Create and submit a request to this CA link 6 49 ...
Page 286: ...6 56 ...
Page 302: ...7 16 ...
Page 306: ...8 4 ...
Page 309: ...9 3 ...


