


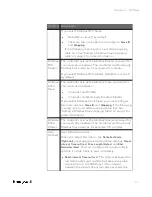


2.
Click
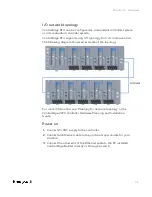
Onboard I/O
and you can view the five channels
AI
,
AO
,
DI
,
DO
and
PI
.
3.
Select the corresponding channel, and configure parameters.
To add and configure an expansion I/O module
1.
From the Home Page, under
I/O and Communications
and click
Configure I/O
.
2.
Click
Add I/O Module
>
SC-UMIX01 Mixed I/O Module, 28
, the
Add I/O
Module
dialog appears.
3.
Enter the
Description
and select the
Address
for the I/O module
which must be same as the rotary switch setting of the physical
device. The range of the address is from one to nine.
4.
Click
OK
to add the I/O module.
5.
Click the corresponding expansion I/O module to view channels.
6.
Select the corresponding channel, and configure parameters.
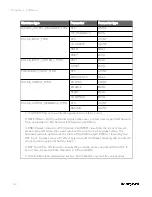
To add and configure an third-party I/O, ST103A
1.
From the Home Page, under
I/O and Communications
, click
Configure Third-Party I/O
>
ST103A
.
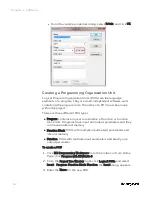
2.
Click
Add ST103A Module
. The
Add I/O Module
dialog appears.
3.
Enter
Description
for ST103A module which will be a unique
identifier for binding with specific meter runs.
4.
Select
Slave ID
for the drop-down list. The valid value is from 1 to
15.
The ST103A should be opened to set Slave ID and row 4 bit
switches will be available to configure the value from 1 to 15. See
"Configuring ST103A" in the
ControlEdge 2020 Platform Hardware
Planning and Installation Guide
for how to set Slave ID.
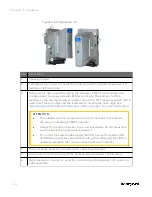
ATTENTION: If there are other Modbus devices connected to
the same RS485 port along with ST103A, ensure that they
do not conflict with each other.
5.
Select the port number, and provide values for
Retries
and
Timeout
.
6.
Click
OK
to add ST103A module.
7.
Click the corresponding module to view channels.
Only ST103A's analog input, pulse input, frequency and raw pulse
48
Chapter 4 - Software
Summary of Contents for ControlEdge 2020 SC-TEPL01
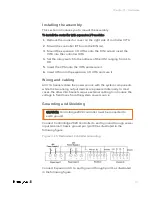
Page 28: ...Figure 3 8 Single star topology 28 Chapter 3 Hardware ...
Page 40: ...40 Chapter 3 Hardware ...
Page 66: ...66 Chapter 4 Software ...
Page 114: ...114 Chapter 6 Communication ...
Page 126: ...126 Notices ...