


71
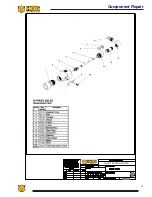
Component Repair
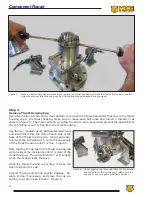
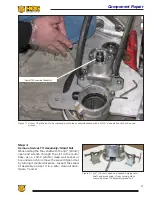
Step 9
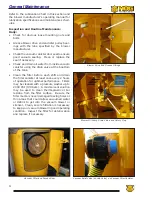
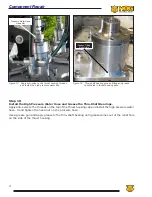
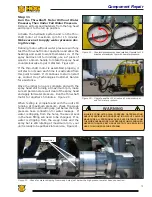
Install The Thrust Housing Cap.
Inspect the O-ring seal in the thrust housing cap. Replace the O-ring if it shows any sign of nicks,
cuts, deterioration or wear. Then apply light layer of grease to the O-Ring. The grease will help the
cap assembly slide into the torque housing and reduce the possibility for the O-ring to be pushed out
of the seat or damaged as the assembly is installed. Figure 15.
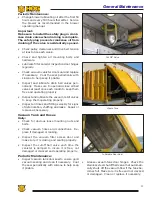
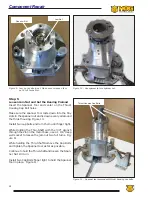
Set the thrust housing cap on top of the thrust housing and carefully press it into the housing. Align
the bolt holes in the cap to the threaded holes in the thrust housing. Apply Anti-seize to the 3/8”
Allen bolts and hand tighten using a crisscross pattern. Use the 6 mm Allen wrench to tighten the
thrust housing cap bolts to “snug” using a crisscross pattern. Figure 16.
1
2
3
4
5
6
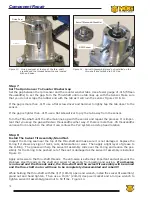
Figure 15: Inspect and grease the O-ring seal on the thrust
housing cap.
Figure 16: Apply anti-seize to the thrust housing bolts and
tighten them in a crisscross pattern to snug
using a 6 mm Allen wrench.
Summary of Contents for Stripe Hog SK3000
Page 1: ...3 K Operations Manual...
Page 2: ...2...
Page 14: ...14 THIS PAGE WAS LEFT BLANK INTENTIONALLY...
Page 62: ...62 THIS PAGE WAS LEFT BLANK INTENTIONALLY...
Page 77: ...77 Component Repair HOG TECHNOLOGIES...
Page 79: ...79 Component Repair HOG TECHNOLOGIES...
Page 81: ...81 Component Repair HOG TECHNOLOGIES...
Page 82: ...82 NOTES...
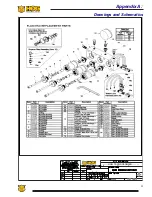
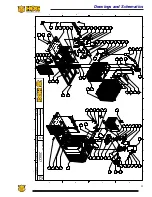
Page 83: ...83 JETSTREAM UHP PUMP FLUID END Drawings and Schematics Appendix A HOG TECHNOLOGIES...
Page 86: ...86 THIS PAGE WAS LEFT BLANK INTENTIONALLY...
Page 90: ...90 THIS PAGE WAS LEFT BLANK INTENTIONALLY...
Page 92: ...92 THIS PAGE WAS LEFT BLANK INTENTIONALLY...
Page 104: ...104 THIS PAGE WAS LEFT BLANK INTENTIONALLY...
Page 107: ...107...


