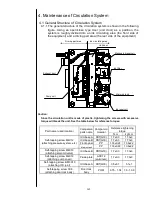


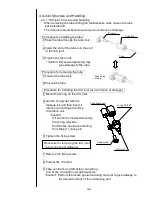


4-7
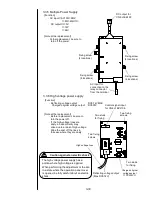
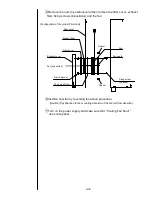
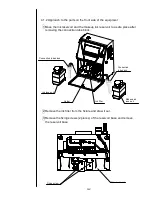
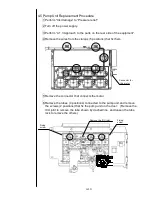
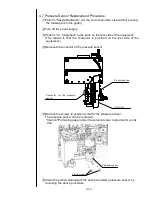
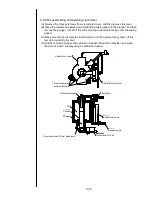
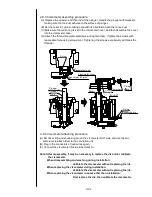
6 Pass Attaching pin through hole A and hole B for centering holes.
Mount Pressure reducing valve joint PRV on Ink circulation unit by
Nonsert M4x12 (2 pieces). And then remove Attaching pin.
"Caution" : - Make sure that no O-ring drops out.
- Make sure to use Nonsert M4x12.
- Be careful of the mounting direction of Pressure reducing
valve joint PRV.
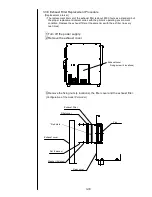
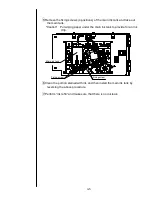
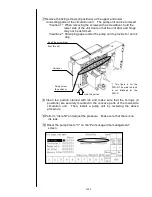
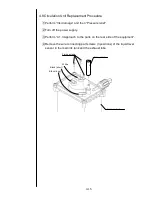
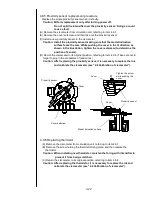
7 Mount Pressure reducing valve on Pressure reducing valve joint PRV by
Nonsert M4x16 (2 pieces).
"Caution" : Be careful of the mounting direction of Pressure reducing
valve. (Turn ‘Al’ mark to the lower side.)
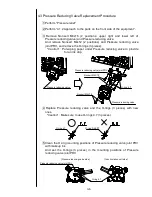
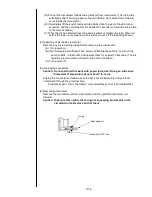
8 Perform “Ink Replenishment” and adjust the pressure.
Make sure that there is no ink leak.
Nonsert M4X12
Attaching pin
Pressure reducing valve joint PRV
Ink circulation unit
Hole A
Hole B
Joint nut
Nonsert M4X16
Pressure reducing valve
Pressure reducing valve joint PRV
‘Al’ mark
Summary of Contents for IJ PH
Page 1: ...Service Manual HITACHI Printer Model PH Revision Aug 2011 Version First edition ...
Page 2: ... Revision of PH service manual Revision Chapter Revised Page ...
Page 13: ...1 2 2 Main body internal PH D 1 8 ...
Page 80: ...3 25 3 25 Circuit diagram of EZJ95 ...
Page 201: ...7 1 7 Attached Drawing 7 1 Circulation System Diagram ...
Page 202: ...7 2 7 2 Electrical Connection Diagram ...
Page 205: ...7 5 7 4 Dimensions around charge electrode and deflection electrode Nozzle diameter 65 um ...


