12. Adding a Cover to Each Copy Set
4-32
C
onven
ie
nt
Fun
ct
ions
Chapter
4
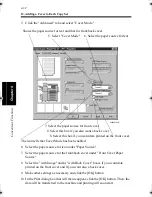
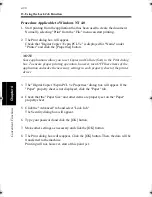
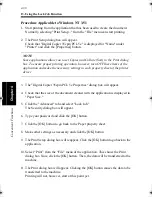
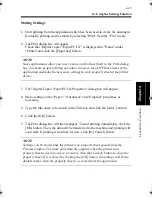
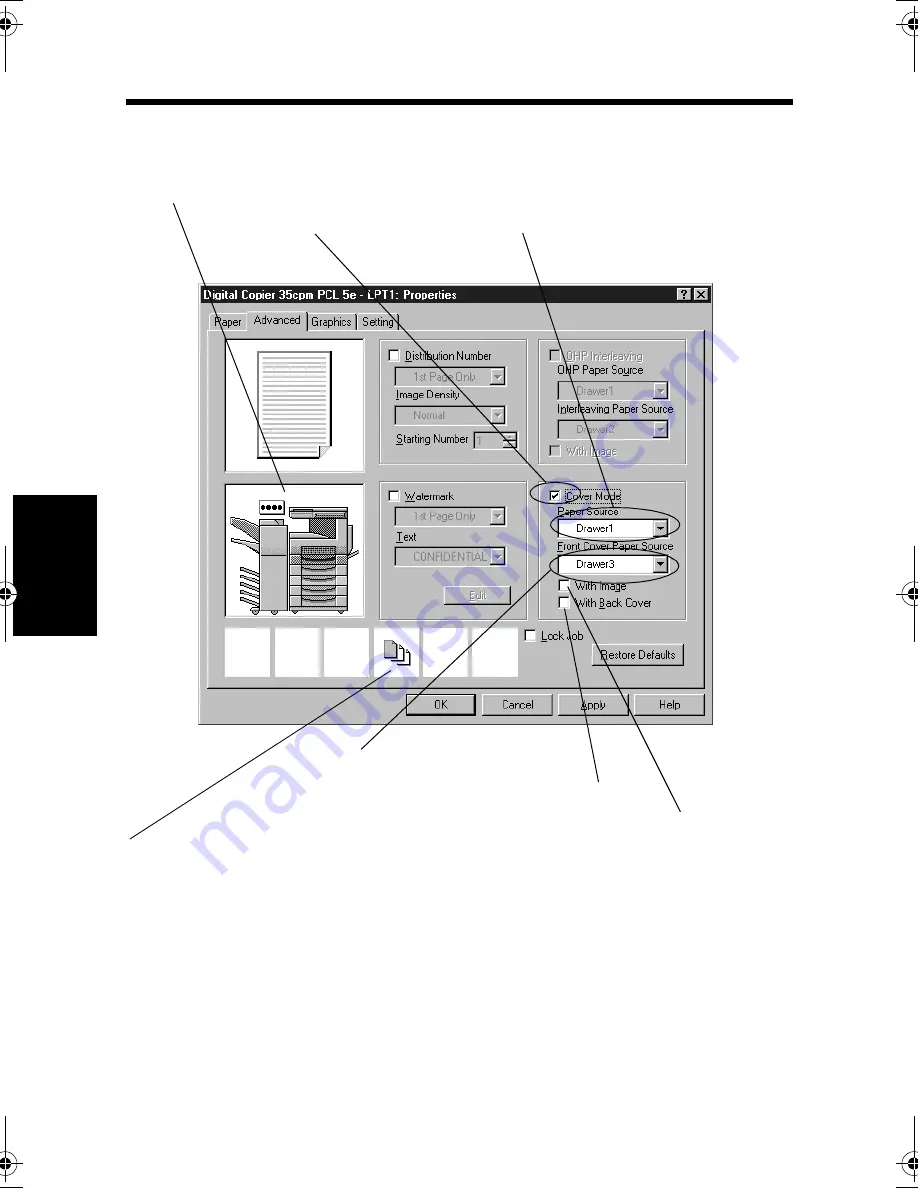
5. Click the "Advanced" tab and select "Cover Mode."
6. Select the paper source for text under "Paper Source."
7. Select the paper source for the front/back cover under "Front Cover Paper
Source."
8. Select the "with Image" and/or "with Back Cover" boxes if you want data
printed on the front cover and if you want also a back cover.
9. Make other settings as necessary and click the [OK] button.
10. In the Print dialog box that will then reappear, click the [OK] button. Then, the
data will be transferred to the machine and printing will soon start.
4608P236CA
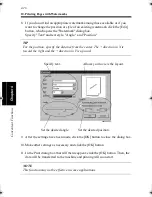
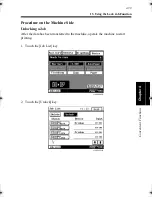
Shows the paper source for text and that for front/back cover.
5. Select "Cover Mode."
7. Select the paper source for front cover.
8. Select this box if you want data printed on the front cover.
The icon tells that Cover Mode has been enabled.
6. Select the paper source for text.
8. Select this box if you also want a back cover.
win.book Page 32 Wednesday, January 26, 2000 11:31 AM
Summary of Contents for Hi-35pc
Page 19: ...Installing the Printer Driver Chapter 2 2 1 Chapter 2 Installing the Printer Driver ...
Page 69: ...3 1 Property Sheet Chapter 3 Chapter 3 Property Sheet ...
Page 104: ...8 Conflict Settings Validation Dialog Box 3 36 Property Sheet Chapter 3 ...
Page 105: ...Convenient Functions Chapter 4 4 1 Chapter 4 Convenient Functions ...
Page 153: ...5 1 Chapter 5 Troubleshooting Chapter 5 Troubleshooting ...
Page 162: ...1 Troubleshooting 5 10 Chapter 5 Troubleshooting ...
Page 163: ...Appendix A A 1 Appendix A ...
Page 179: ...Appendix B B 1 Appendix B ...
Page 184: ...1 Glossary B 6 Appendix B ...
Page 185: ...Appendix C C 1 Appendix C ...


