


Scheduler Settings
Acendo Book Scheduling Touch Panels - Instruction Manual
39
4.
Press any of the buttons along the top of the page to access each Settings page.
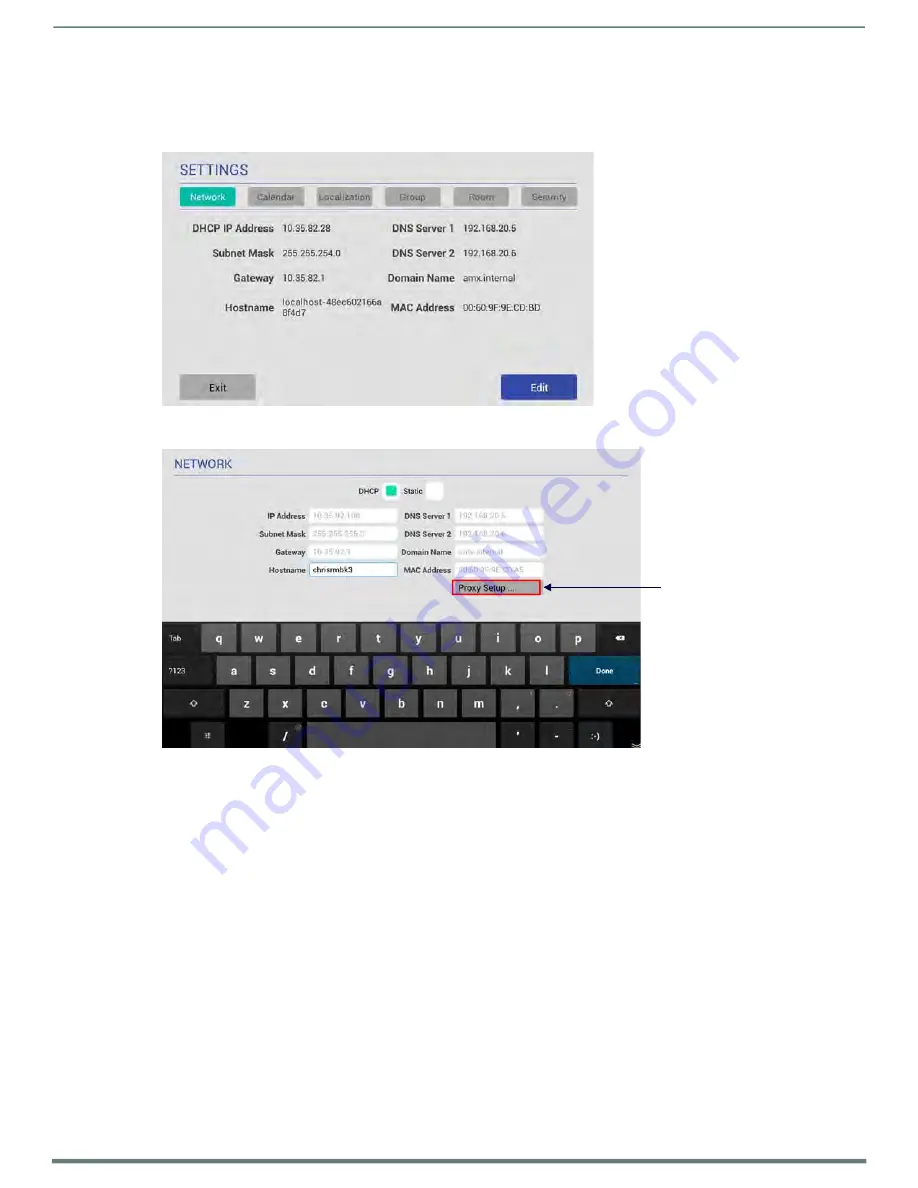
Viewing/Editing Network Settings
1.
Press
Network
to view the current Network settings for this panel (FIG. 52):
FIG. 52
SETTINGS Page - Network
2.
Press
Edit
to open the NETWORK Settings page, to edit the current settings as required (FIG. 53).
Press to open the Proxy
Settings page
FIG. 53
NETWORK Settings page
3.
Press on any enabled field and use the on-screen keyboard or keypad to edit these fields as necessary.
4.
Press
Next
to jump to the next editable field on this page. The fields on the NETWORK Settings page are described on page 23.
NOTE:
The example in FIG. 53 shows all f ields enabled. This is because with "Static" selected, all network information must
be manually entered. When DHCP is selected, only the "Hostname" f ield is enabled for editing.
5.
Press
Proxy Setup
to enable/disable the Proxy option and configure Proxy Settings and Account Information as required, in
the
Proxy Settings
page. By default Proxy is disabled on RMBK panels, Refer to the
details.
6.
Press
Save
to save changes and close the NETWORK Settings page.
NOTE:
The panel’s Network settings can be also be edited via Advanced Settings (see CONNECTIONS - Ethernet
Changing the IP Address on the Acendo Book Panel
Select either
DHCP
or
Static
at the top of the NETWORK Settings page.
Note that by default,
DHCP
is selected (and the remaining addressing options on this page are disabled).
If
Static
is selected, the fields on this page are enabled and must be filled in manually.


