


Scheduler Settings
Acendo Book Scheduling Touch Panels - Instruction Manual
38
Scheduler Settings
Overview
Most of the settings made in the
Scheduling Panel Setup Wizard
(see page 22) can be viewed and edited via the
Scheduler Settings
options, as described below.
NOTE:
Refer to the Advanced Settings
for information on viewing/edit touch panel-specif ic options.
Accessing the Scheduler Settings Pages
1.
Press and hold the pushbutton on the top of the touch panel for 5 seconds to invoke the SETTINGS window (FIG. 49):
FIG. 49
SETTINGS window - SCHEDULER SETTINGS
NOTE:
Alternatively, press and hold the room name for approximately 5 seconds to open the Settings window.
2.
Press
SCHEDULER SETTINGS
. These settings are password-protected. Enter the Administrator password for the
scheduling system in the ENTER PASSWORD field (FIG. 50):
FIG. 50
Administrator Login window
The default password is
1988
.
This password is configured in the Security page of the Setup Wizard - see
Setup Wizard: Step 7 - SECURITY
3.
Press
Submit
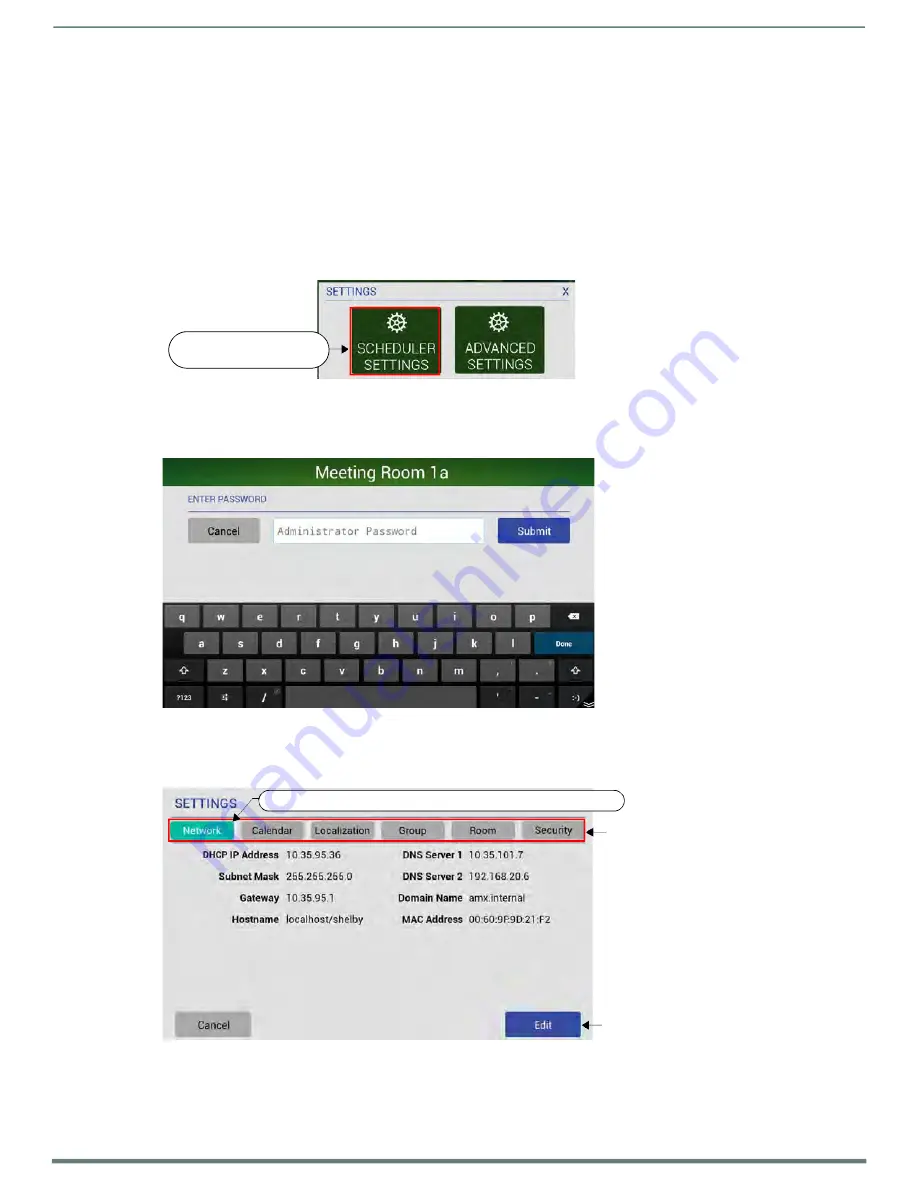
. If the password entered was valid, the SETTINGS pages are opened (FIG.
51):
The button for the currently selected Settings page is highlighted
Press to access the Settings pages
Press to edit the current settings
FIG. 51
SETTINGS Pages (Network Settings page shown)
The SETTINGS pages provide the ability to view/edit the
Scheduler Settings
on this panel.
Note that these pages are presented in a similar fashion to the pages in the Scheduling Panel Setup Wizard - the initial
Settings page presented is the
Network
Settings page (shown in FIG. 51).
Press to view/edit
scheduling system options


