


88_
starting web viewer
starting web viewer
4.
Set the network connection type and the connection environment on the <
network
> screen, and then click the
<
next
> button.
■
For details on network settings, refer to the "
Getting Started
>
Installation wizard
" page in the Table of Contents.
5.
Set the daylight saving time on the <
time zone
> screen, and then click <
next
>.
6.
To modify the date and time on the <
date & time
> screen, select the <
Modify
> check box.
Set the date and time, and then click <
next
>.
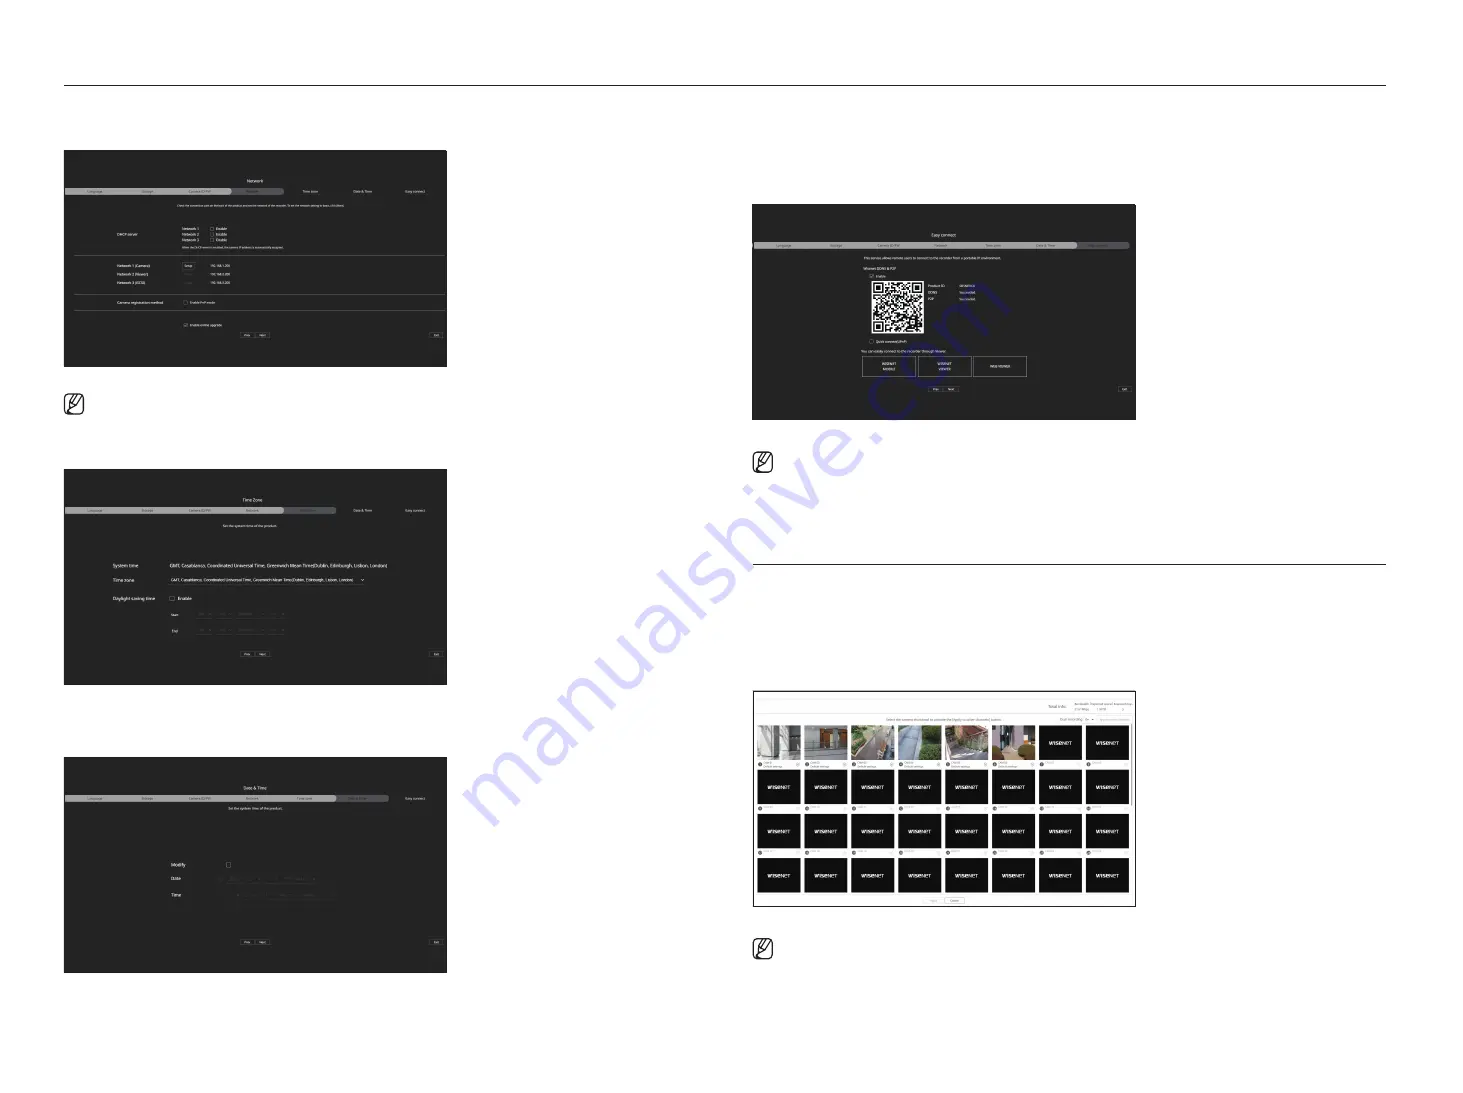
7.
On the <
easy connect
> screen, a remote user can network a recorder in a dynamic IP system.
Click <
enable
> to test the connection to see if the current recorder can be connected remotely. When the
connection is successful, a QR code is created.
To connect a recorder via a viewer, select the viewer you want to use. You can check the connection method of the
selected viewer in the popup window.
■
It connects to Wisenet DDNS first. If it does not connect to DDNS, it automatically connects to P2P.
8.
Click the <
next
> button to complete the installation wizard.
CaMera setuP
When the installation wizard closes, the camera setup screen will automatically appear.
Based on the registered camera's record profile information, you can check the total bandwidth, expected space, and
expected days.
You can change camera setup and the record schedule, and apply the same settings to other channels.
For details, refer to the "
getting started
>
Camera setup
" page of the table of contents.
■
The camera setup screen is also displayed when registering a camera for the first time in the "
Setup
>
Camera
>
Channel setup
" menu.
Summary of Contents for XRN-3210B4
Page 1: ...NETWORKVIDEO RECORDER User Manual Wisenet NVR...
Page 131: ......


