


www.HandiQuilter.com/ProStitcher
07/23/12
Installation Instructions 3.25
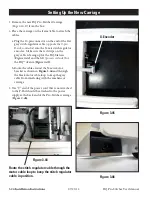
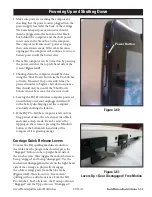
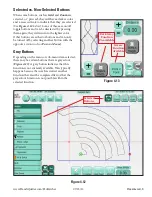
4. The black cables that extend out the back of the
HQ Pro-Stitcher carriage
(
Figure 3.47
)
provide
power and communications to the motors and are
already attached to the carriage. Lay that cable
so it extends out the back and the stitch regulator
cable so it extends out the side as shown in
Figure
3.47
.
5. Place the carriage on the table so the carriage
wheels are in place on the table tracks.
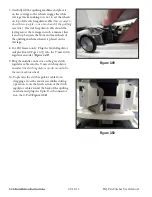
6. Verify that the white gear toward the front of
the carriage engages with the blue rack that was
installed previously. If the teeth of the white
gear do not fully engage the blue rack teeth, be
sure the X-axis release mechanism is set in its
lowest position and that the blue rack was set the
appropriate distance from the front white table
track
(some minor adjustments to the blue rack
may be necessary for proper alignment)
.
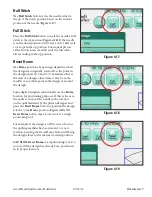
It may be necessary to loosen the two 4mm Allen
bolts that mount the X-axis black lever bracket
to the side of the carriage in order to allow the
X-axis white gear to drop low enough to fully
engage the blue rack, then re-tighten those two
bolts
(
Figure 3.48
)
.
Figure 3.47
Figure 3.48
Adjust only
if necessary