


www.HandiQuilter.com/ProStitcher
07/23/12
Installation Instructions 3.23
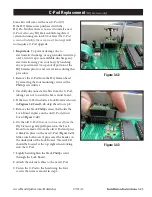
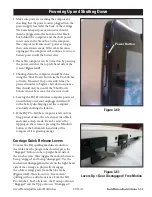
Figure 3.42
C-Pod Replacement
(HQ Sixteen only)
Some kits will come with a new C-Pod (C).
If the HQ Sixteen was purchased with the
HQ Pro-Stitcher, there is no need to install a new
C-Pod. Also, any HQ Sixteen Stitch-regulated
systems running version 8.04 or later
(the C-Pod
screen will identify the version as it boots up)
will
not require a C-Pod upgrade.
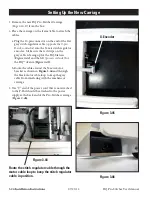
Figure 3.43
1.
Important:
To prevent damage due to
electrostatic discharge, use a grounded wrist strap
or if a wrist strap is not available, discharge any
electrostatic energy on your body by touching
any exposed metal
(non-painted)
portion of the
HQ Sixteen prior to and several times during this
procedure.
2. Remove the C-Pod from the HQ Sixteen head
by removing the four mounting screws with a
Phillips screwdriver.
3. Carefully disconnect all cables from the C-Pod,
taking care not to touch the bare circuit board.
4. If the new C-Pod includes a Lock Board as shown
in
Figures 3.42 and 3.43
, skip ahead to step 8.
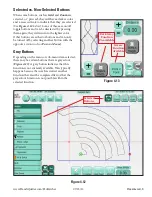
5. Remove the black Phillips screw that holds the
Lock Board in place on the old C-Pod circuit
board
(
Figure 3.42
)
.
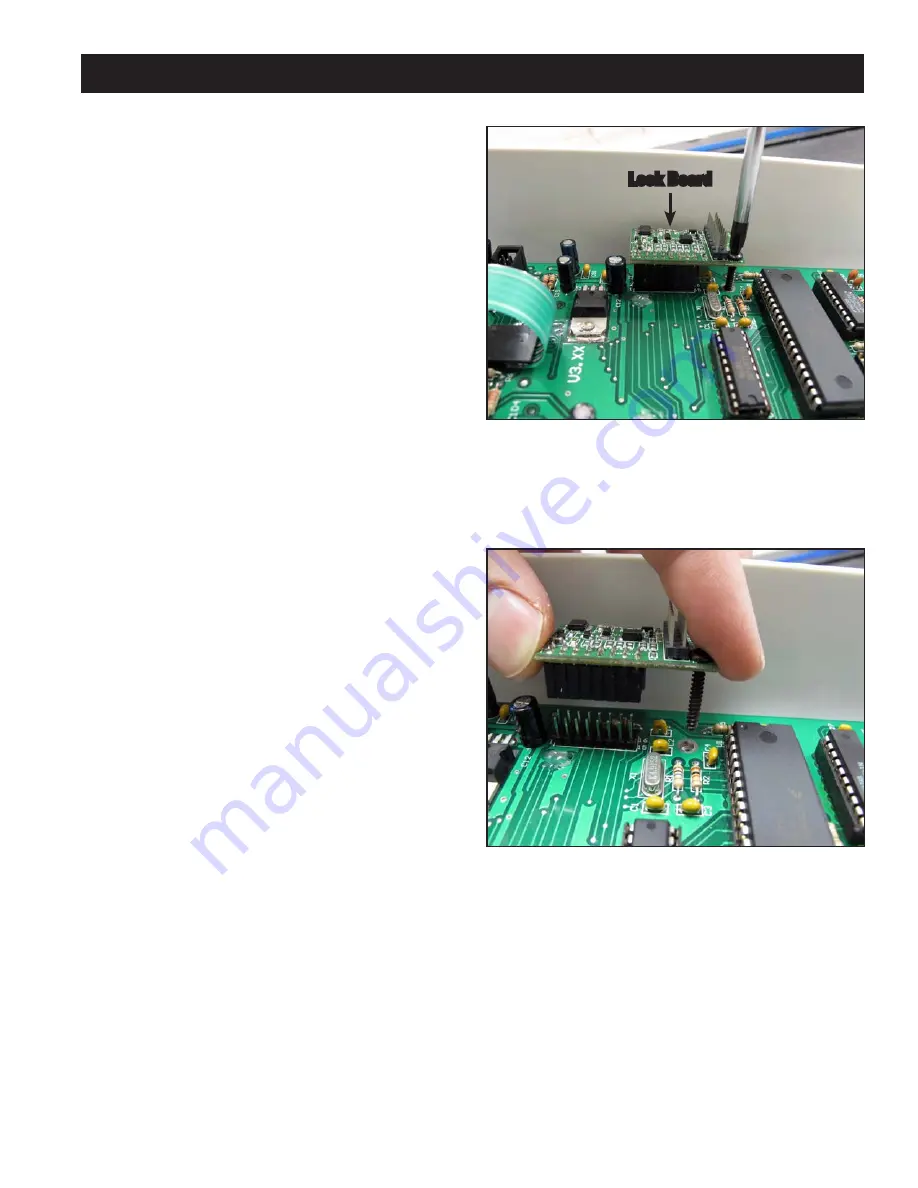
6. On the old C-Pod
(the one just removed from the
HQ Sixteen)
, gently pull upward on the Lock
Board to remove it from the old C-Pod and press
it firmly in place on the new C-Pod
(
Figure 3.43
)
.
Make sure both rows of pins enter the header on
the underside of the Lock Board. The red LED
should be located at the top right when looking
into the C-Pod.
7. Lightly hand-tighten the black Phillips screw
through the Lock Board.
8. Attach the internal cables to the new C-Pod.
9. Fasten the C-Pod to the head using the four
screws that were removed in step 2.
Lock Board