


HQ Pro-Stitcher User Manual
07/23/12
3.24 Installation Instructions
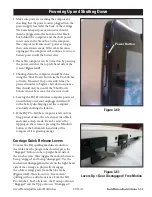
Figure 3.44
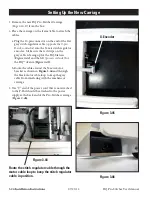
Setting Up the New Carriage
1. Remove the new HQ Pro-Stitcher Carriage
(Page 3.16, E)
from the box.
2. Place the carriage on the frame/table to attach the
cables.
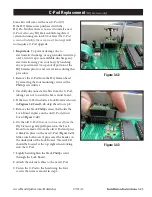
a. Plug the 10-pin connector on the end of the flat
gray stitch-regulator cable
(opposite the 9-pin
D-sub connector)
into the X-axis stitch regulator
encoder. Make sure the red stripe on the
gray cable is facing up for the HQ-Sixteen
(
Figure 3.44
)
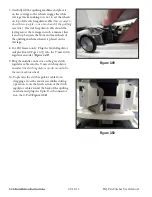
and the left
(power cord side)
for
the HQ
18
Avanté
(
Figure 3.45
)
.
b. Route the cable around the X-axis motor
bracket as shown in
Figure 3.44
and through
the black motor cable loop to keep the gray
cable from interfering with the machine or
carriage.
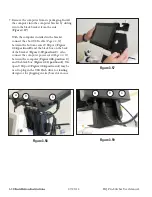
3. The “Y” end of the power cord that is not attached
to the P-Pod should be attached to the power
supply at the back end of the Pro-Stitcher carriage
(
Figure 3.46)
.
Figure 3.46
Figure 3.45
Route the stitch regulator cable through the
motor cable loop to keep the stitch regulator
cable in position.
X-Encoder