


Moxi GO II
™
User Guide
Page 17
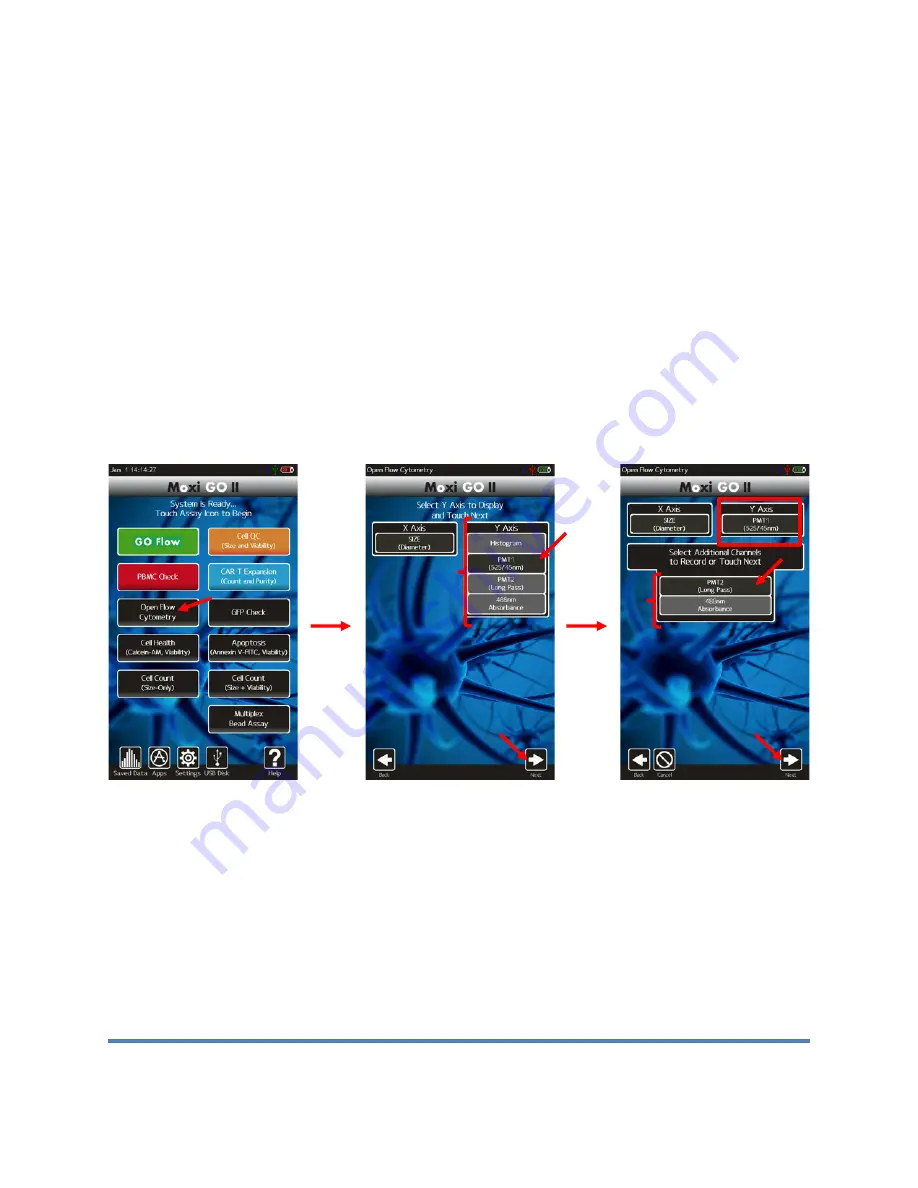
2. Select the “Open Flow Cytometry” assay from the
Home
screen (image below/left)
3.
The “X-axis” is always populated with Cell size as its selection; however multiple
additional parameters can be selected under the “Y-axis” column. Select the first
channel to record from the “Y-axis” column (image below/middle) and select “Next”.
Notes:
a. This is the channel that will initially be displayed during test acquisition.
b. Only one value from that column can be selected.
c. If “Histogram” is chosen, the system will perform a “Size Only” counts and
sizing assay. For that configuration, no laser alignment will be performed, as
the laser is not used.
4.
Select any additional channels to record (image below/right) and select “Next.”
Notes:
a. Any combination (none, only one, or both) of the channels can be selected for
recording.
b. These channels will not be displayed during sample acquisition but can be
viewed immediately following a test by changing the display axis. See
section below “Changing Display Axis”
c. If “Histogram” was selected on the prior screen, this screen will be skipped.
5. To adjust the Fluorescent gain for this test only (permanent changes to the
fluorescent gain must be made in the global settings as described in the “Settings |
Fluorescent Gain” section above) touch the gray box next to the “Fluorescent Gain”
field (red arrow in image below/left). Note: Due to the innate nature of how data is
collected, selecting a gain change will affect both PMT detectors.
6. A pop-up menu will appear with the available options (image below/right). Touch the
desired value to change the setting.


