background image

Getting Started: Entering Information on Your iQue M5

9

Chapter 1: Getting Started

Try these tips for good recognition:

•  Write neatly.
•  Write on the lines and draw descenders below the line. Write the cross of the “t” and apostrophes below the top line so that 

they are not confused with the word above. Write periods and commas above the line.

•  For better recognition, try increasing the zoom level to 300% using the 

Tools

 menu.

•  Write the letters of a word closely and leave big gaps between words so the device can easily tell where words begin and end.
•  Note that hyphenated words, foreign words that use special characters such as accents, and some punctuation cannot  

be converted.

•  Note that you cannot change words that have already been recognized by writing over them with the stylus. 

Drawing on the Screen

You can draw on the screen in the same way that you write on the screen. The difference between writing and drawing on the screen 

is how you select items and how they can be edited. For example, selected drawings can be resized, whereas writing cannot.
To create a drawing, select the Pen icon   and simply cross three ruled lines on your first stroke. A drawing box appears. 

Subsequent strokes inside or touching the drawing box become part of the drawing. Drawings that do not cross three ruled lines will 

be treated as writing.

To edit a drawing:

1.  Tap and hold the stylus on the drawing until the selection handle (looks like a “+”) appears.
2.  Drag the selection handle to select the drawing.
3.  Tap and drag to move the drawing.
4.  Tap the 

Edit

 menu or tap and hold on the drawing to cut, copy, or paste the drawing.

Recording a Message

In any program where you can write or draw on the screen, you can also quickly capture thoughts, reminders, and phone numbers 

by recording a message. In Calendar, Contacts, and Tasks, you can include a recording in the Notes tab. In the Notes program, you 

can either create a stand-alone recording or include a recording in a written note. If you want to include the recording in a note, 

open the note first. In Messaging, you can add a recording to an e-mail message.

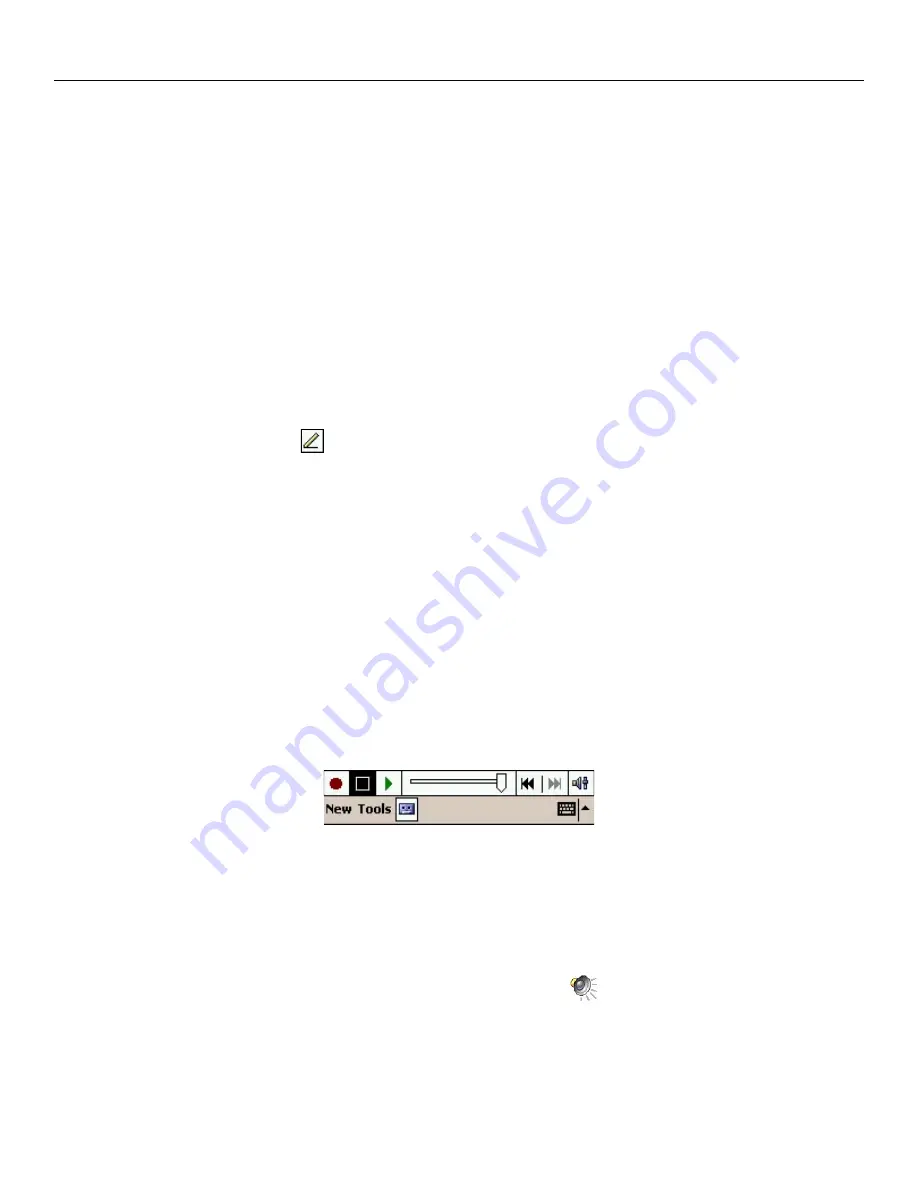
Recording in

 Notes.

To create a recording: 

1.  Hold the microphone on your iQue M5 near your mouth or other source of sound.
2.  Press and hold the 

Record

 hardware button on your device until you hear a beep.

3.  While holding down the 

Record

 button, make your recording.

4.  To stop recording, release the 

Record

 button. The new recording appears in the note list or as an embedded icon.

5.  To play a recording, tap it in the list or tap the embedded recording icon 

 in the note.

Summary of Contents for iQUE M5

Page 1: ...iQue M5 integrated handheld operating instructions...

Page 2: ...entation and printed materials together called the Product and grants you a limited non exclusive license to use the Product in accordance with the terms of this License Agreement The copyright and al...

Page 3: ...on are provided with RESTRICTED RIGHTS Use duplication or disclosure by the United States Government is subject to restrictions as set forth in subparagraph c 1 and 2 of the Commercial Computer Softwa...

Page 4: ...ve limitations may not apply to you Garmin retains the exclusive right to repair or replace the unit or software or offer a full refund of the purchase price at its sole discretion SUCH REMEDY SHALL B...

Page 5: ...lace when usage time between charges become short If there are any problems with the battery keep the battery in a safe place and immediately contact Garmin If the battery must be disposed of contact...

Page 6: ...ng the Stylus 3 The Today Screen 3 Opening Programs 4 Navigation Bar and Command Bar 5 Pop up Menus 5 Noti cations 5 Entering Information on Your iQue M5 6 Entering Text Using the Input Panel 6 Editin...

Page 7: ...to tell your manager your available times For more information on scheduling appointments and meetings see Chapter 3 You are meeting your friends tonight for dinner and a movie You download the latest...

Page 8: ...entering information SD Card Slot Audio Jack External Antenna Connector covered by weather cap Infrared IR Window Stylus GPS Antenna Release GPS Antenna Stylus Reset button on bottom of unit Removable...

Page 9: ...e a blue circle of dots that indicates you are opening a menu On the pop up menu that appears tap the action you want to perform The Today Screen When you turn on your device for the rst time each day...

Page 10: ...d desktop computer Calculator Perform basic arithmetic and computations Calendar Keep track of your appointments and create meeting requests Contacts Keep track of your friends and colleagues Messagin...

Page 11: ...y For example you can open a pop up menu in the Contact list and quickly delete a contact make a copy of a contact or send an e mail message to a contact The actions in pop up menus vary from program...

Page 12: ...the arrow next to the Input Panel button to choose a method for typing or writing When you use the input panel your device anticipates the word you are typing or writing and displays it above the inp...

Page 13: ...ut Panel button and then tap Block Recognizer 2 Write a letter in the box Block Recognizer To write with Transcriber 1 Tap the arrow next to the Input Panel button and then tap Transcriber 2 Write any...

Page 14: ...e directly on the screen Write the way you do on paper You can edit and format what you have written and convert the information to text at a later time To write on the screen 1 Tap the Pen icon to sw...

Page 15: ...bsequent strokes inside or touching the drawing box become part of the drawing Drawings that do not cross three ruled lines will be treated as writing To edit a drawing 1 Tap and hold the stylus on th...

Page 16: ...age space choose Larger than 64 KB from the Type menu 4 Tap Go Tap here and enter the name of the le or folder you are looking for Tap to begin searching for les or folders Tap here to specify the typ...

Page 17: ...troduction 12 Choosing What Data to Synchronize 12 Choosing When to Synchronize 13 Moving Files between Your Desktop Computer and iQue M5 13 Adding and Removing Programs 14 Backing Up Files and Settin...

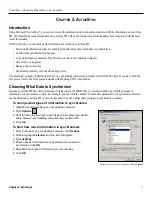
Page 18: ...refer to the Setup Guide included with the Setup CD for instructions Choosing What Data to Synchronize Because your iQue M5 has a limited amount of storage space 64 MB RAM we recommend that you limit...

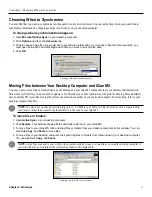
Page 19: ...to update or for les that you cannot synchronize like pictures Moving les and folders onto your iQue M5 is just like moving them from one location to another on your personal computer For more help re...

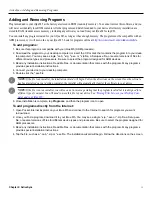
Page 20: ...Many programs provide special installation instructions 4 Connect your device to your desktop computer 5 Double click the exe le NOTE If the le is an installer the installation wizard will begin Follo...

Page 21: ...instructions below OR 1 Tap Programs and then File Explorer 2 From the pull down menu select My Device to view all les and folders on your iQue M5 Locate the program le 3 Tap and hold on the program l...

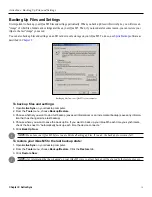
Page 22: ...on your desktop computer 2 From the Tools menu choose Backup Restore 3 Choose whether you want to do a full backup saves all information or an incremental backup saves any informa tion that has change...

Page 23: ...are lined up with no objects between them To synchronize remotely with IR 1 Tap and then ActiveSync on your iQue M5 2 Tap Tools and then Connect via IR ActiveSync will automatically make the IR conne...

Page 24: ...ng Meeting Requests 21 Contacts Tracking Friends and Colleagues 22 Using the Summary Screen 22 Tasks Keeping a To Do List 23 Using the Summary Screen 23 Notes Capturing Thoughts and Ideas 24 Messaging...

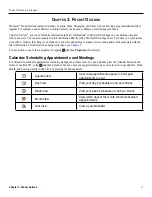
Page 25: ...r and updates both computers with the latest information For information on using ActiveSync see Chapter 2 You can switch to any of these programs by tapping and then Programs if necessary Calendar Sc...

Page 26: ...a description and a location using the input panel 4 If needed tap the date and time to change them 5 Enter other desired information You will need to hide the input panel or use the scroll bar to see...

Page 27: ...tlook or Pocket Outlook The meeting request is created automatically and sent either when you synchronize your Inbox or when you connect to your e mail server Indicate how you want to send meeting req...

Page 28: ...assign the contact to a category tap Categories and select a category from the list 4 To add notes tap the Notes tab You can enter text draw or create a recording See Notes Capturing Thoughts and Ide...

Page 29: ...Capturing Thoughts and Ideas later in this chapter 6 When nished tap ok to return to the task list To create a task with only a subject line 1 Make sure Entry Bar is checked on the Tools menu 2 To ma...

Page 30: ...Notes icon on the Shortcuts bar located on the Today screen You can also tap Programs and then Notes To create a note 1 Tap New 2 Add text to your note using one of the input methods 3 If you wish add...

Page 31: ...from time to time to save storage space Open your Deleted Items folder tap and hold on each message and choose Delete from the pop up menu Tap the Sort by drop down menu located to the right of the I...

Page 32: ...to synchronizing e mail messages with your desktop computer you can send and receive e mail messages by connecting to an e mail server To connect you must set up a remote connection to a network or an...

Page 33: ...Options 4 Choose how often you want to connect to your server and download new messages Choose whether you want to use your Internet pro le or your Work pro le to connect Tap Next For more informatio...

Page 34: ...Pocket Of ce Chapter 4 Table of Contents 28 Chapter 4 Pocket Of ce CHAPTER 4 POCKET OFFICE Pocket Word 29 Using Pocket Word 29 Input Modes in Word 30 Pocket Excel 31 Working with Pocket Excel 31...

Page 35: ...ame by tapping Tools File and then Save Document As To create a new Pocket Word document 1 Open Pocket Word by tapping Programs and then Pocket Word 2 If a blank document does not automatically appear...

Page 36: ...document by tapping Edit and then Find Replace Typing Mode Writing Mode In Writing mode use your stylus to write directly on the screen Ruled lines are displayed as guides and the zoom magni cation is...

Page 37: ...open a blank spreadsheet You can open only one le at a time When you open a second le you will be asked to save the rst You can save a spreadsheet you create or edit in a variety of formats including...

Page 38: ...ccessories 32 CHAPTER 5 POCKET ACCESSORIES MSN Messenger 33 Working with MSN Messenger Contacts 34 Using My Text 34 Chatting Tips 34 Windows Media Player for Pocket PC 35 Media Playback 35 Pictures 35...

Page 39: ...a free Microsoft Hotmail e mail address at http www hotmail com Once you have obtained either a Microsoft Passport or a Microsoft Exchange account you are ready to use MSN Messenger To open MSN Messen...

Page 40: ...g My Text When you are using MSN Messenger you can use My Text to insert frequently used words or phrases into the text entry area To insert a message tap My Text and tap a message You can add text af...

Page 41: ...the background on the Today screen You can even set Pictures to launch itself when a digital camera storage card is inserted into your device To open tap Programs and then Pictures By tapping and hol...

Page 42: ...lient Using the Terminal Services Client TSC you can log onto a desktop computer running Terminal Services pre Windows XP or Remote Desktop Windows XP and later and use all of the programs available o...

Page 43: ...to the Internet from a Modem38 Connecting to your ISP 40 Establishing Dialing Rules for Modems 40 Connecting to a Network 42 Setting up a VPN 42 Connecting to a VPN Server 42 Setting up a Proxy Serve...

Page 44: ...ice that uses these technologies See Exchanging Data with Mobile Devices Connect using Bluetooth to any other Bluetooth enabled device See Chapter 8 Using Bluetooth For information on how to connect a...

Page 45: ...card If you are using an external modem that is connected to your device with a cable select Hayes Compat ible on COM1 Tap Next Name the connection and select the appropriate modem from the list 6 Ent...

Page 46: ...s and send and receive instant messages To connect manually to your ISP 1 Tap Settings the Connections tab and the Connections icon 2 Under My ISP or My Work Network tap Manage Existing Connections 3...

Page 47: ...Tap to disable call waiting If you have a pulse phone tap Pulse dialing most phones have tone dialing 7 Tap Dialing Patterns to change how dialing occurs 8 Enter how local long distance and internatio...

Page 48: ...the Connections tab and the Connections icon 2 Under the My Work Network heading tap Add a new VPN server connection 3 Enter a name for the connection a host name or IP address and the VPN type Then...

Page 49: ...ettings tab You should get this information from your company s network administrator To change existing proxy server settings 1 Tap Settings the Connections tab and the Connections icon 2 Under My Wo...

Page 50: ...etwork card has been con gured you will connect immediately To turn your wireless network connection on or off 1 Tap the Connectivity icon and then tap Turn off ight mode to turn on your network card...

Page 51: ...hen Beam to beam a le to another device You can also tap and hold on a le name and select Beam from the drop down menu Make sure that the Infrared ports are lined up and that there are no objects betw...

Page 52: ...t Internet Explorer Chapter 7 Table of Contents Chapter 7 Pocket Internet Explorer 46 CHAPTER 7 POCKET INTERNET EXPLORER Browsing the Internet 47 Displaying Images 48 Con guring Pocket Internet Explor...

Page 53: ...r iQue M5 with your desktop computer To view mobile favorites and channels 1 On your iQue M5 tap the Internet Explorer icon in the Shortcut bar 2 Tap Favorites to display the list of favorites you hav...

Page 54: ...ferred large images can be expensive to download To turn off images tap View and then Show Images When a Web site is loaded but with images hidden image placeholders appear To show individual images t...

Page 55: ...Device 53 Setting a PIN Code 54 Connecting to ActiveSync with Bluetooth 54 Connecting to the Internet 55 Browsing Sending or Exchanging Files 55 Sending Contacts Appointments and Tasks via Bluetooth...

Page 56: ...fy this process Using either mode you can view and connect to services on other Bluetooth devices A service is a type of Bluetooth connection like a serial port connection or a network connection Once...

Page 57: ...en as Favorites To connect to a Bluetooth device both devices must be turned on must be within 30 feet 10 meters of each other and must be discoverable able to receive connections see Changing BTExplo...

Page 58: ...ng BTExplorer Settings The name you choose appears when other devices try to connect to your iQue BTExplorer searches for devices and for device names If no devices appear tap and hold then choose Dis...

Page 59: ...tion that follows for each connection type Paring with Another Bluetooth Device Paring means establishing a special relationship with another Bluetooth device To pair with another device you must exch...

Page 60: ...rsonal computer must also offer a Bluetooth Serial Port as a connection service To set up ActiveSync for Bluetooth synchronization 1 Make sure your iQue M5 is not currently connected to your personal...

Page 61: ...orer tap the New Connection icon 2 Choose Connect to Internet using Phone Modem Then tap Next 3 Choose the computer or phone you want to connect to and then tap Next 4 BTExplorer automatically selects...

Page 62: ...Bluetooth device you are connected to 2 To save a le from the device to your iQue M5 tap to highlight the le you want to receive 3 Tap Actions and then Get File or tap and hold on the le and choose G...

Page 63: ...n with your iQue M5 it uses the virtual serial port COM 5 To connect to a serial port 1 From Wizard mode tap File and then New Connection 2 Choose Connect Serial Port from the drop down menu Then tap...

Page 64: ...View To view your active connections 1 In Wizard mode tap Tools and then Active Connections A list of your active Bluetooth connections appears 2 To stop an active connection tap and hold on a connec...

Page 65: ...efault You can change the way active connections appear see To change how active connections appear To switch from Wizard mode to Explorer mode 1 Tap View and then Standard Mode 2 Tap Yes when the pop...

Page 66: ...rarchy similar to that used in File Explorer To move down in the hierarchy for example to view Favorites simply tap an icon To move up in a hierarchy tap the Up One Level icon To move up several level...

Page 67: ...me for your iQue M5 To prevent devices from discovering and connecting to your iQue M5 1 In Wizard mode or Explorer mode tap Tools and then Settings 2 Tap the Device Info tab 3 Choose Non Discoverable...

Page 68: ...ring Data in Basic Mode 64 Tips for Using Basic Mode 64 Synchronizing after Restoring Data 64 Backing Up Data in Advanced Mode 65 Setting Options for Backup 66 Restoring Data in Advanced Mode 67 Setti...

Page 69: ...our last backup and allows you to back up and restore all data on your iQue M5 with a single tap Advanced Mode is designed for users with speci c backup requirements Advanced Mode allows you to select...

Page 70: ...cel any scheduled backups or deactivate battery monitoring If you want to restore data using a backup le other than the default le you must switch to Advanced Mode See Backing Up Data in Advanced Mode...

Page 71: ...tap the next to each item A red checkmark means all items and sub items in a list are included in the backup le A gray checkmark means some sub items are not included in the backup le No checkmark me...

Page 72: ...utomatic backups Stop Processes Before Backup Causes Sprite Backup to close all applications that are open before beginning a backup operation It is a good idea to leave this option checked because it...

Page 73: ...and then Backup Options 2 Check the box next to Maintain prior backup les Then tap Options 3 Check or uncheck boxes for maximum amount of space and maximum number of backup les Then if necessary spec...

Page 74: ...pears to restart your iQue M5 Setting Restore Options Set restore options to customize the way Sprite Backup restores your data By default both restore options are enabled Stop Process Before Restore...

Page 75: ...n and folder where you want to save the backup le 7 Tap to check the box if you want to restart your iQue M5 when the backup is complete 8 Tap OK NOTE The location you select for the backup le must be...

Page 76: ...M Mirroring 2 Tap to check the box next to Enable PIM Mirroring Viewing Backup History The Backup History page displays the date and time of the thirty most recent backup les created You can also view...

Page 77: ...tomizing Your iQue M5 CHAPTER 10 CUSTOMIZING YOUR IQUE M5 Changing Personal Settings 72 Viewing iQue M5 Information 75 Con guring Backlight and Power Settings 76 Changing System Settings 77 Con guring...

Page 78: ...u want to change Then choose the program from the Assign a program drop down menu that you want to open when you press that button 3 Tap the Up Down Control tab to change the way your Up and Down butt...

Page 79: ...the box next to Turn on New button menu to activate the New menu found on the Today page at the lower left corner of the screen Tap to check or uncheck programs you want to ap pear in this menu Chang...

Page 80: ...tap Yes to con rm your changes A simple password a strong password and a password hint To change or delete a password 1 Tap Settings and the Password icon 2 Enter your password 3 Change your password...

Page 81: ...tap Today timeout Then choose a time from the drop down menu the Today screen appears when the iQue M5 is turned on after sitting idle for this amount of time Changing the appearance of the Today scre...

Page 82: ...ge Backlight settings 1 Tap Settings the System tab and the Backlight icon 2 From the Battery Power tab tap the drop down menu to select how much time should pass before the backlight turns off when u...

Page 83: ...ur showing in the Time eld Tap the up arrow or down arrow to change the hour Tap to change minutes seconds and AM or PM in the same way 4 Tap the arrow next to the date to choose a date from the calen...

Page 84: ...comes pre installed with many international regional setting pro les but all can be con gured to your needs To change Regional Settings 1 Tap Settings the System tab and the Regional Settings icon 2...

Page 85: ...change the screen to Landscape left or right handed or Portrait mode NOTE Some programs work best in Portrait mode If you have trouble using a program try switching to Portrait mode Enable ClearType...

Page 86: ...39 Contacts 22 creating 22 nding 22 recording a message 9 Currency changing 78 Customizing Your iQue M5 72 D Date changing format 78 Dates 8 Device Name changing 75 Device name Bluetooth name 61 Drawi...

Page 87: ...a 63 65 70 backup history 70 backup options 66 changing modes 63 monitoring your battery 69 restore options 68 restoring data 64 67 70 scheduling automatic backups 69 Start Menu adding programs 15 73...

Page 88: ...national Inc 1200 E 151st Street Olathe KS 66062 U S A Garmin Europe Ltd Unit 5 The Quadrangle Abbey Park Industrial Estate Romsey SO51 9DL U K Garmin Corporation No 68 Jangshu 2nd Road Shijr Taipei C...

Reviews: